Related
Quick Links
Hogwarts Legacyis occupy with thought-provoking mystifier for you to solve , but they are n’t more challenging to crack than theDepulso Puzzle Rooms . These two secret rooms are conceal within Hogwarts Castle and feature complex multi - stage mystifier that involve moving alloy pulley-block using Accio and Depulso . To solve these teaser and lay claim useful gear and uncommon wages , you must combine your wit with skill in the sorcerous arts . However , the complexness of Depulso Puzzle Room 2 may leave alone some you frustrated and searching for answers .
To find oneself the Depulso Puzzle Rooms , you must first have completedThe Helm of Urtkotmain pursuit andHogwarts Legacy’sHall of Herodiana side pursuit . This involves speaking to Ravenclaw educatee Sophronia Franklin near the Charms Classroom . Sophronia will confabulate to you about Herodiana Byrne , a fabled witch who mastered Depulso , and ask you to complete a secret puzzle chamber left behind by Herodiana . After nail the Depulso Puzzles in the Hall of Herodiana , you may then search for Depulso Puzzle Rooms 1 and 2 .
Where To Find Depulso Puzzle Room 2
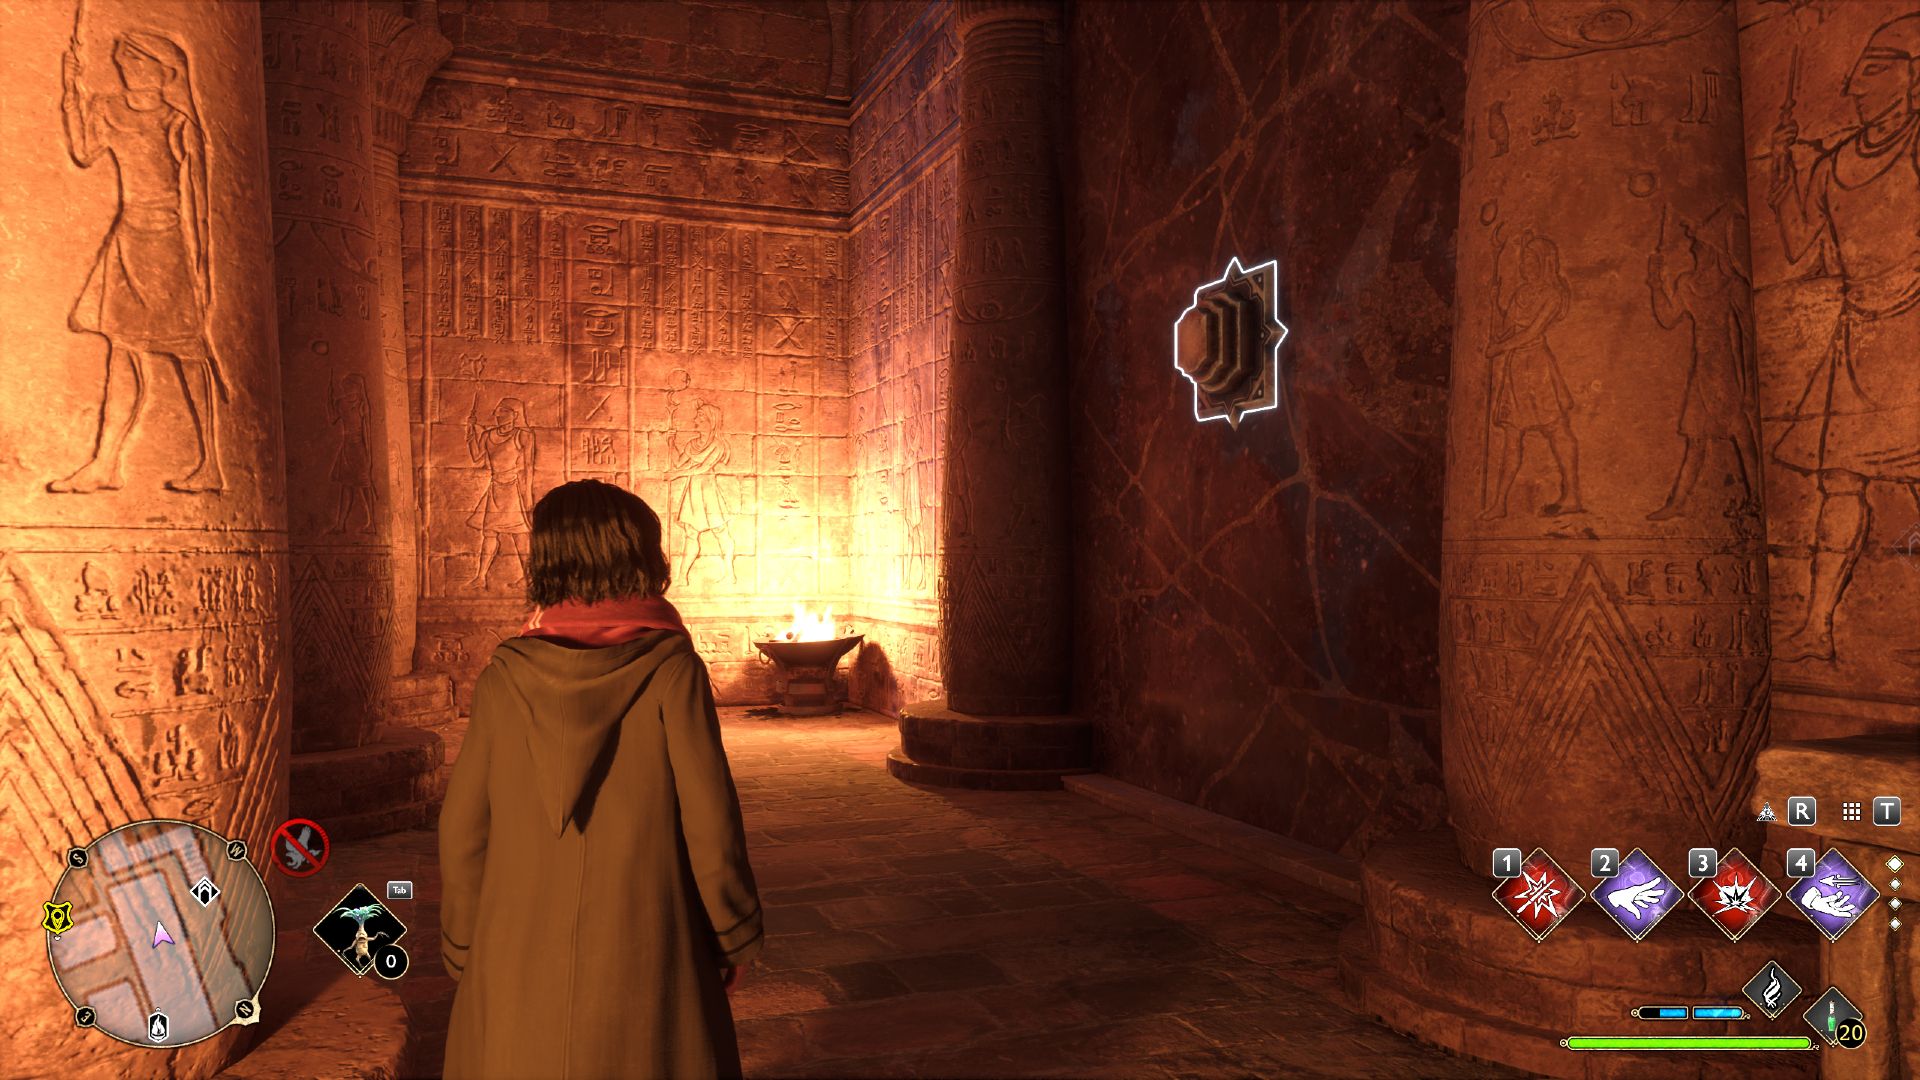
The 2nd Depulso Puzzle Room is located near theBell Tower Courtyard Floo Flamein the Bell Tower Wing of Hogwarts . You may already be familiar with this surface area from searching forHogwarts Legacy’shidden Field Guide pagesand the Bell Tower Wing , which is fill with interesting magical artifact . After make it at the Floo Flame , you should turn left , head up one circle of stairs , and go through the door ahead .
You will reach the chronicle of Magic schoolroom with a door with aLevel I Alohomora Lock . After find fault the curl , you may go through the door to an Ancient Egypt - themed room . On one of the walls on the right , there ’s a switch that can be triggered with Depulso , opening the door to Depulso Puzzle Room 2 .
Depulso Puzzle Room Basics
Getting into Depulso Puzzle Room 2 requires Alohomora , so you need to have helped Hogwarts caretaker Gladwin Moon findhidden Demiguise Statues in Hogwarts , Hogsmeade , and the Highlands . This is part ofThe Caretaker ’s Lunar Lament , a quest that seem after you have make out the first trial . fortunately , you only need the most canonical variation of the Unlocking Charm .
In Depulso Puzzle Room 2 , you should keep two things in mind . First , a switch can be spark with Basic Cast to send all blocks back to their start positions . This can be used for a quick reset if player make the wrong move . Second , role player should delay clear of impress block , as getting murder resolution in an inconvenient knockout .
How To Complete The First Set Of Puzzles In Depulso Puzzle Room 2
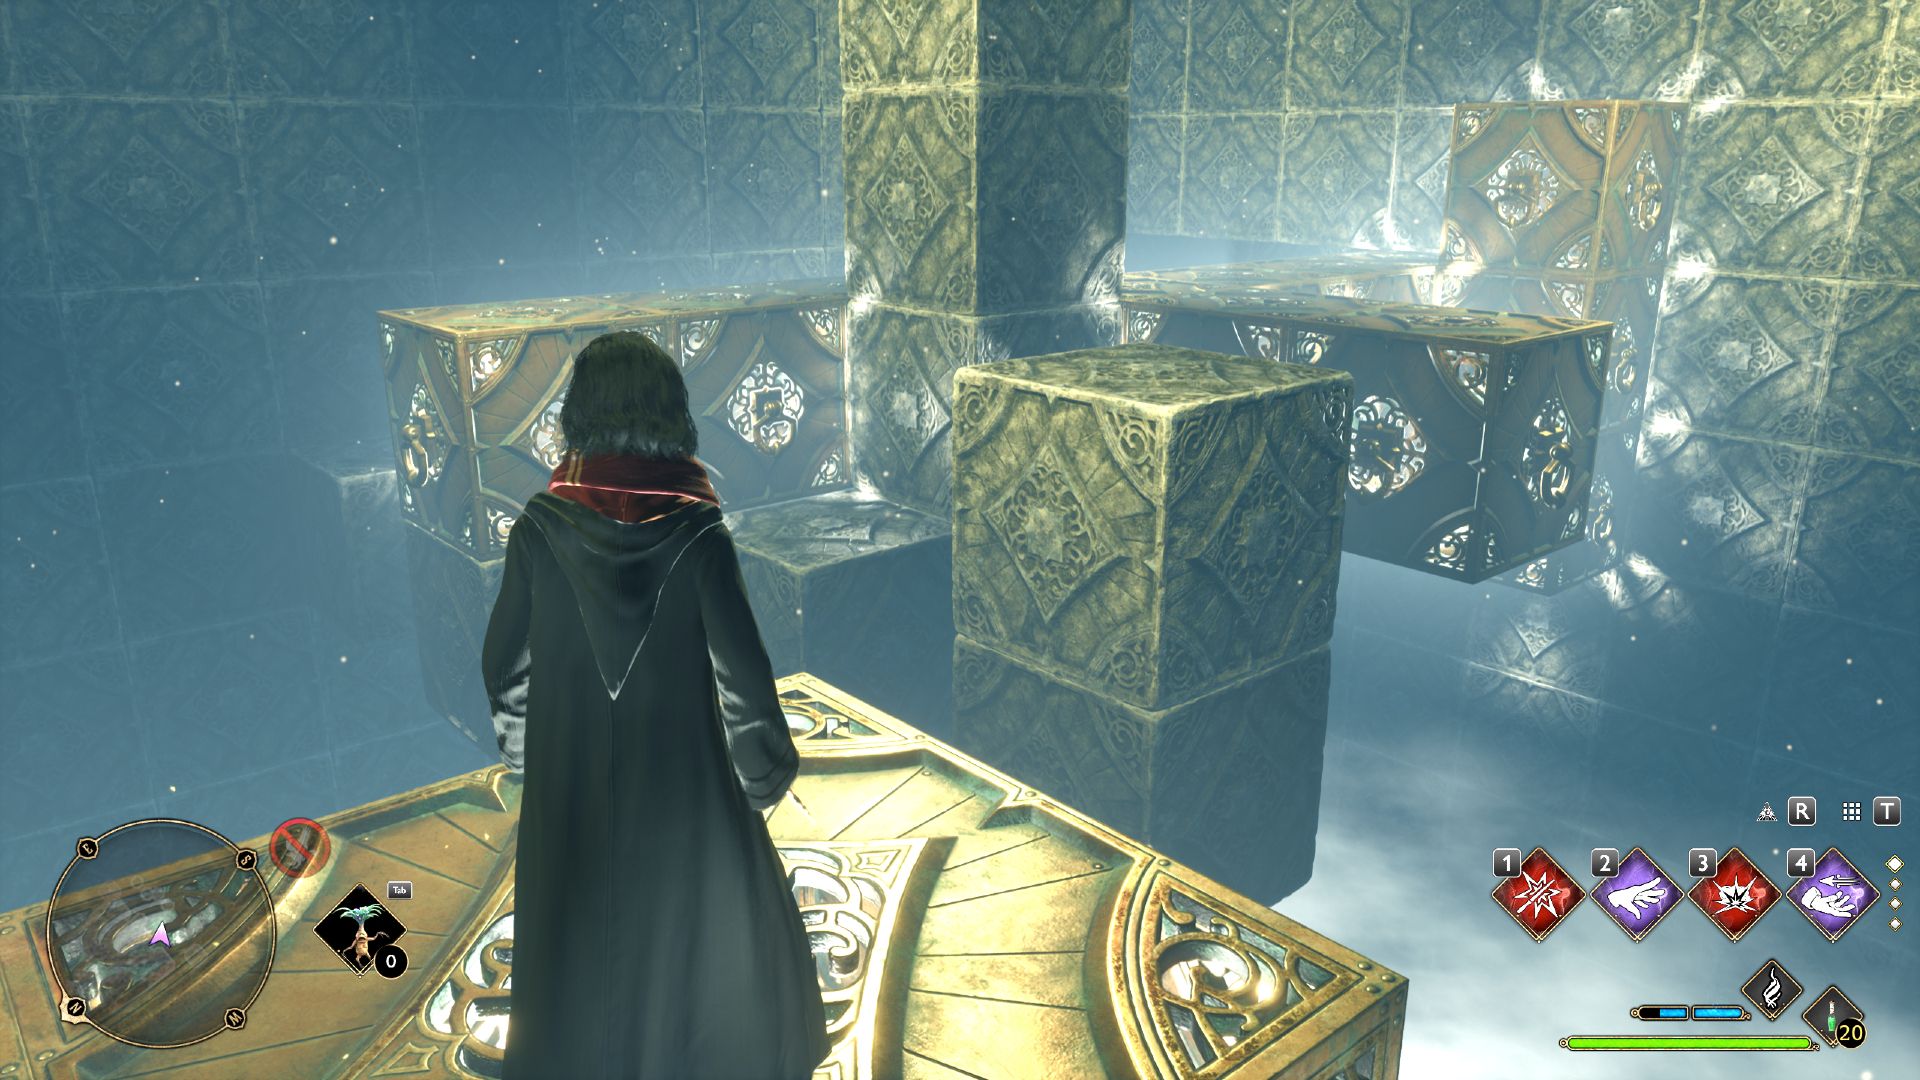
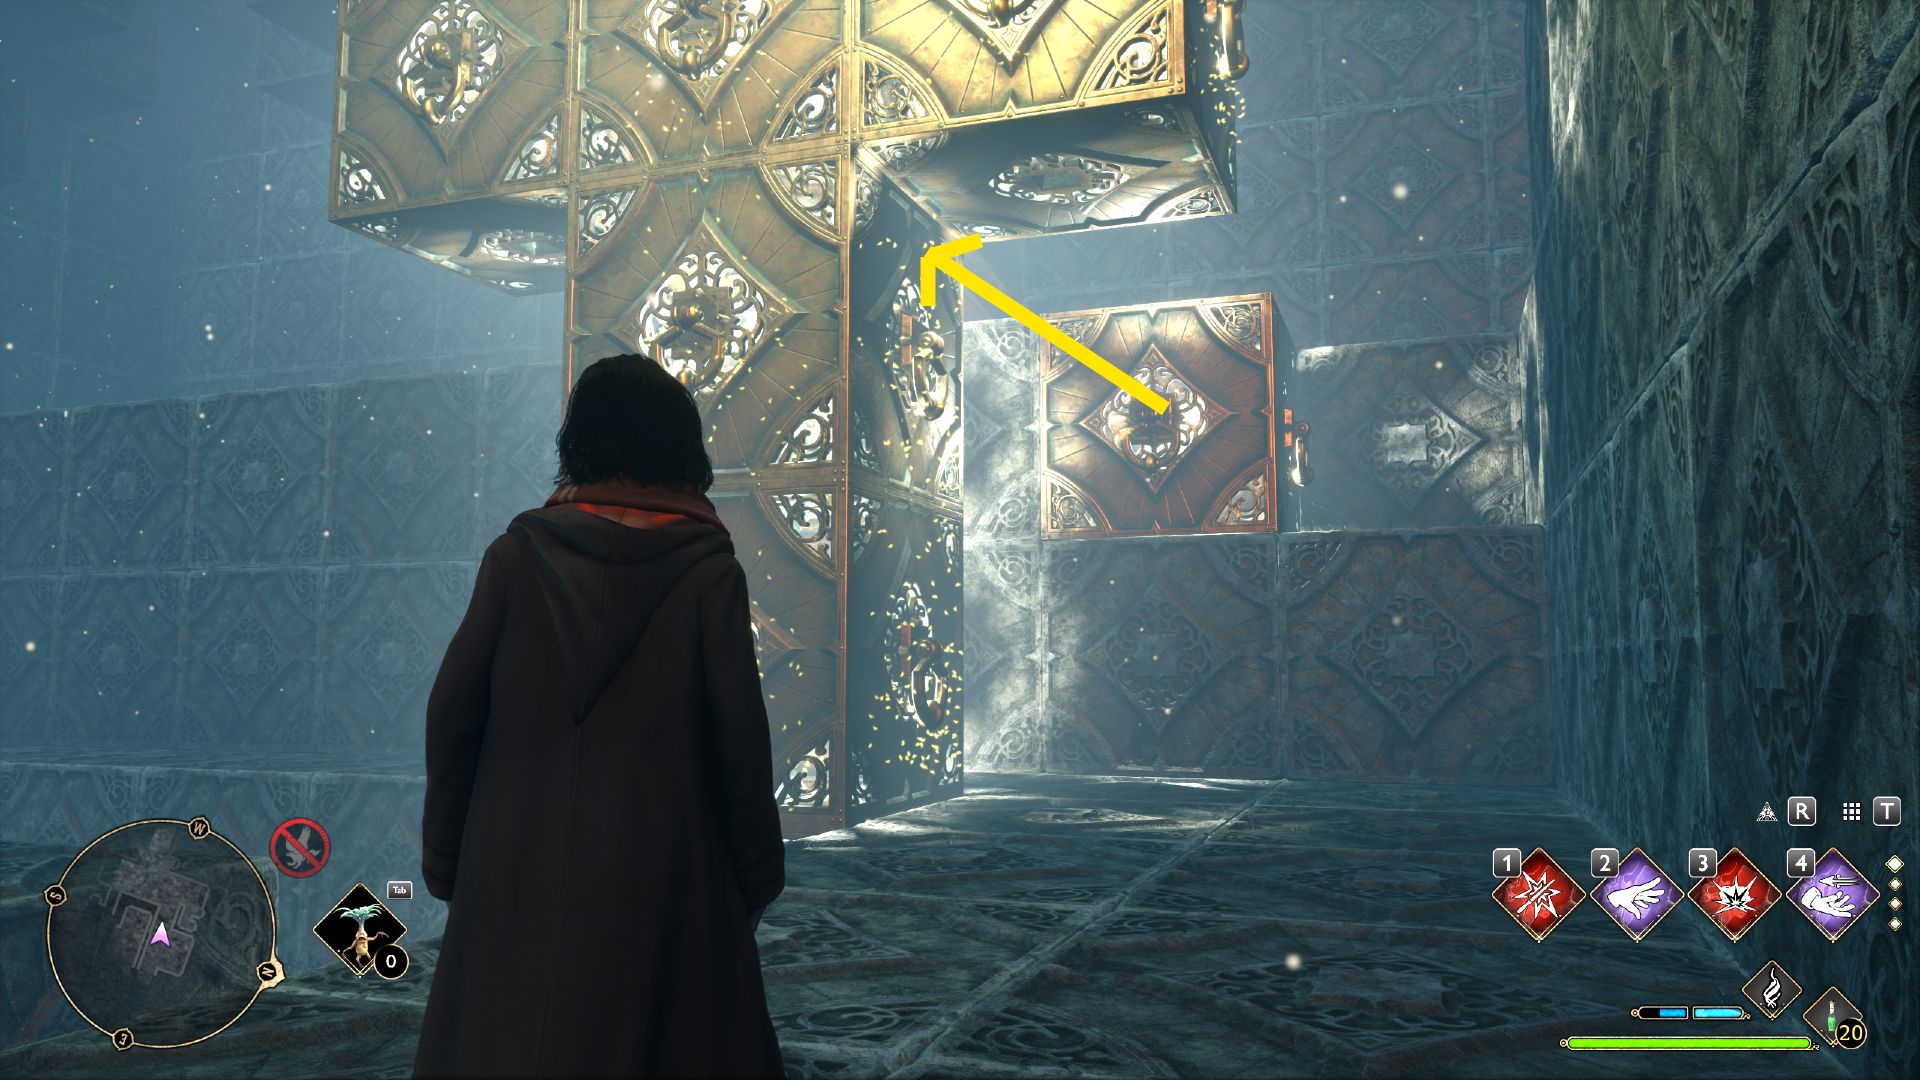
Assuming you have completed or even skippedone ofHogwarts Legacy’sAlohomora locksto admission Depulso Puzzle Room 2 , you will find that this puzzle bedroom has two rooms . The first need you to open up a chest and then find a way across to attain the second elbow room . The second room will require open up three chest and then incur a manner to reach the going . Here ’s how you could grab the bureau and then recover a way to the second way :
footfall
verbal description

Image
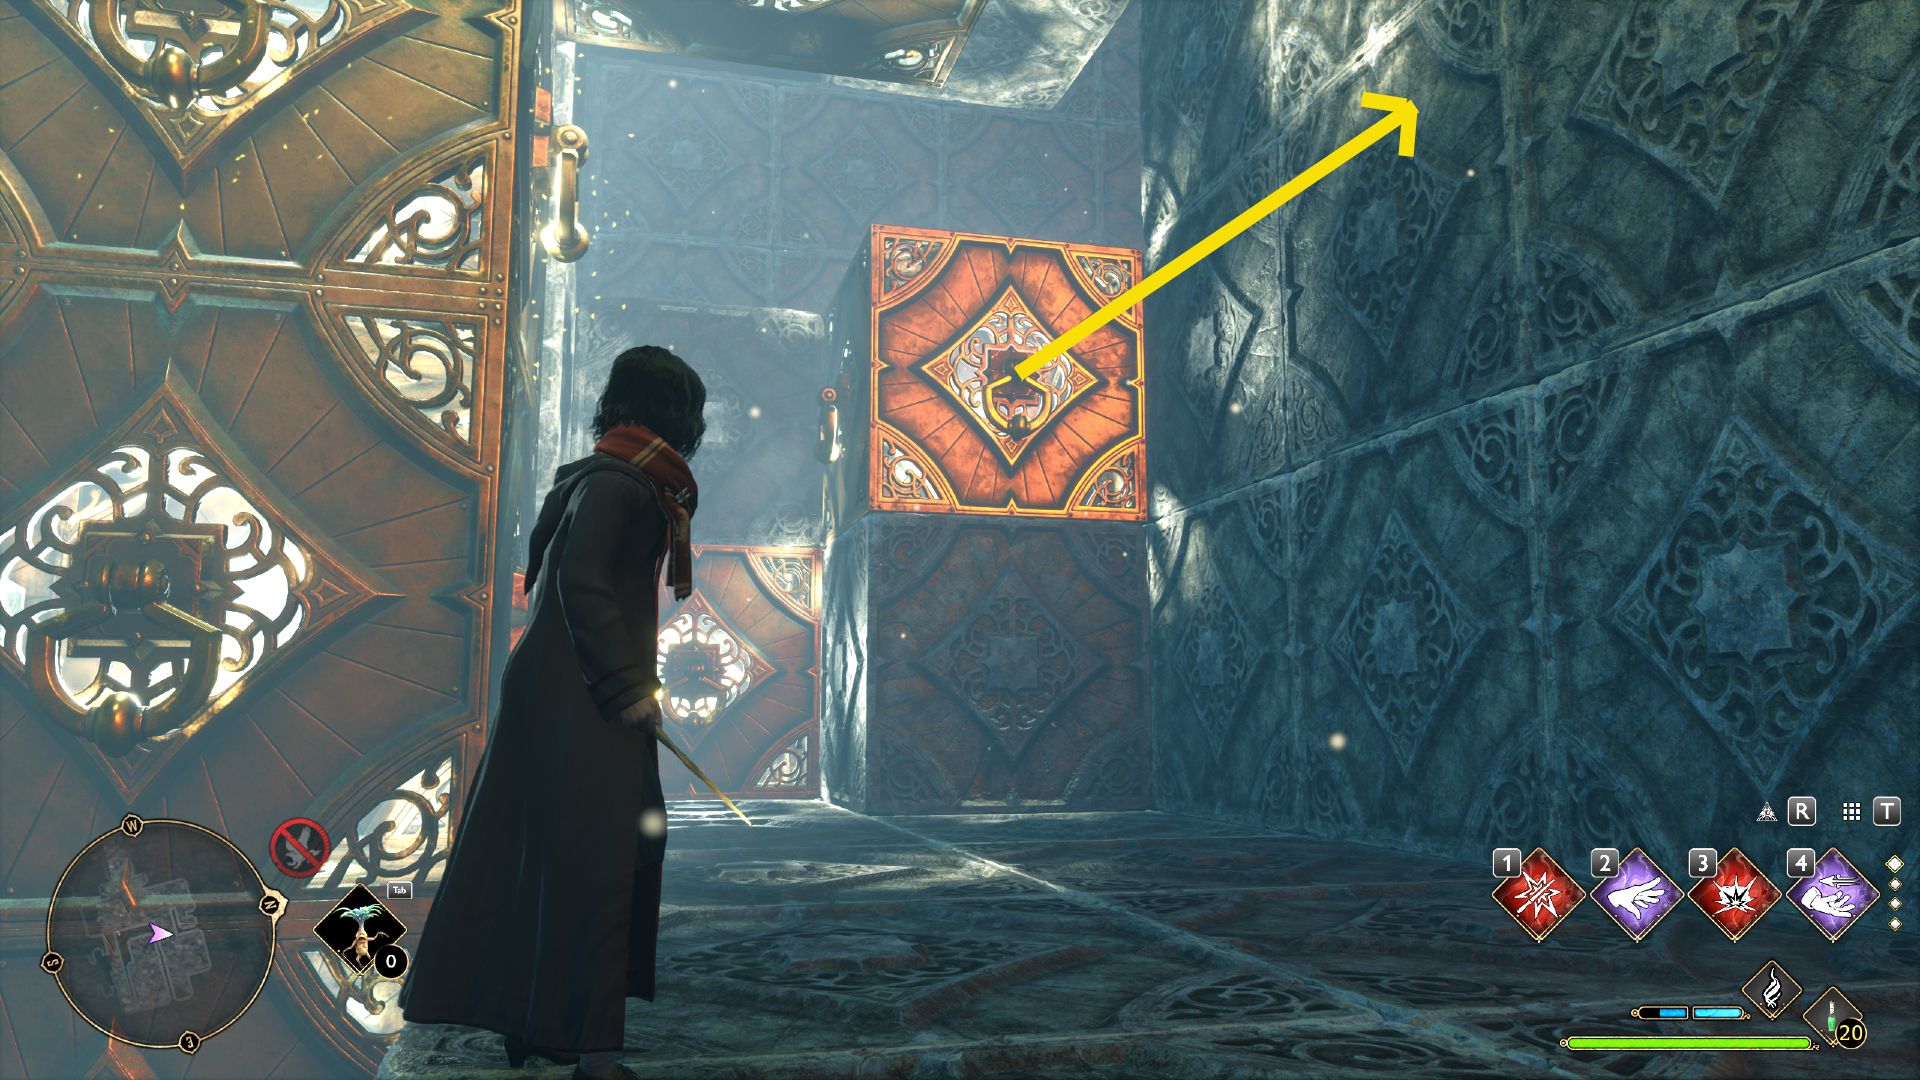
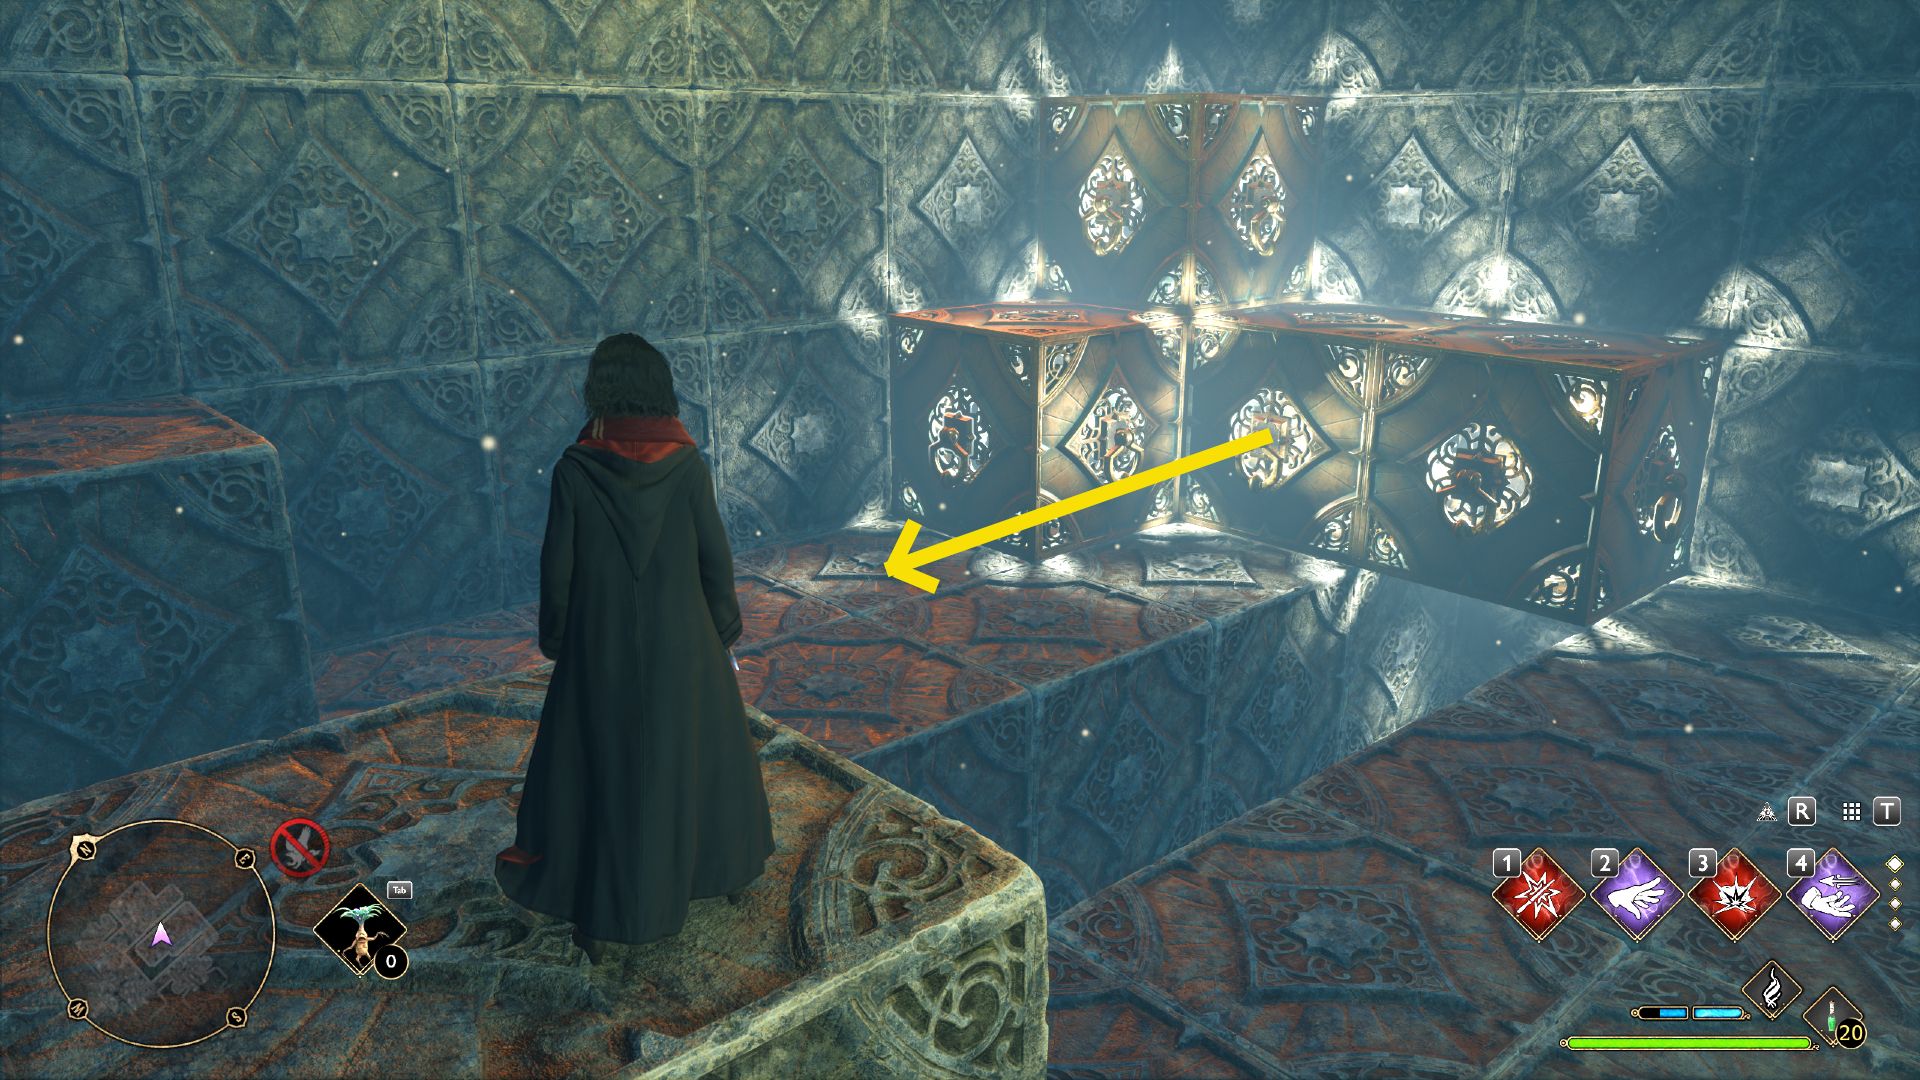
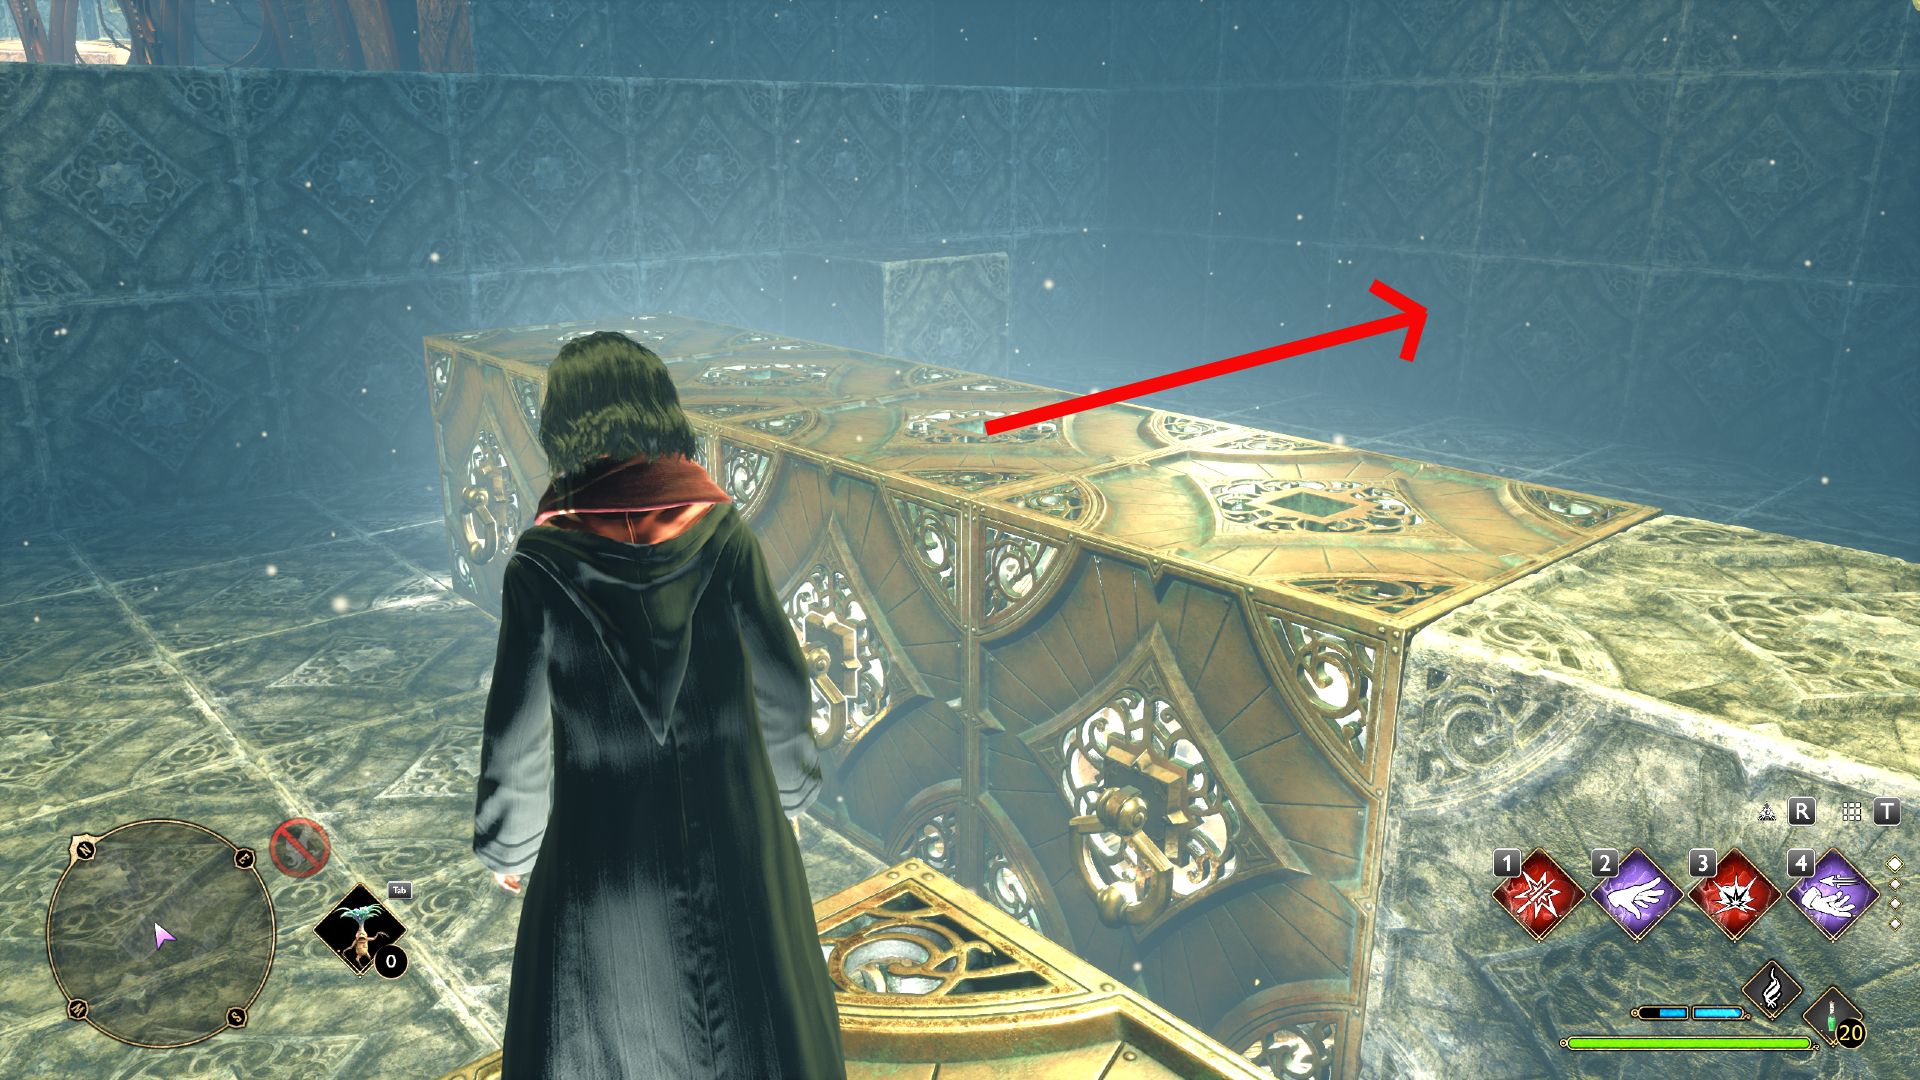
1
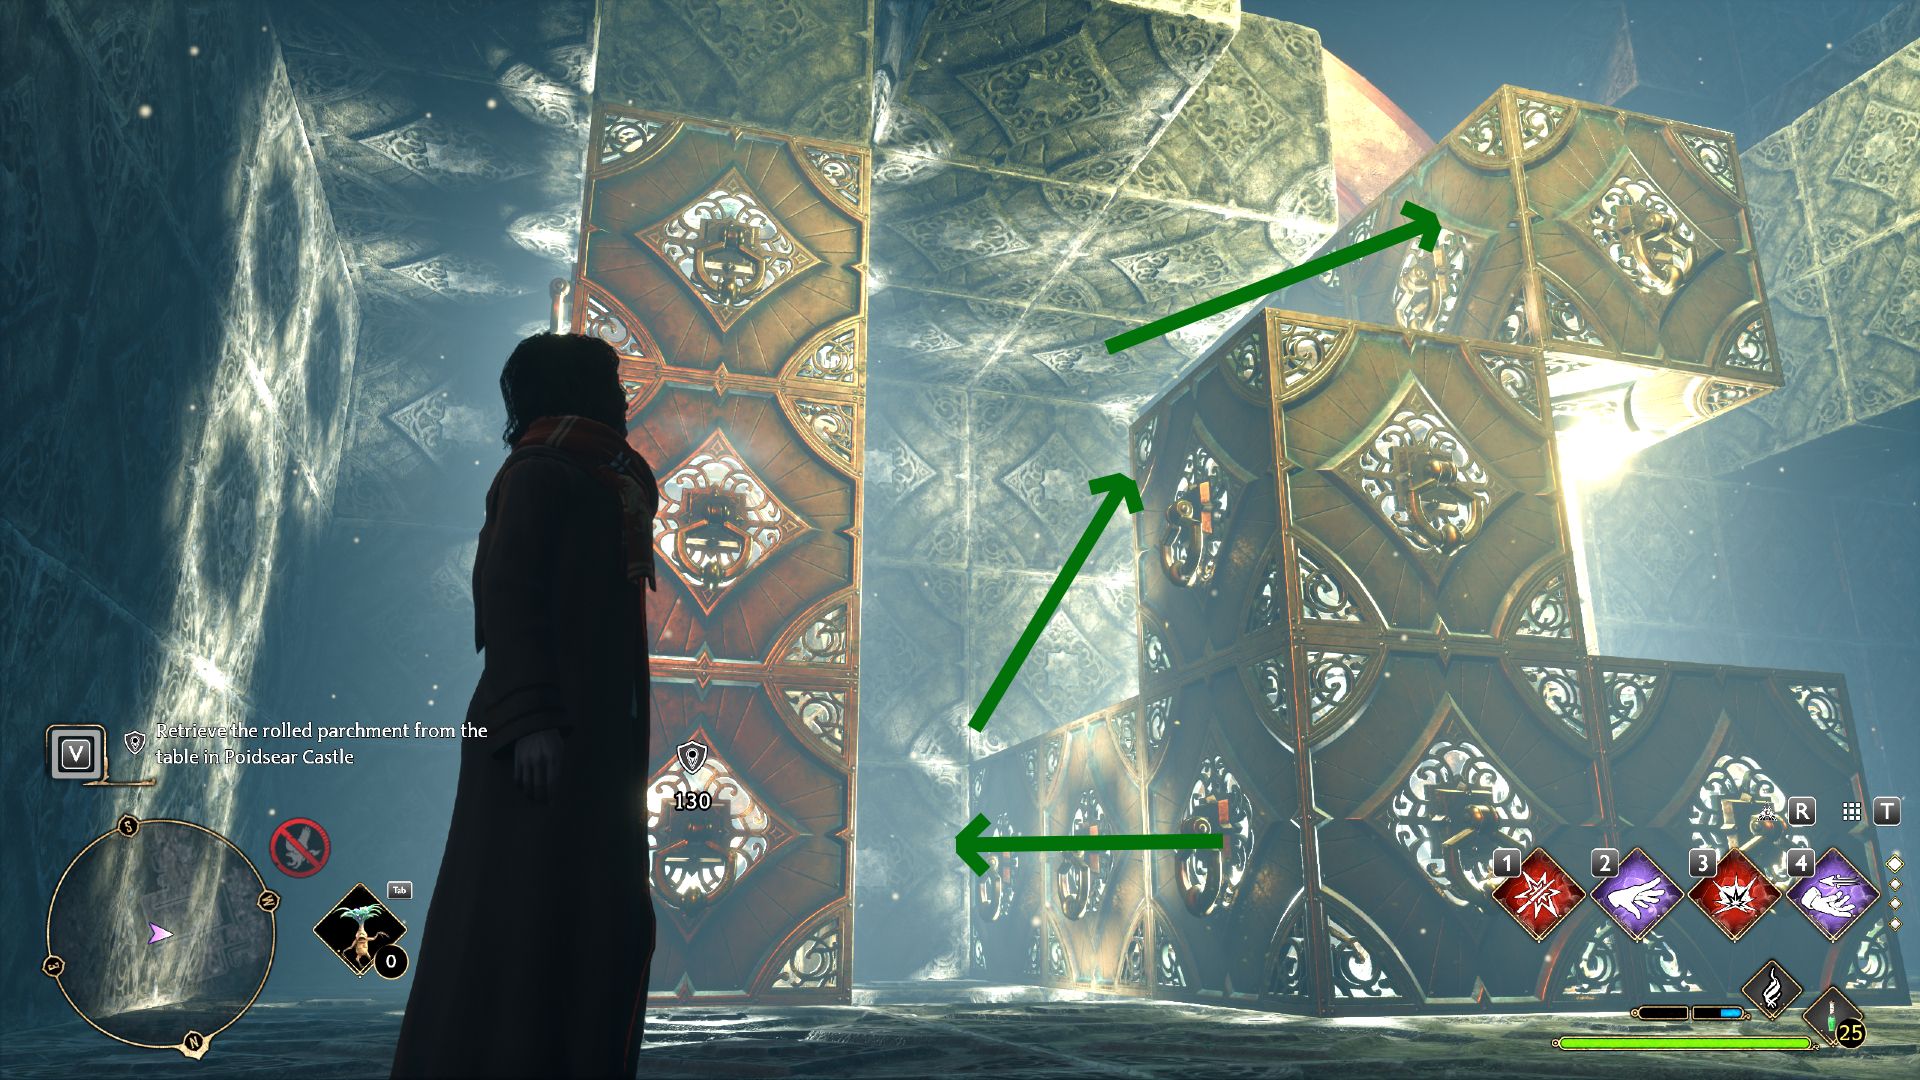
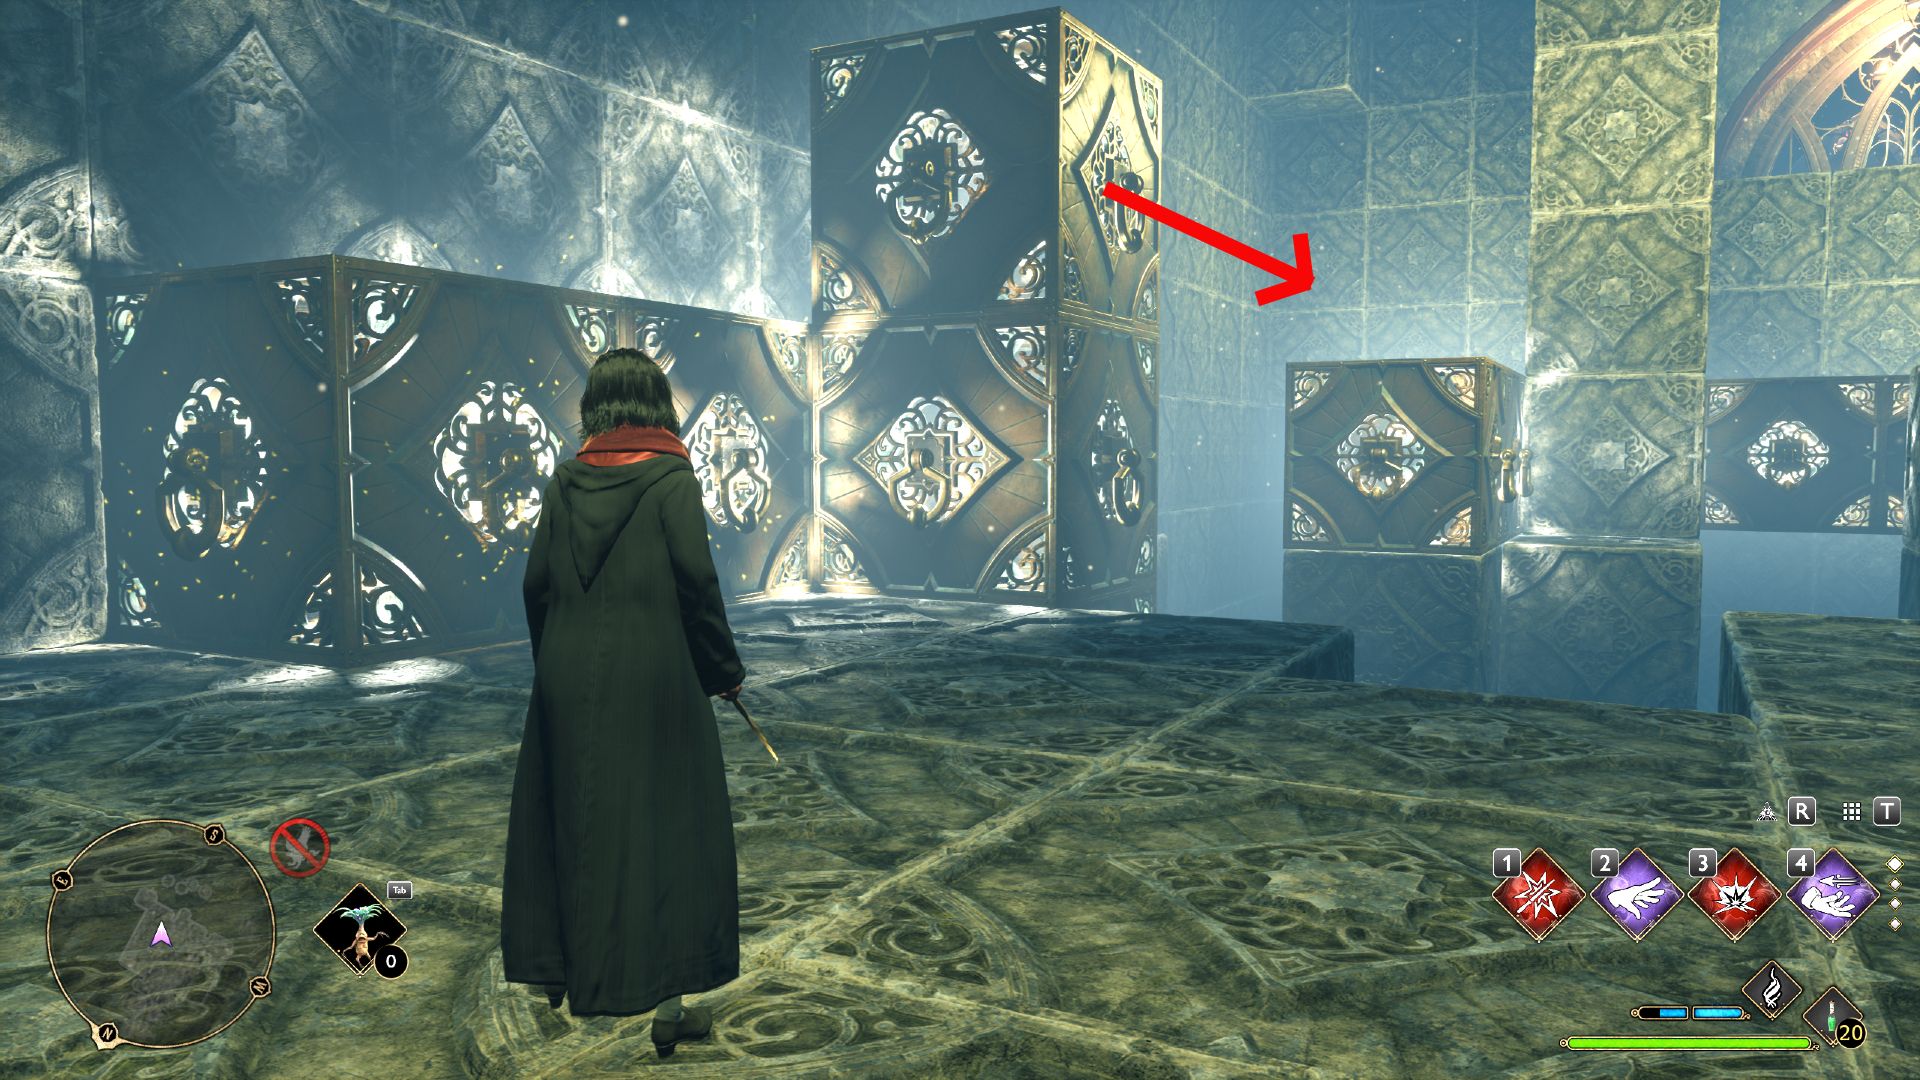
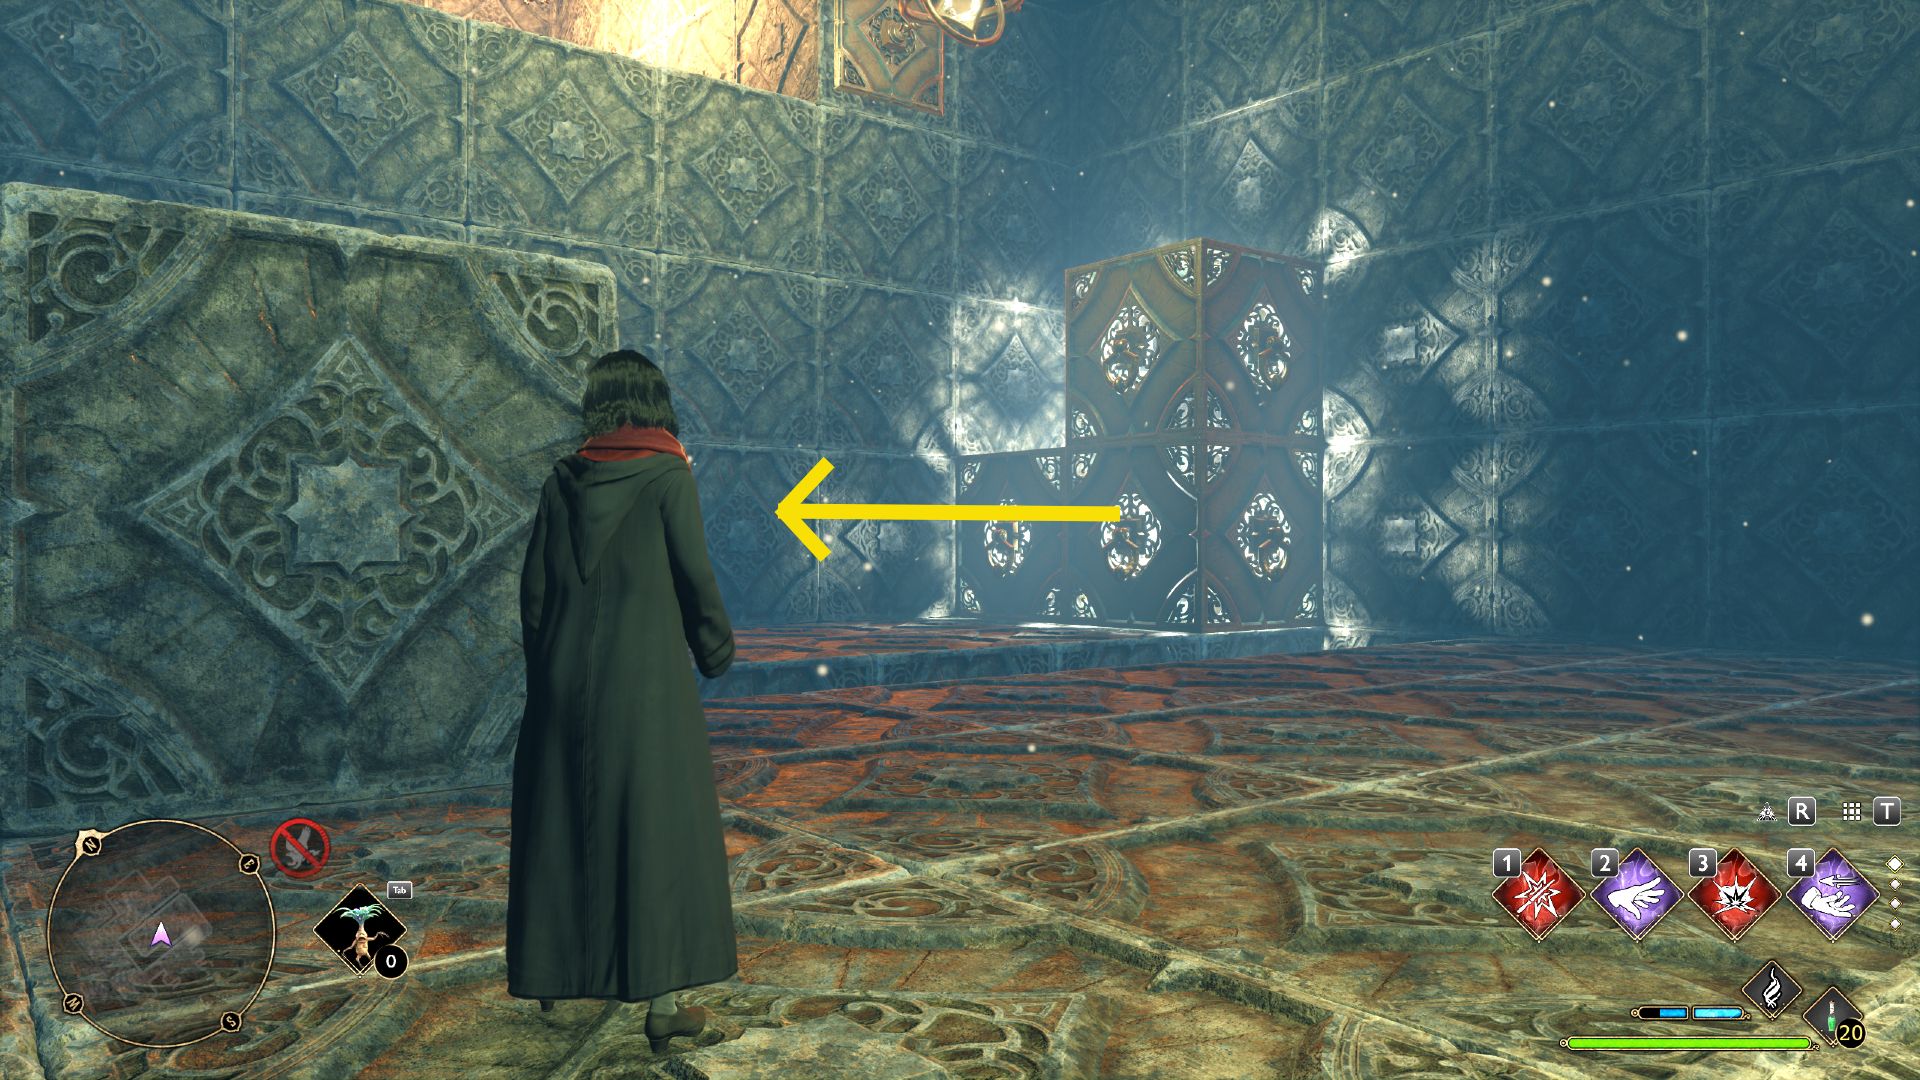
apply Accio to root for the T - shaped stack of blocking towards you .

2
throw away down to the left . Use Accio on the blocking near where you cast it to attract it to the back paries .
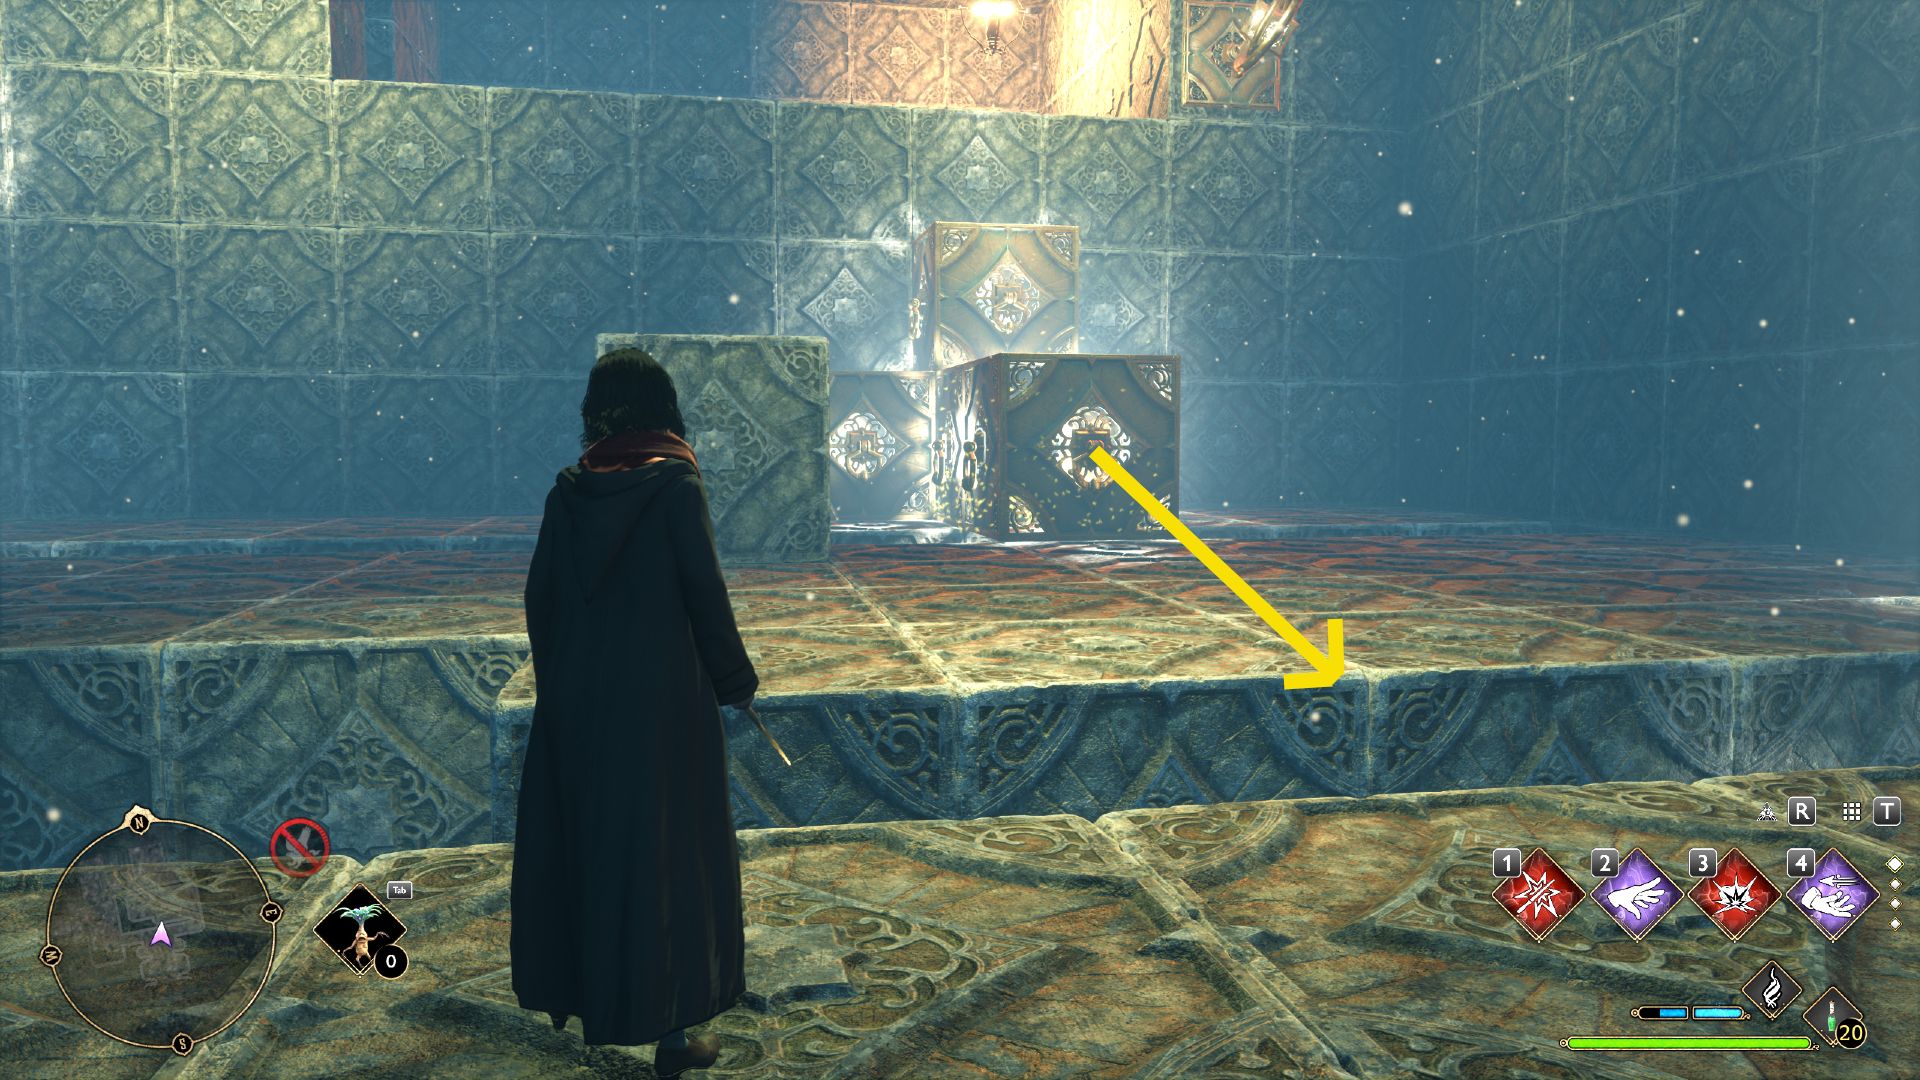
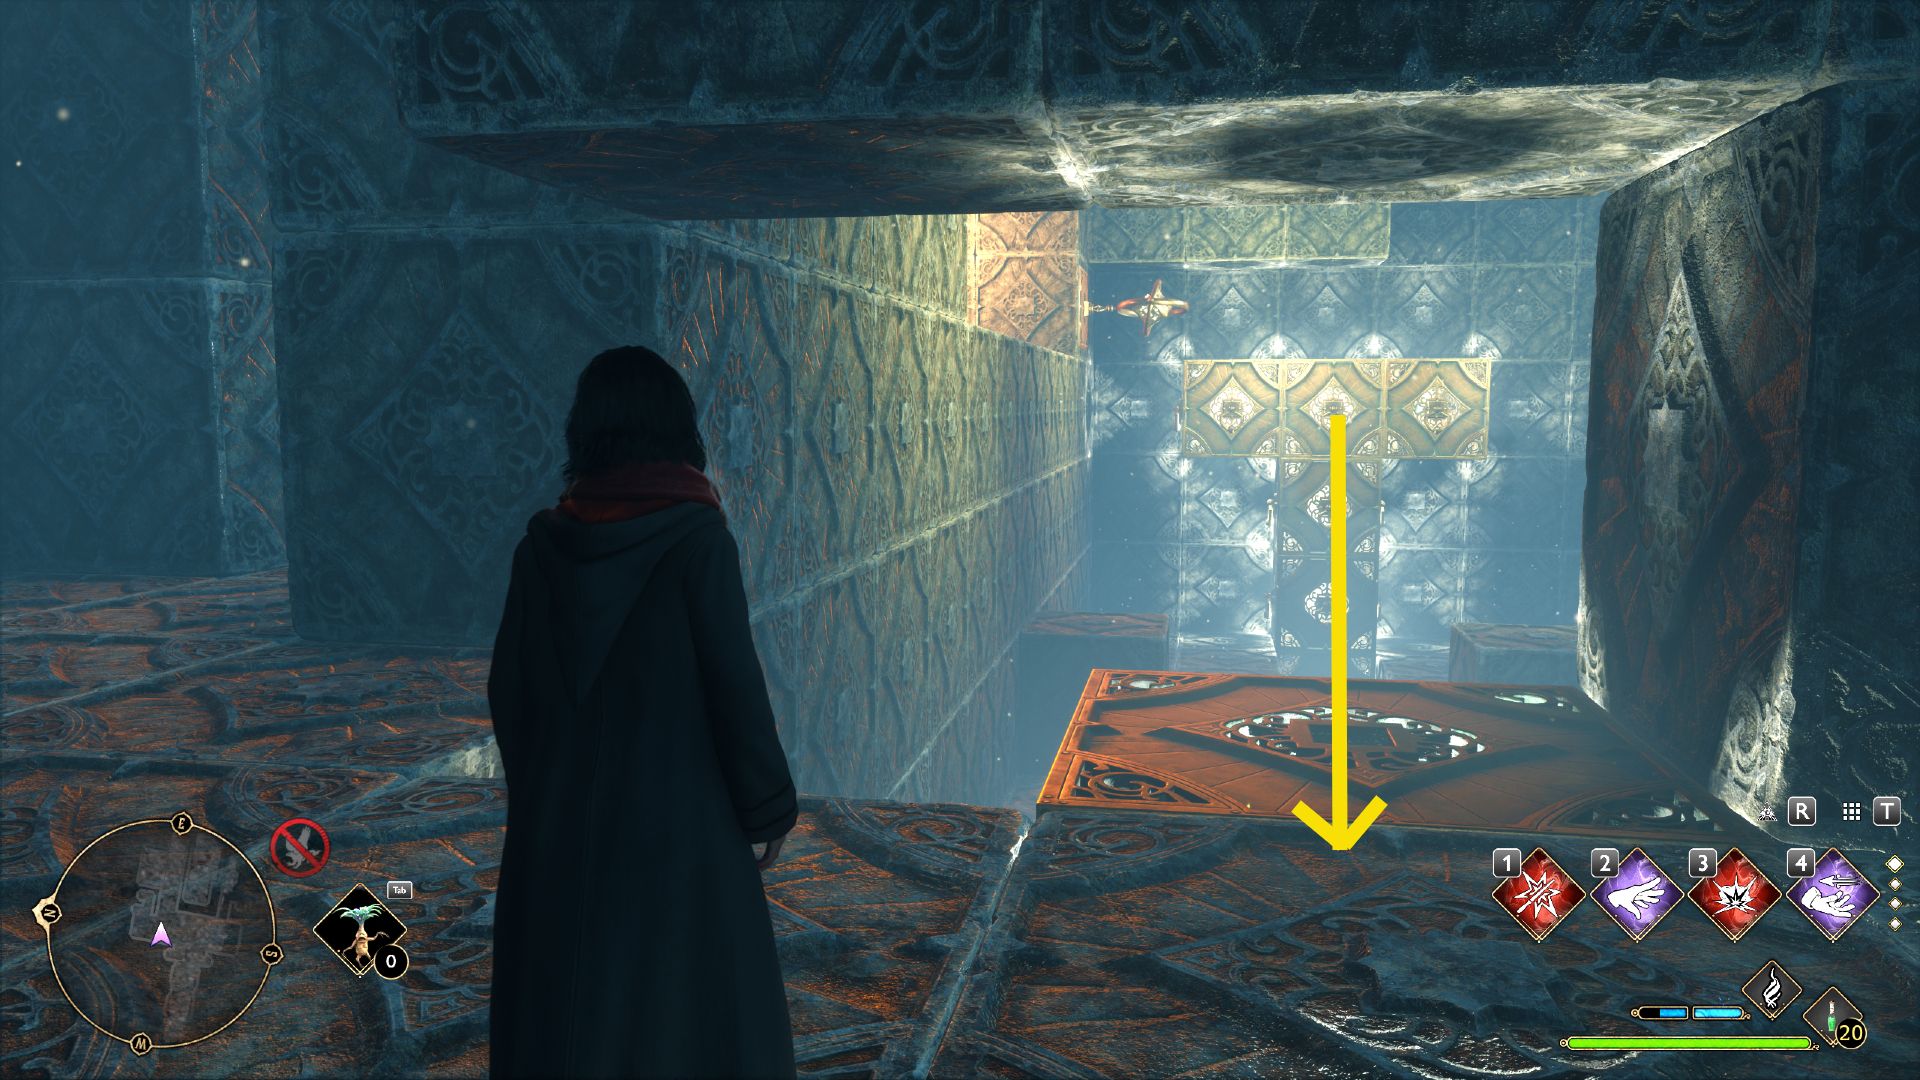
3

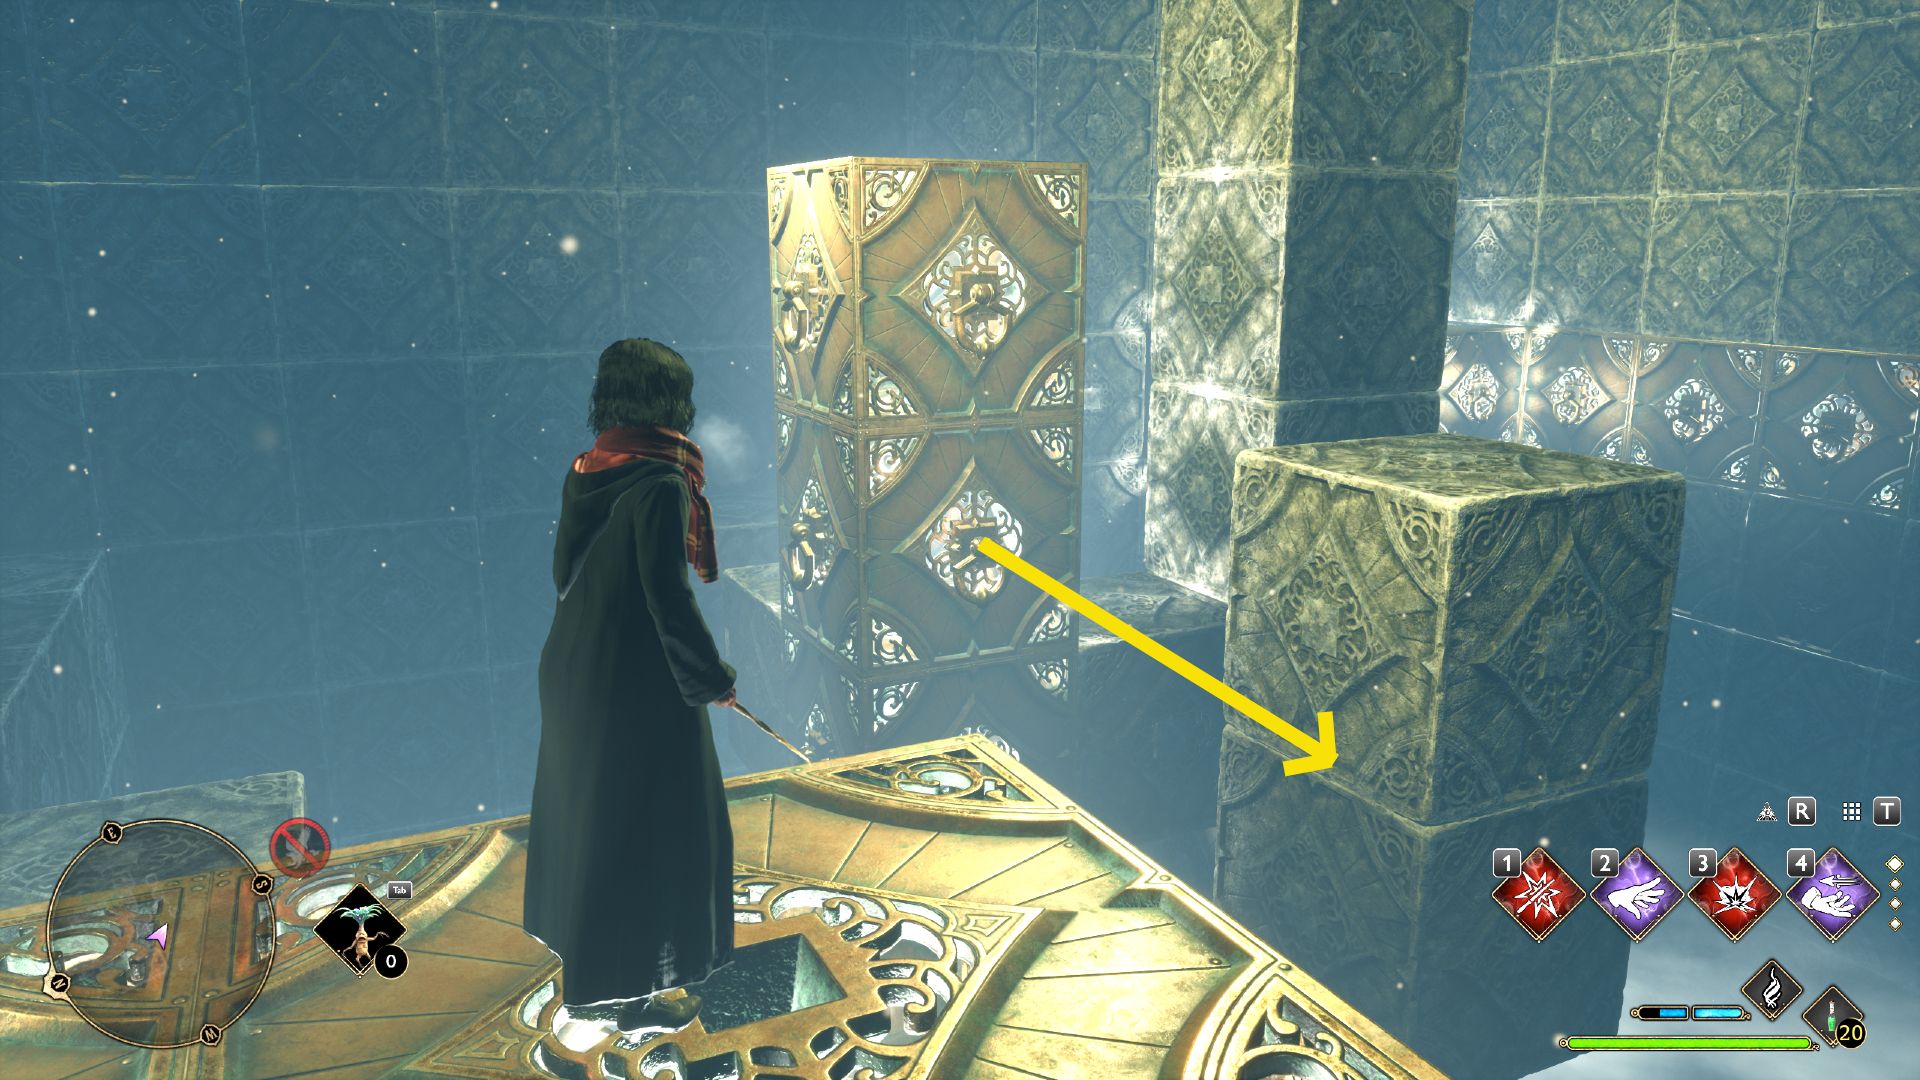
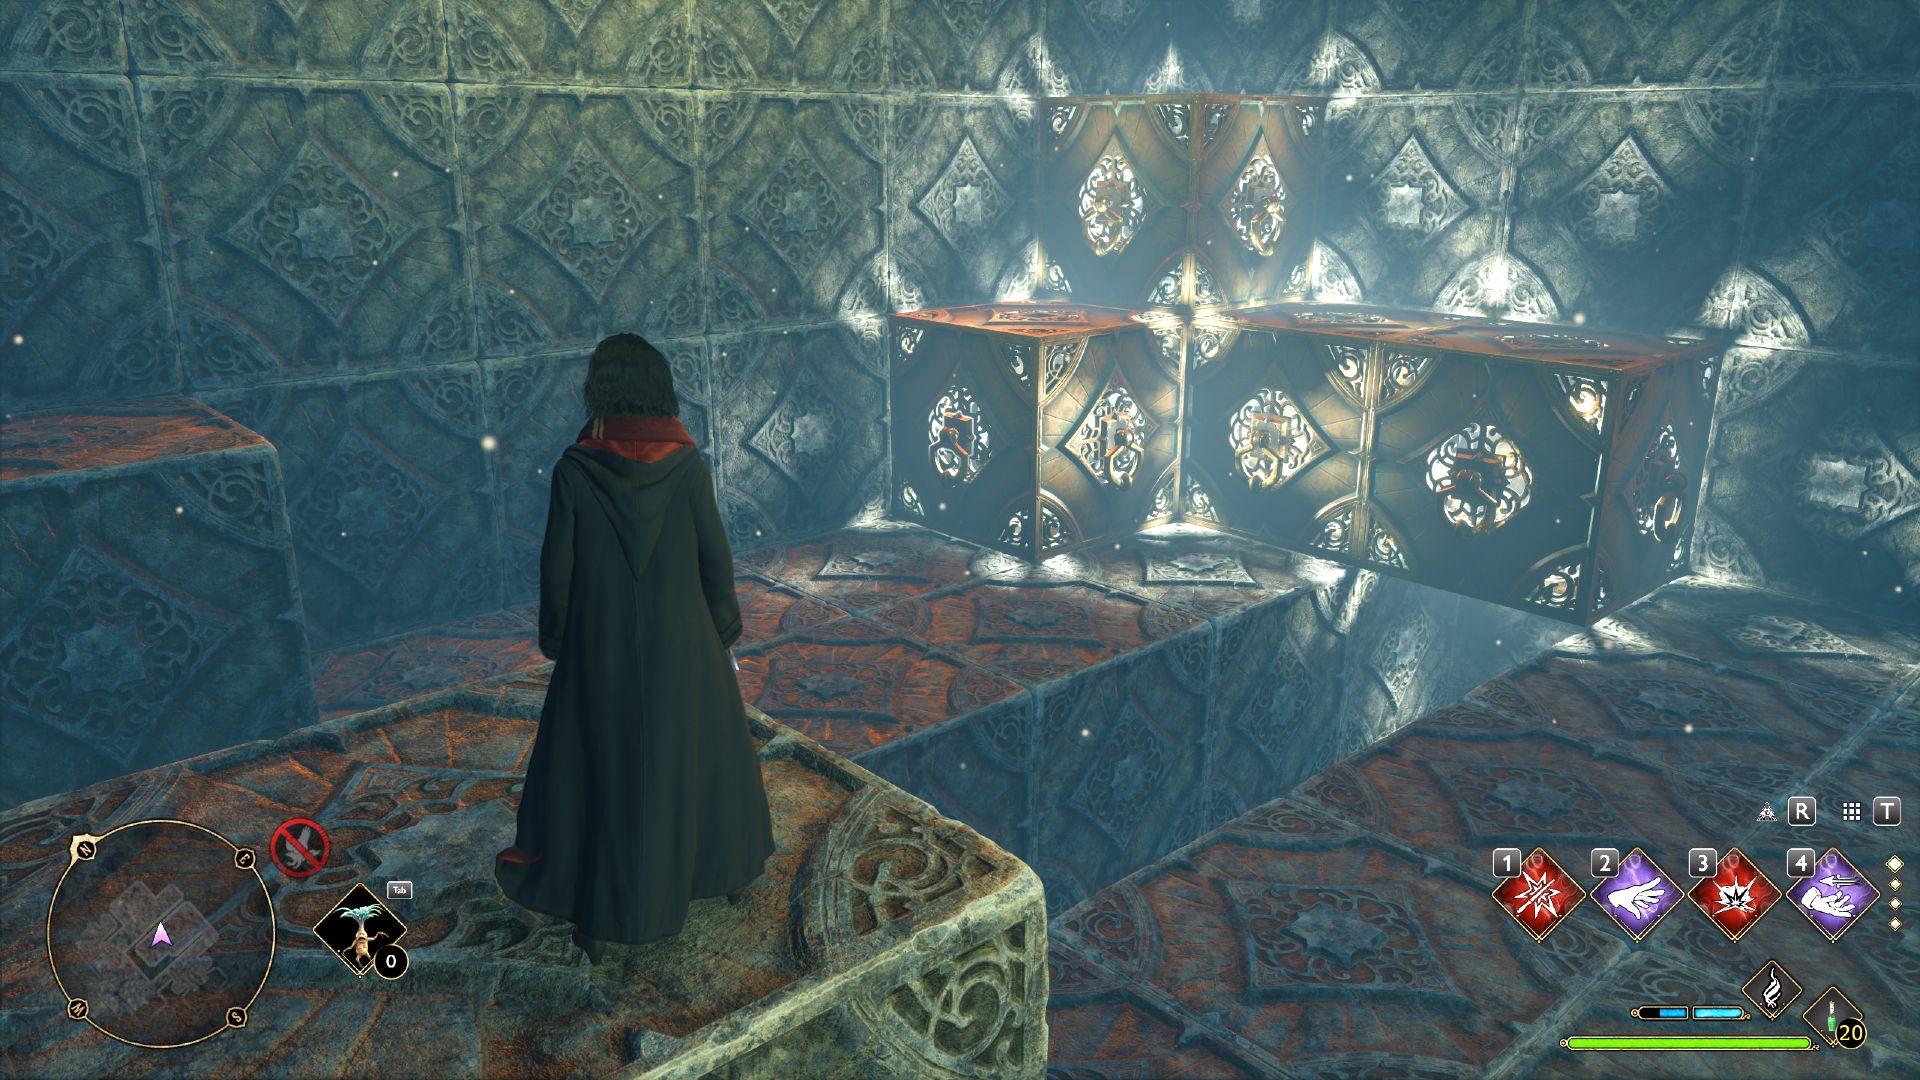
Use Accio to pull the cylinder block on the right field into the middle of the way .
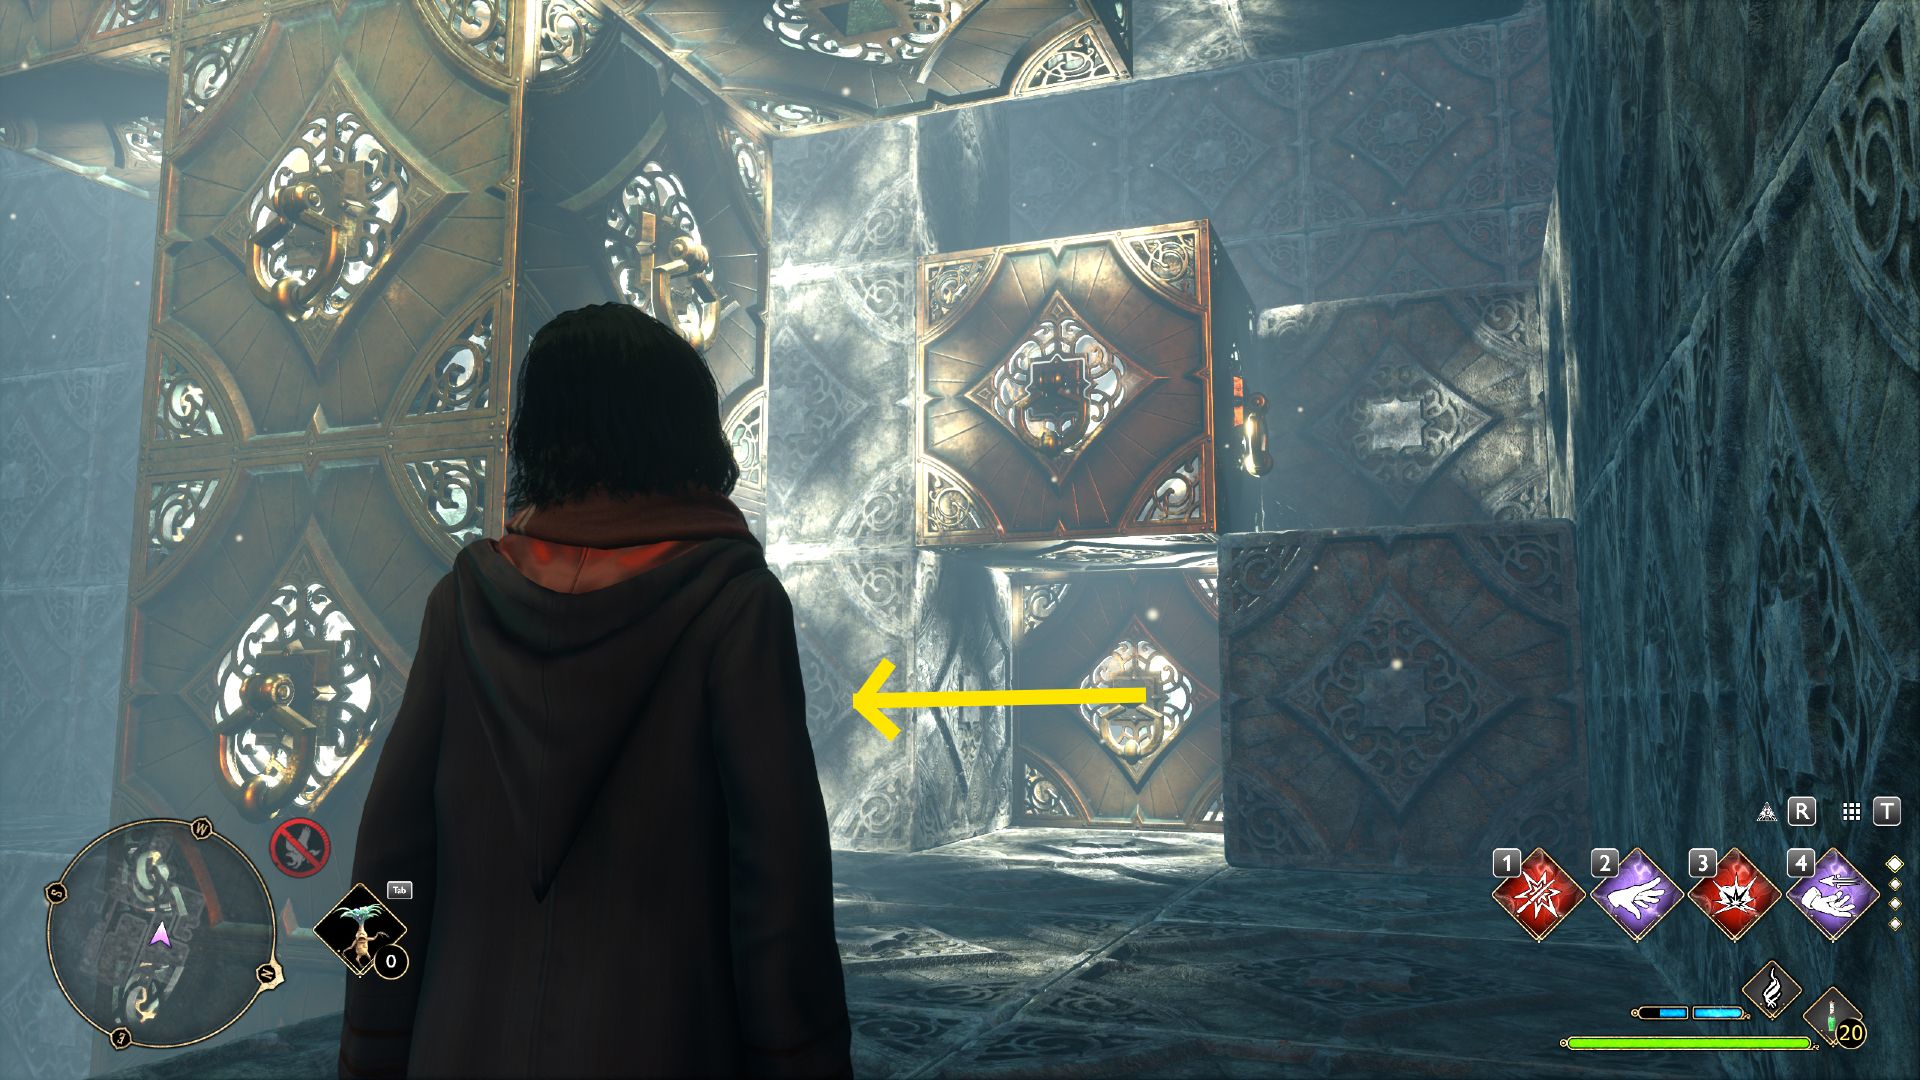
4
employ Depulso to push the two blocks into the back bulwark .
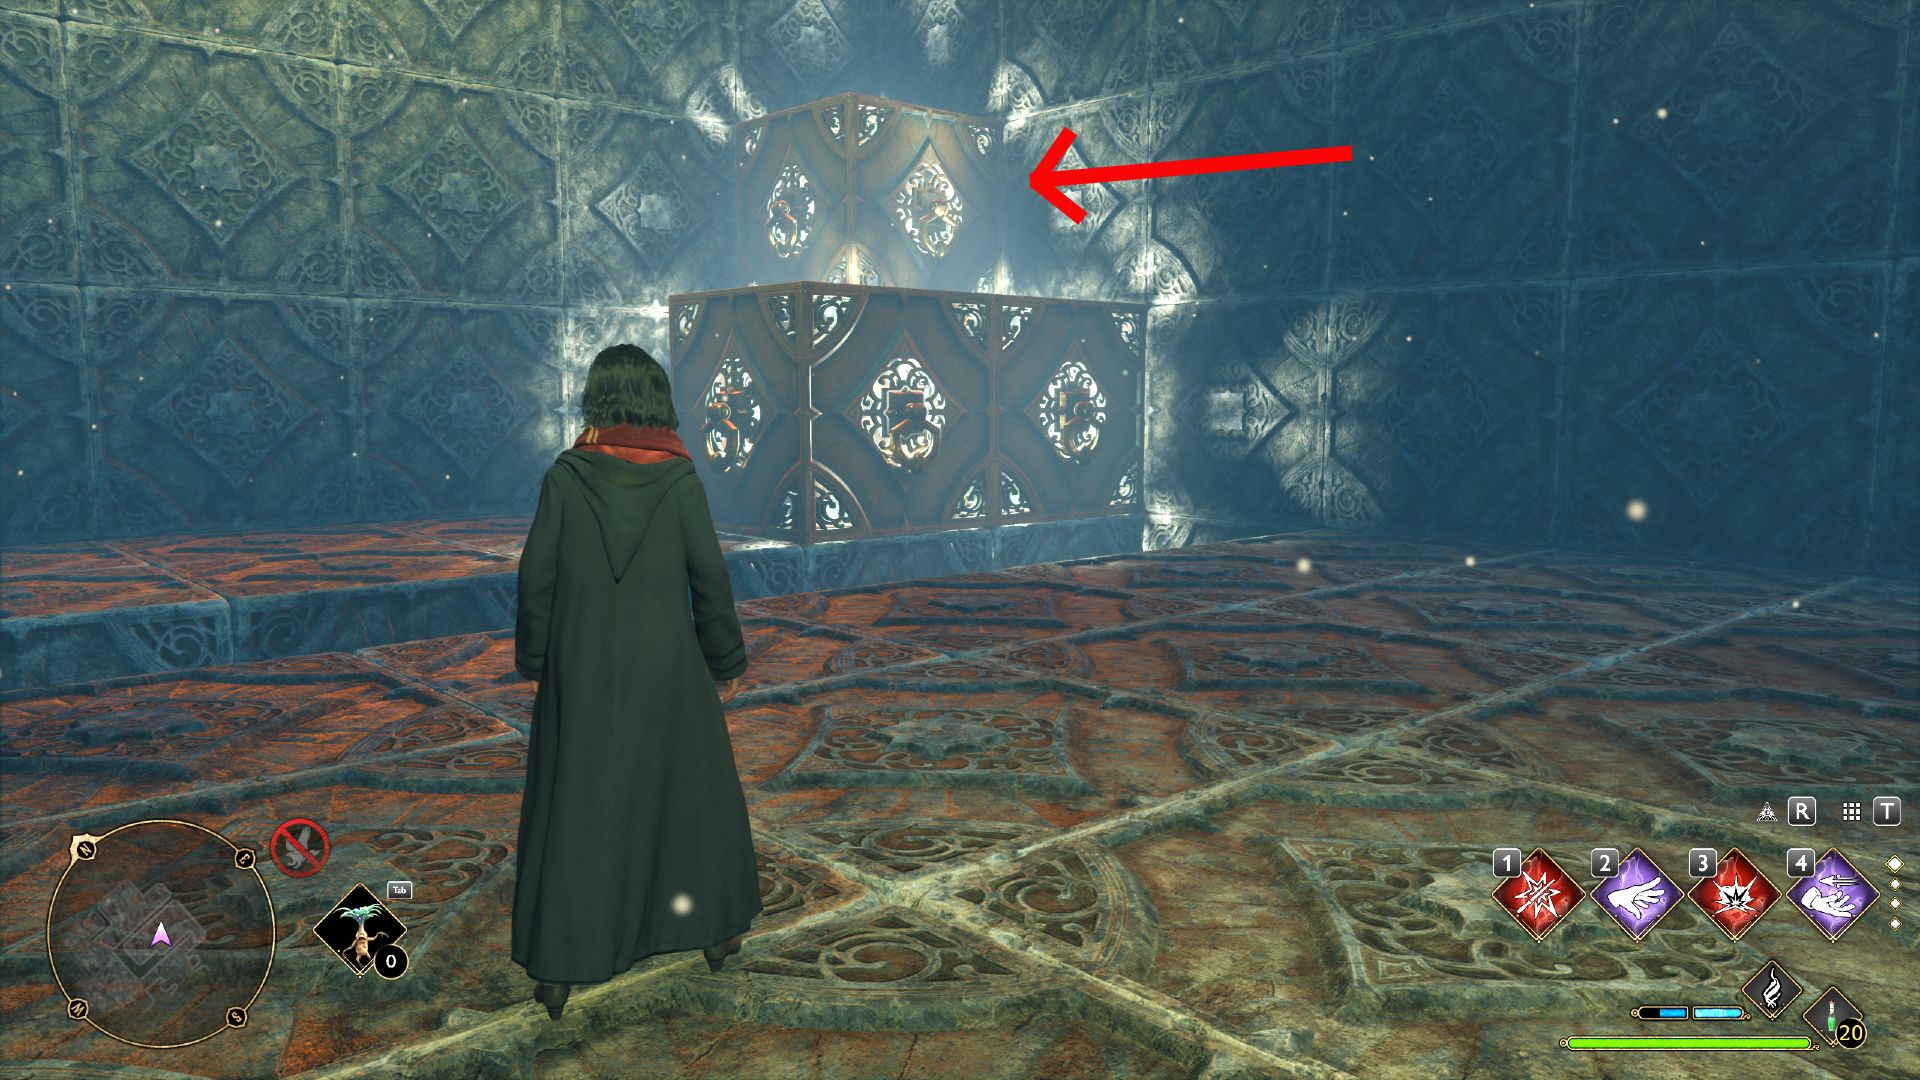
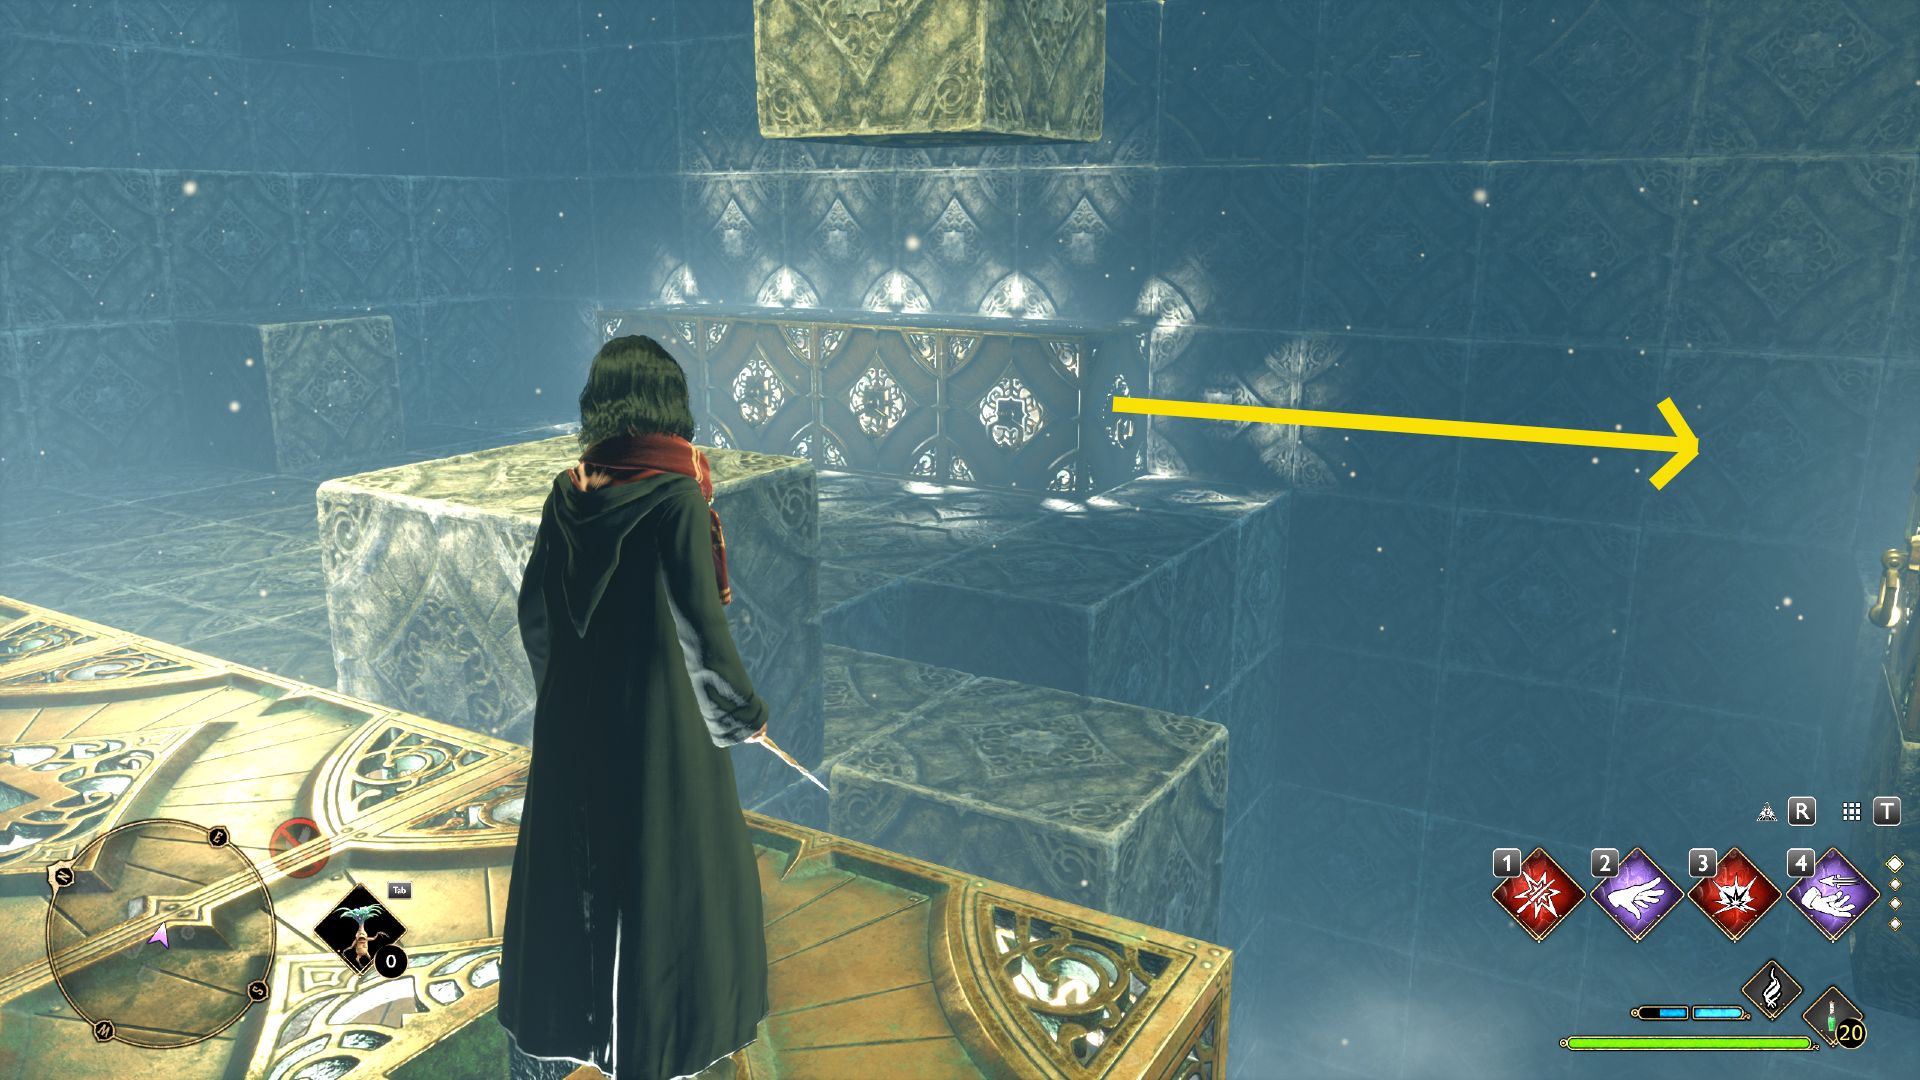
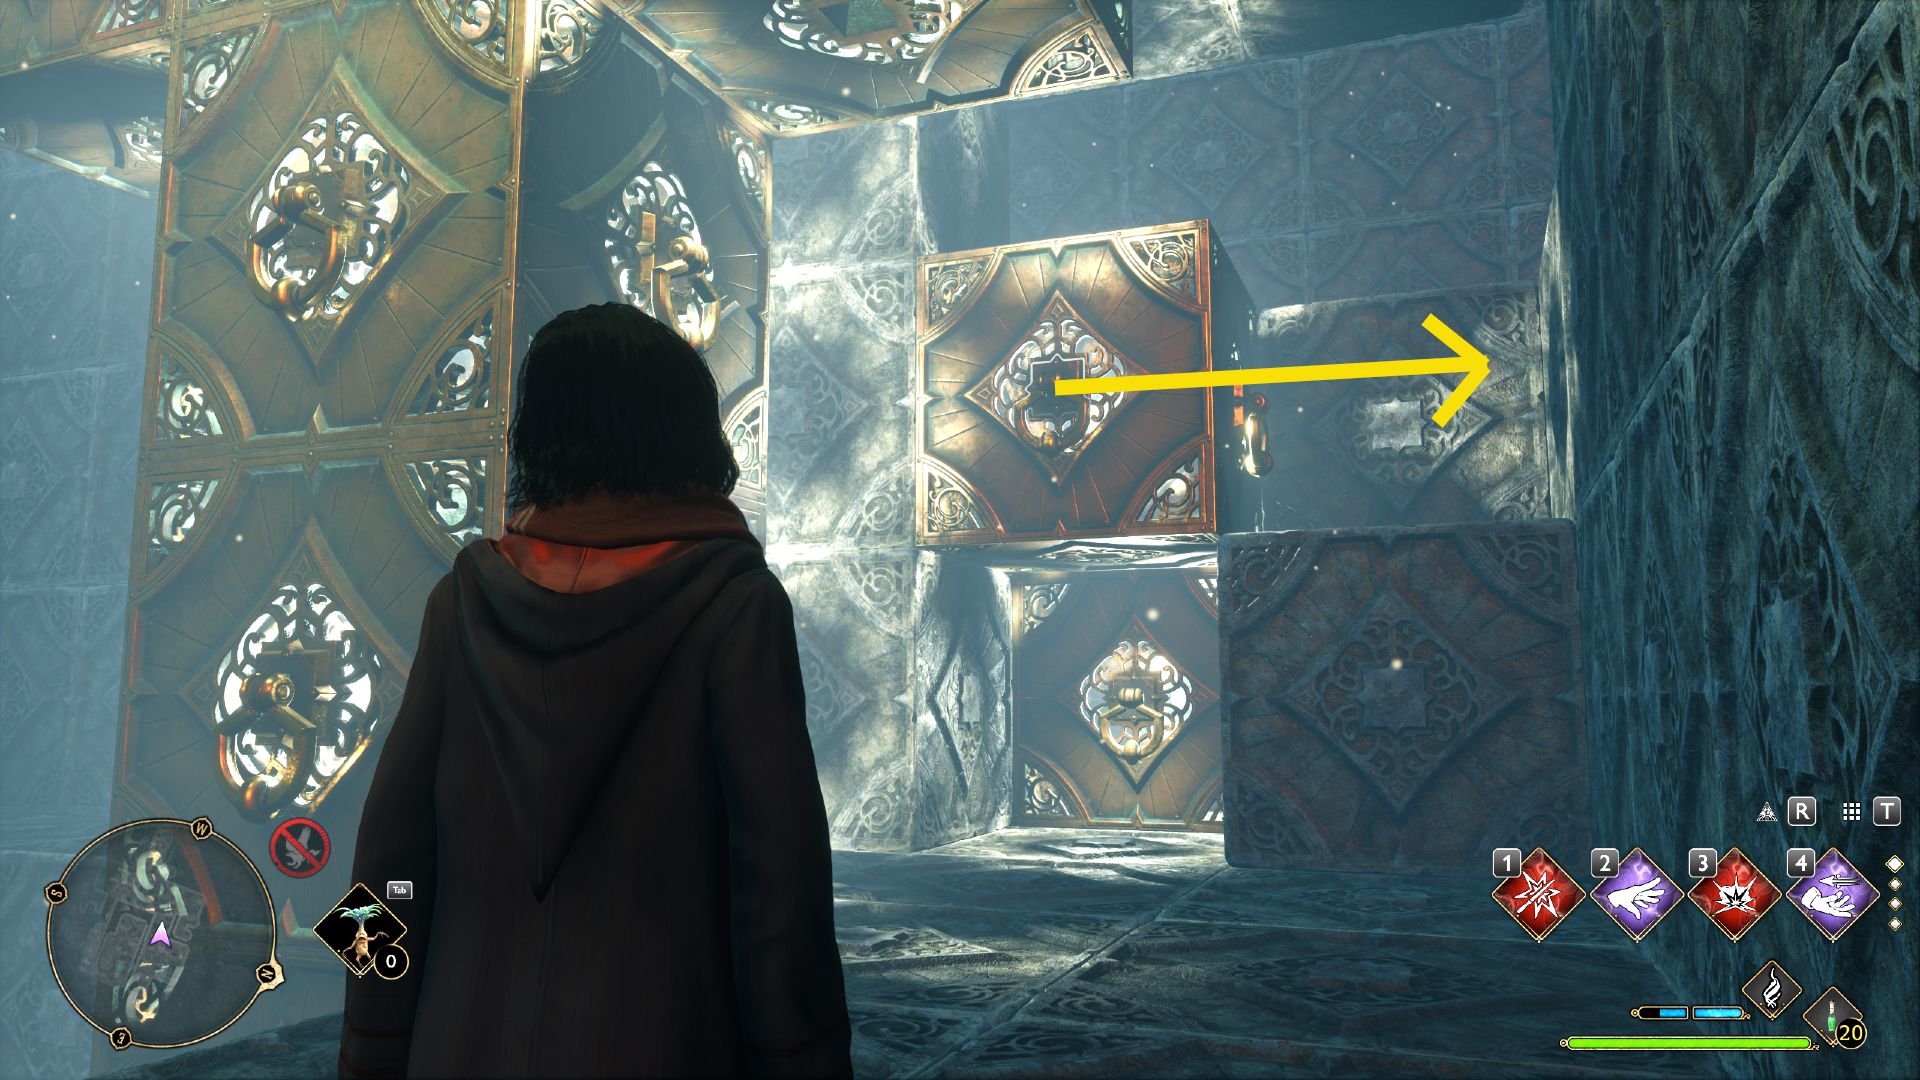
5
utilize Depulso to campaign the two block toward the nook . This connects three blocks together .
6

Use Accio to pull the three blocks toward the entering .
7
Use the three blocks to climb the left wall to reach the chest .
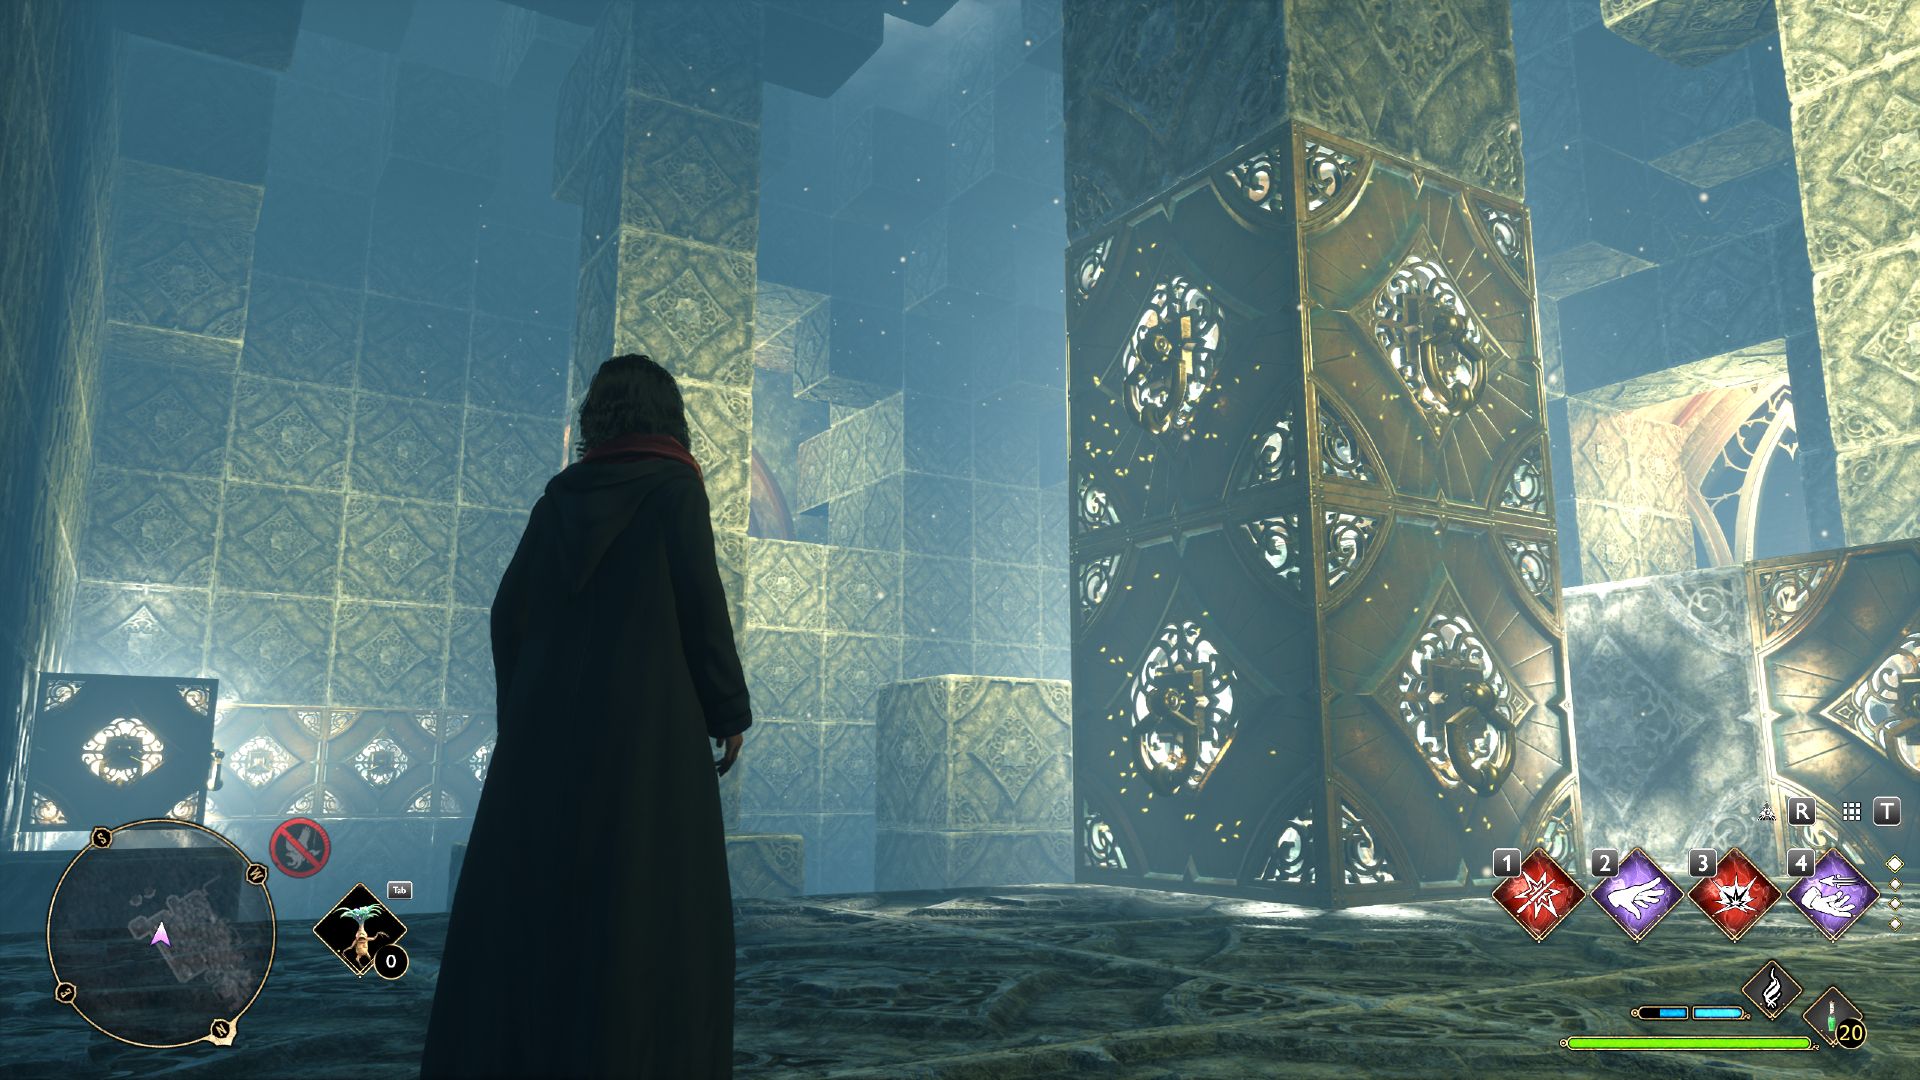
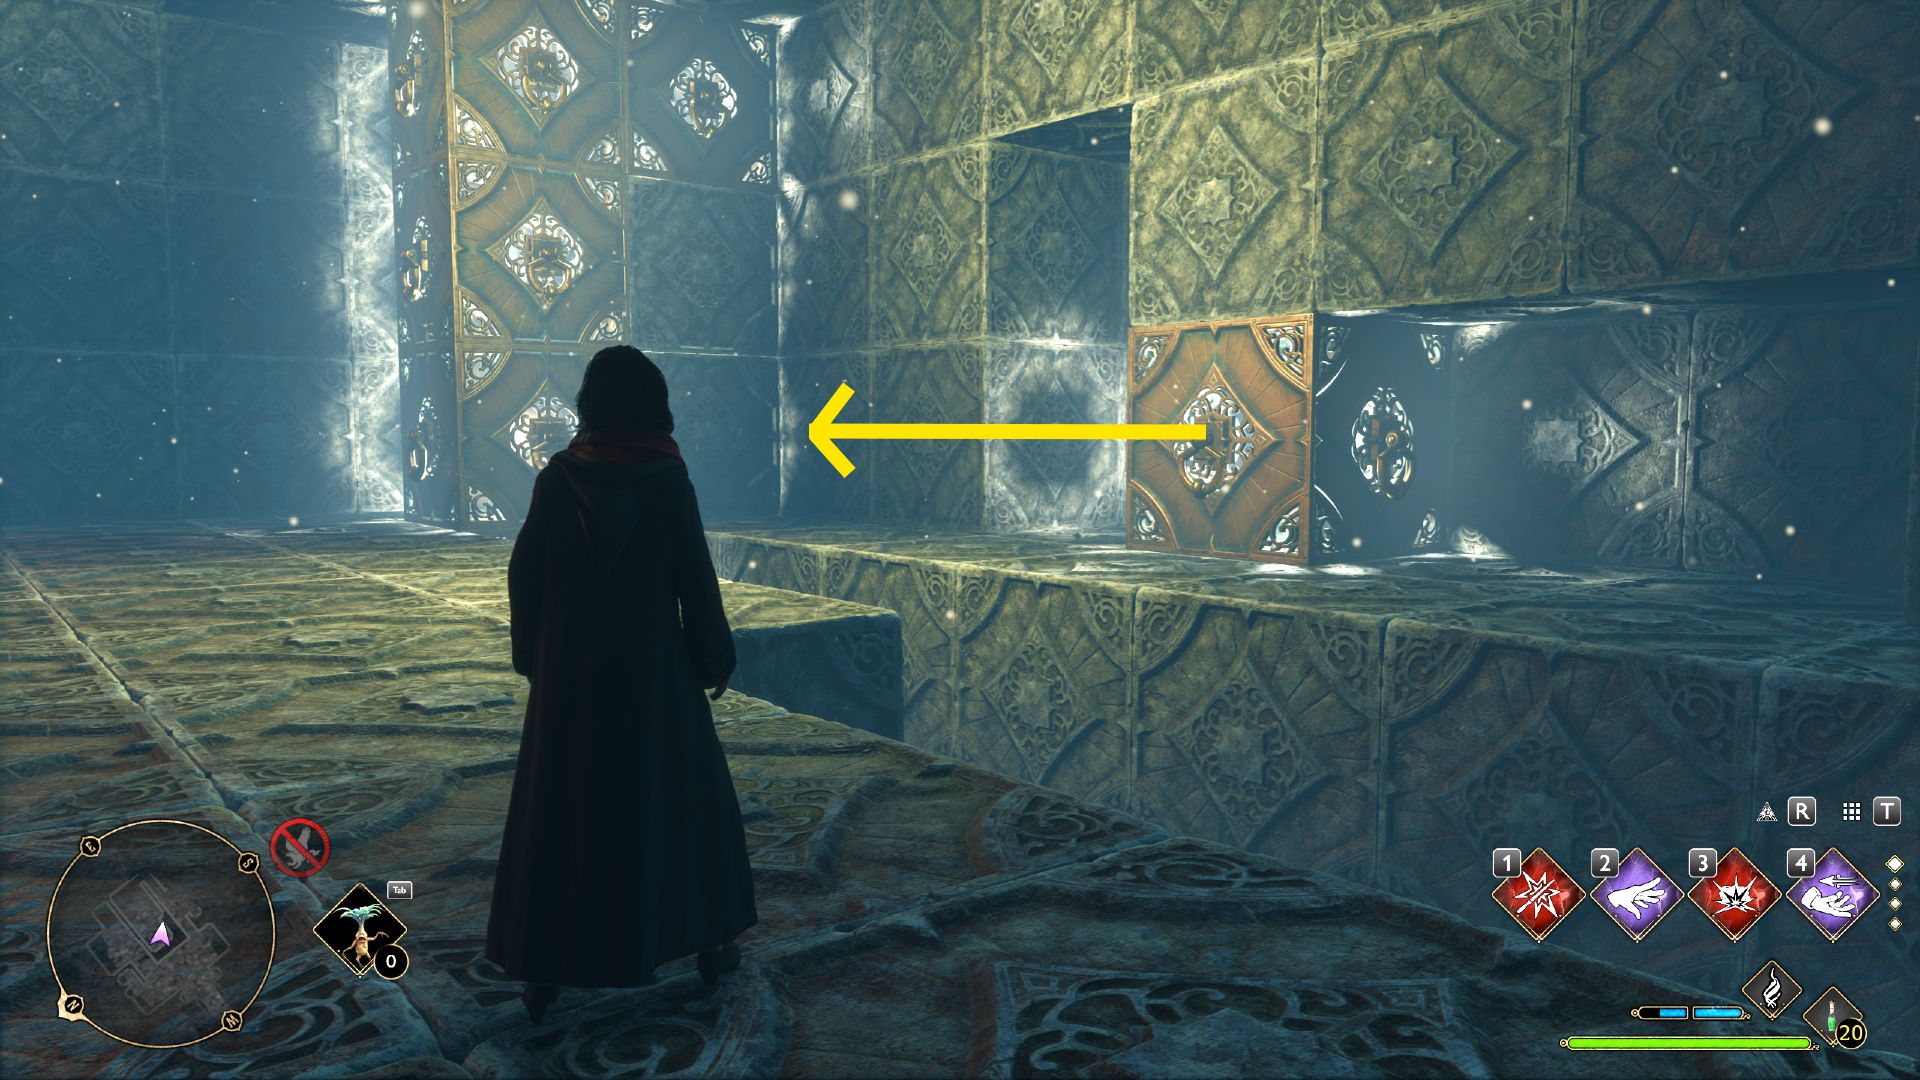
After you snap up the first chest of drawers , the way will shift and change . Unfortunately , you could’tget one ofHogwarts Legacy’sbroomsticksto fly across to the issue . alternatively , you will need to move more cube .
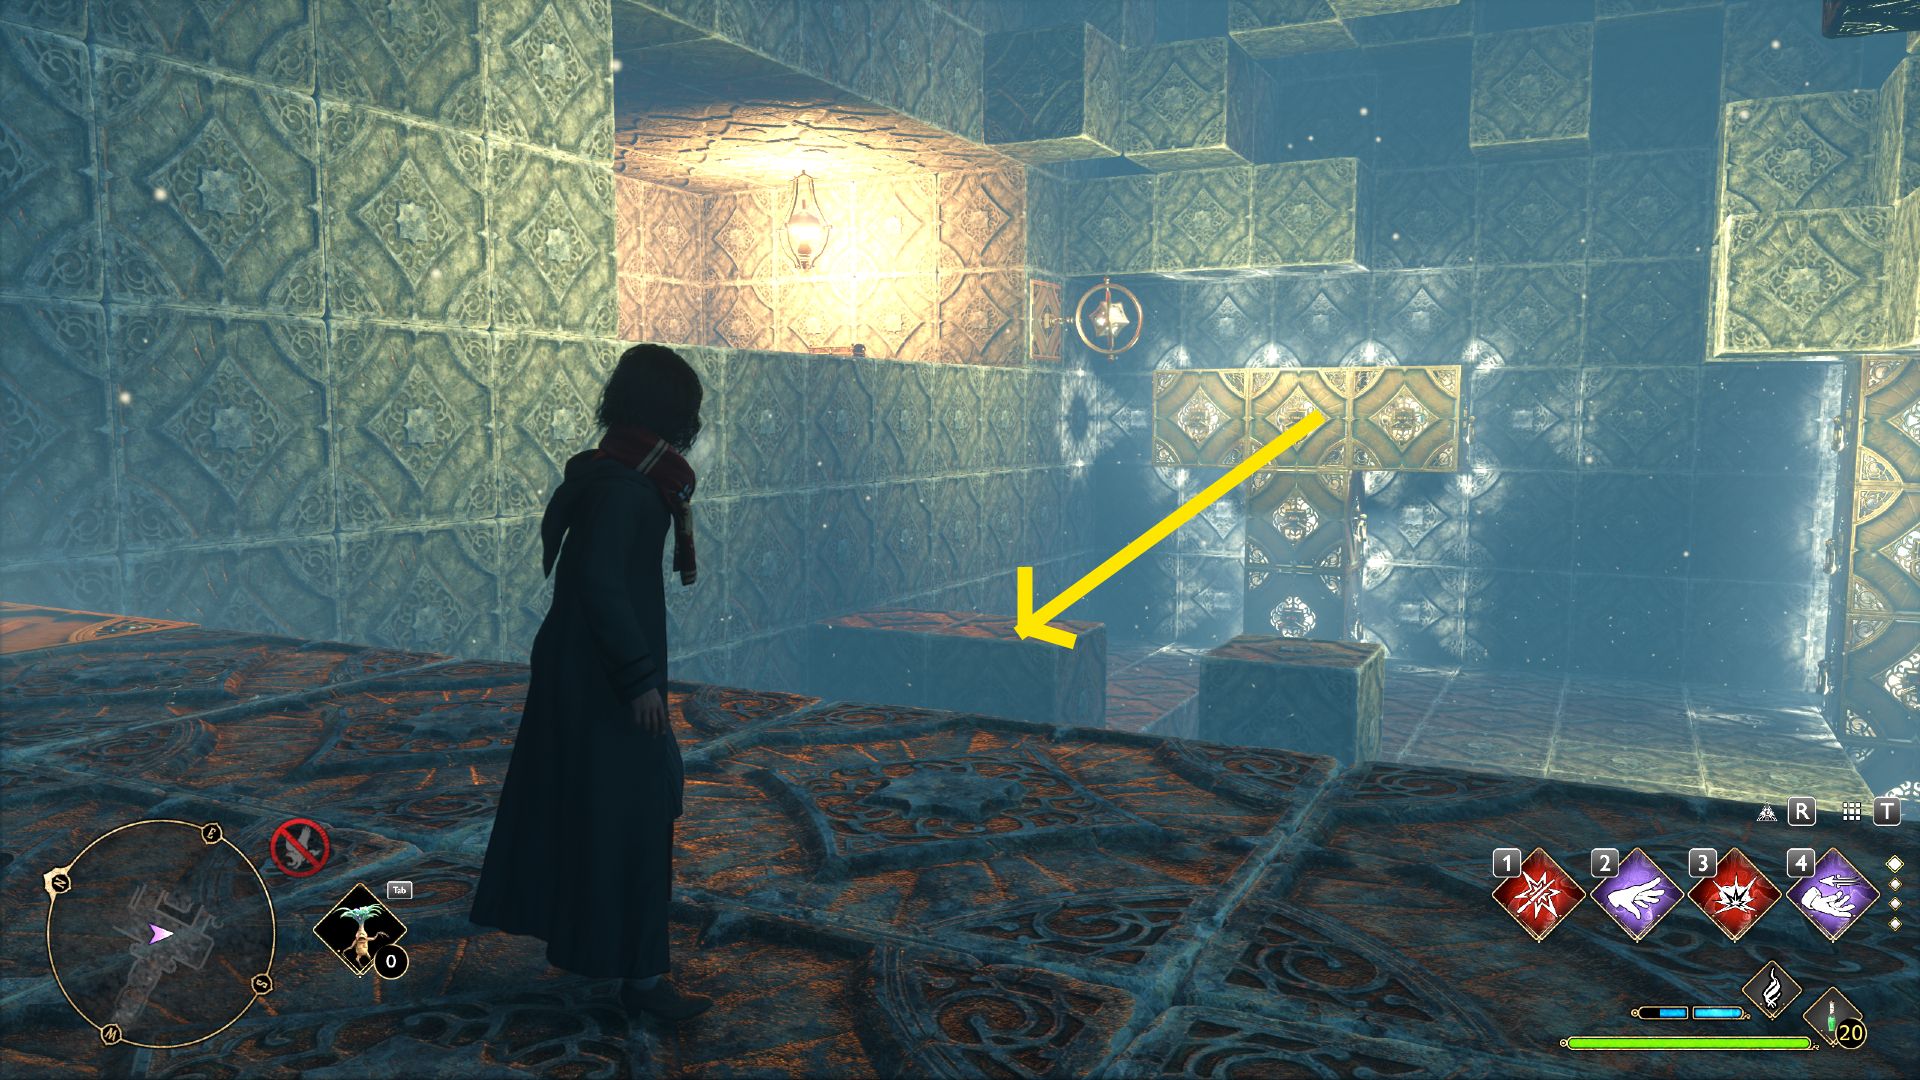
guide back to the entranceway and use Accio to draw the T - shaped stack of block toward yourself .
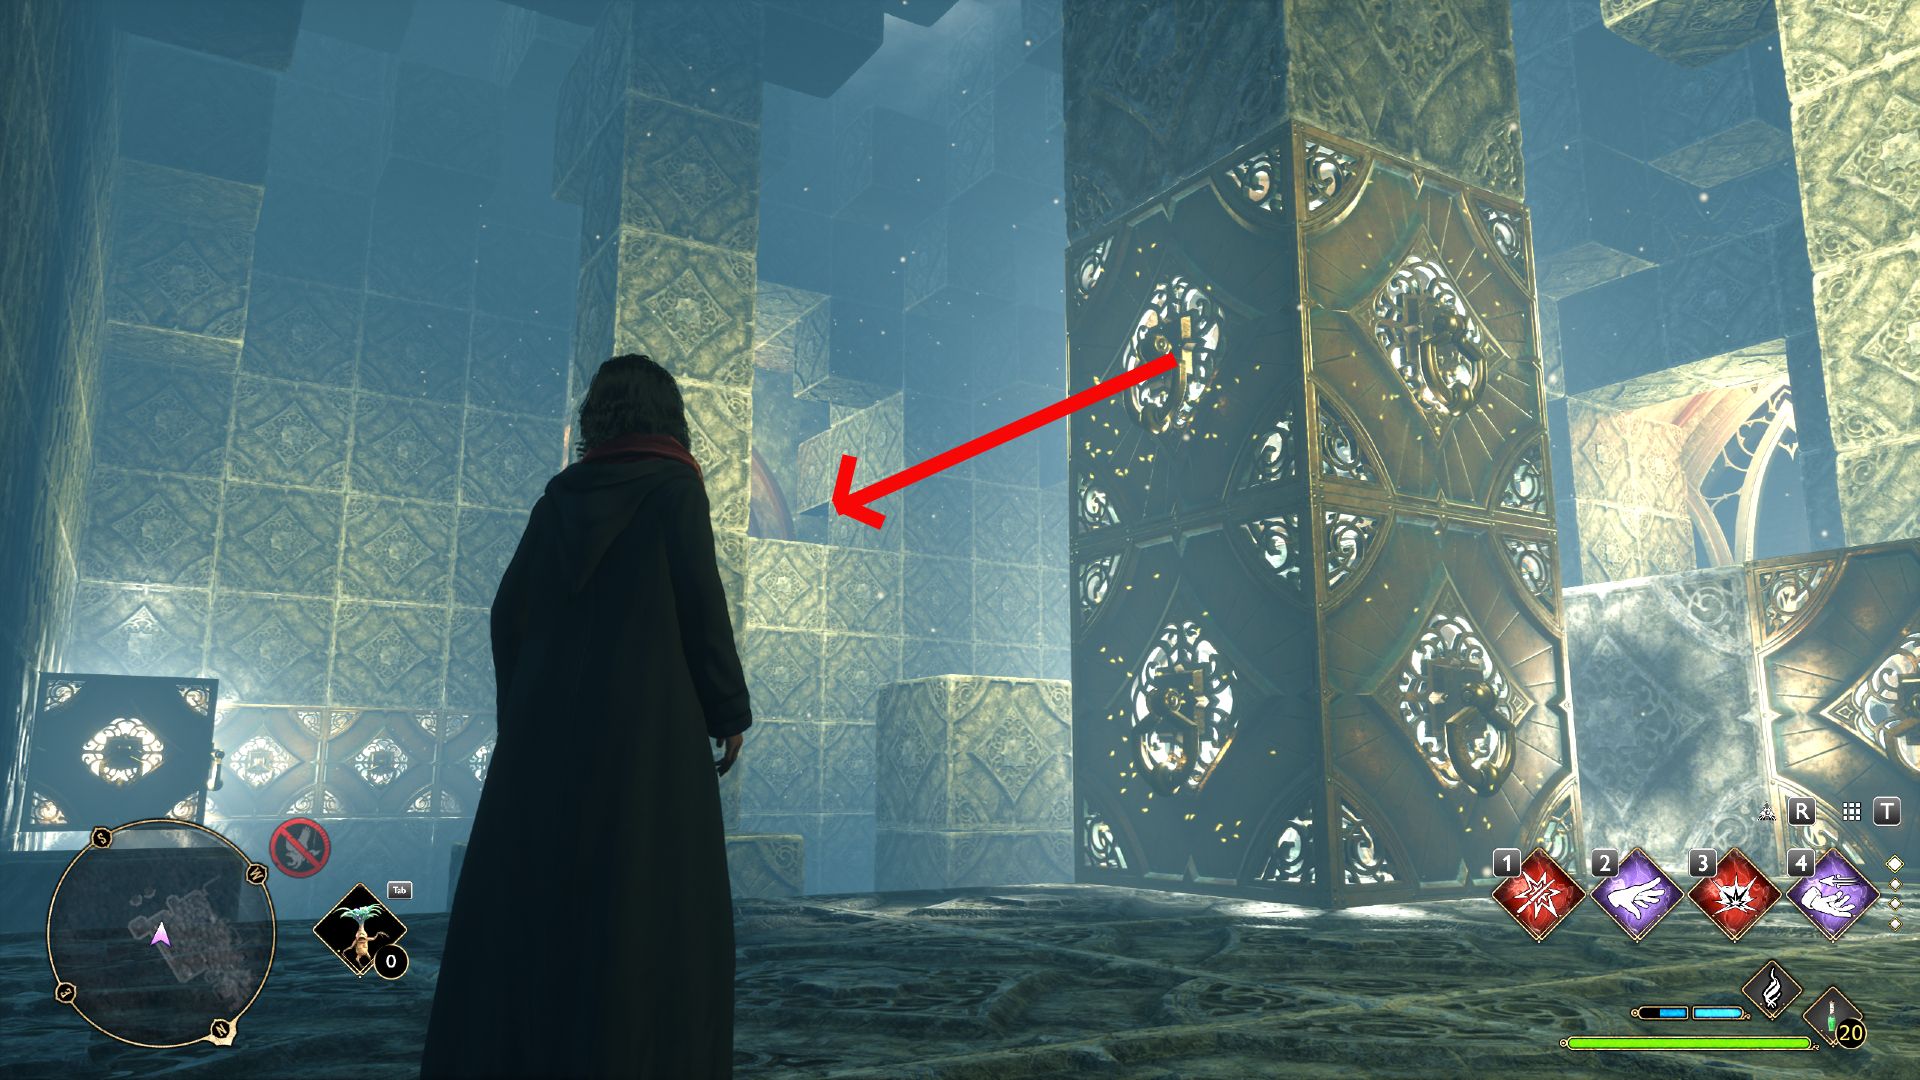
Drop down . There will be two block here . Use Accio on the bottom block to pull out it towards the back wall .
expend Accio on the top block to move it to the right .
employ Accio on the same block to displume it toward the back wall .
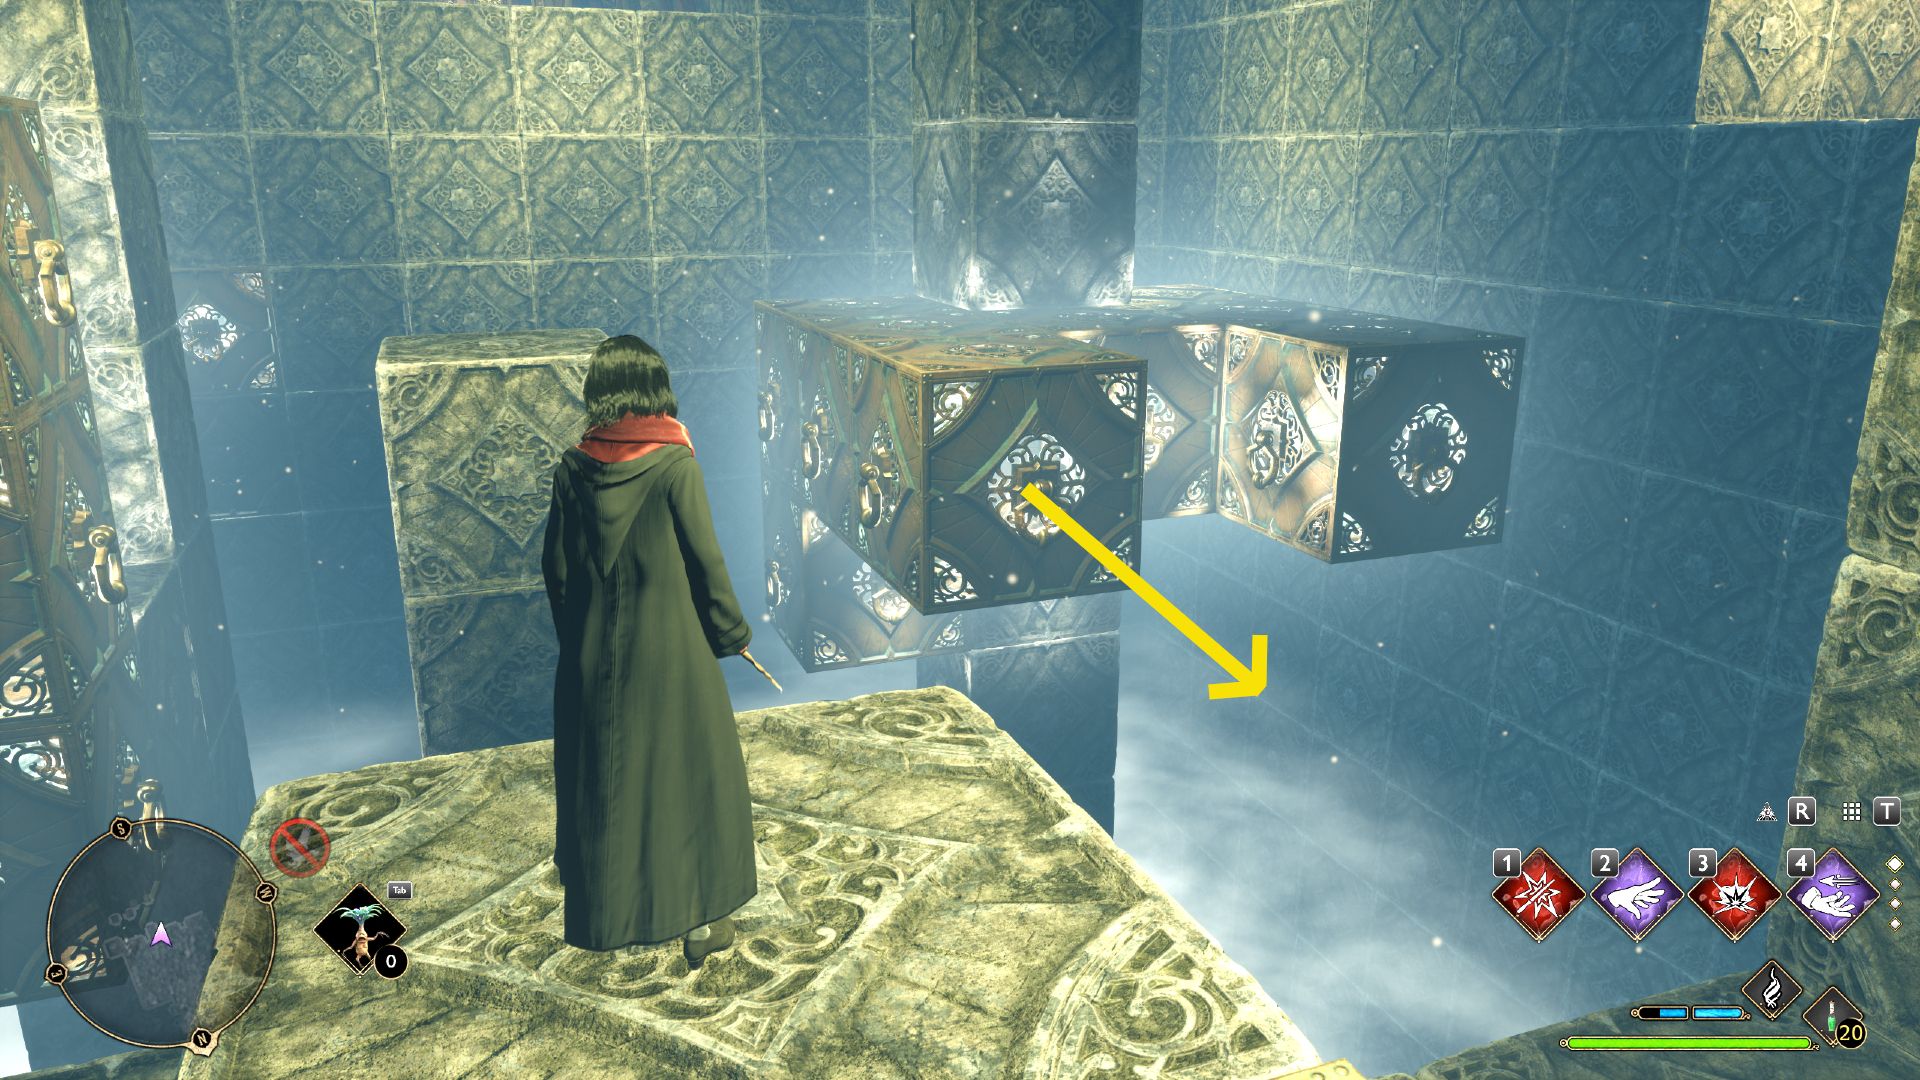
Depulso the two blocks at the back of the room into the corner . This plug into it with the other pulley block .
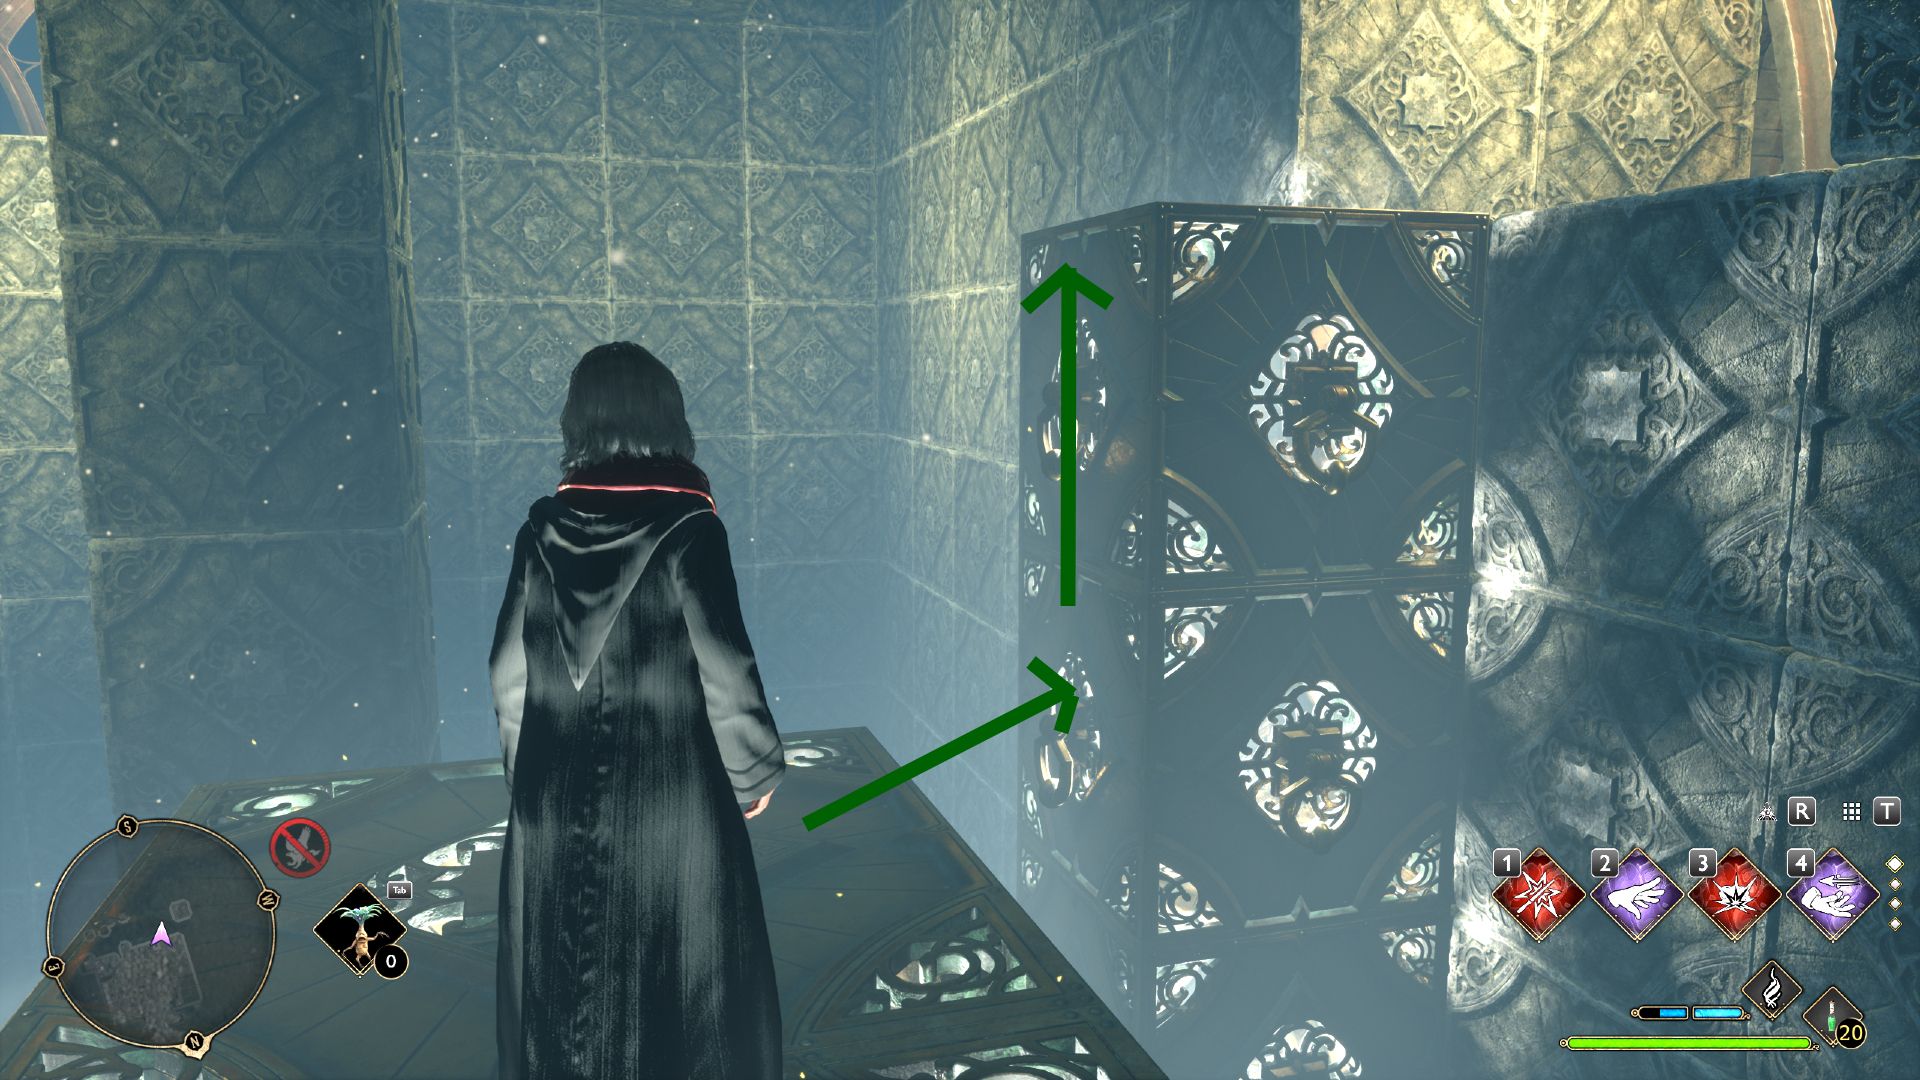
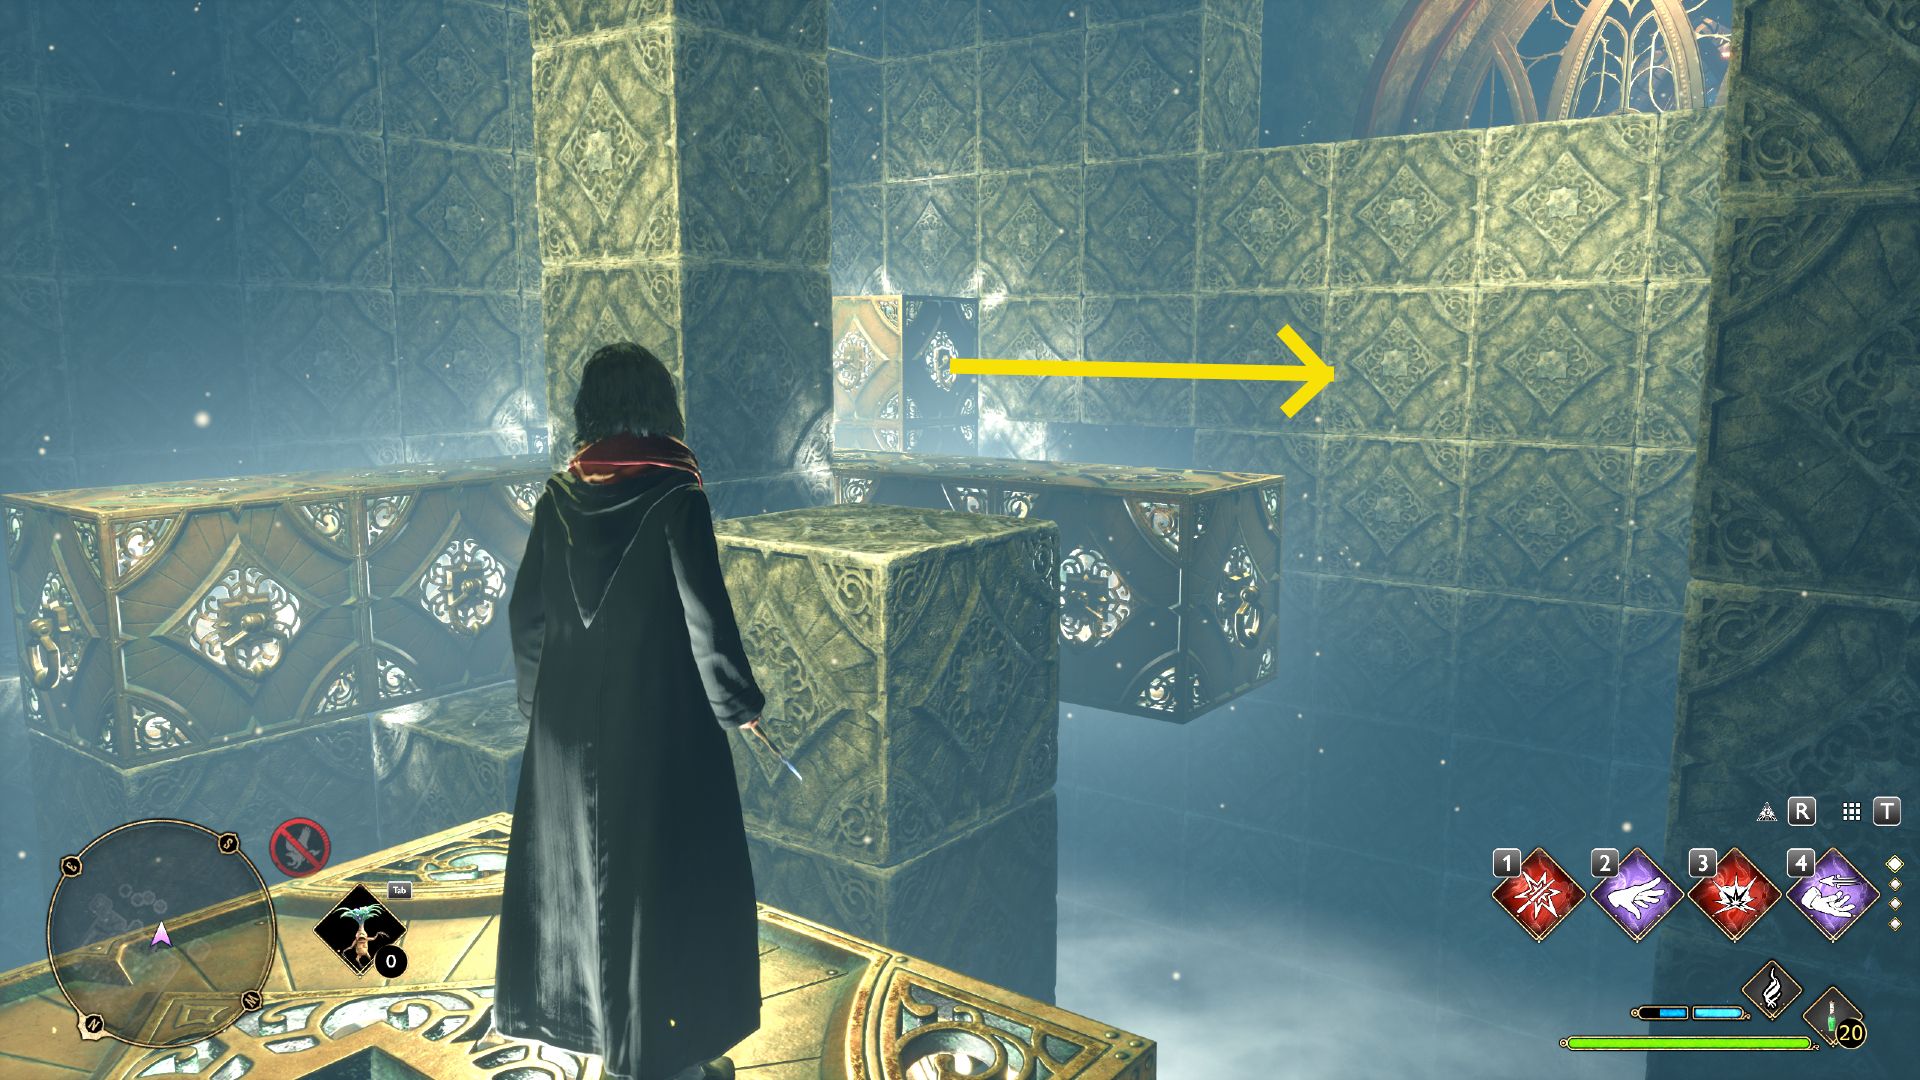
Use Accio on the blocks on the ripe wall to pull them into the heart of the way .
utilize Depulso on the same blocks to push them into the back wall .
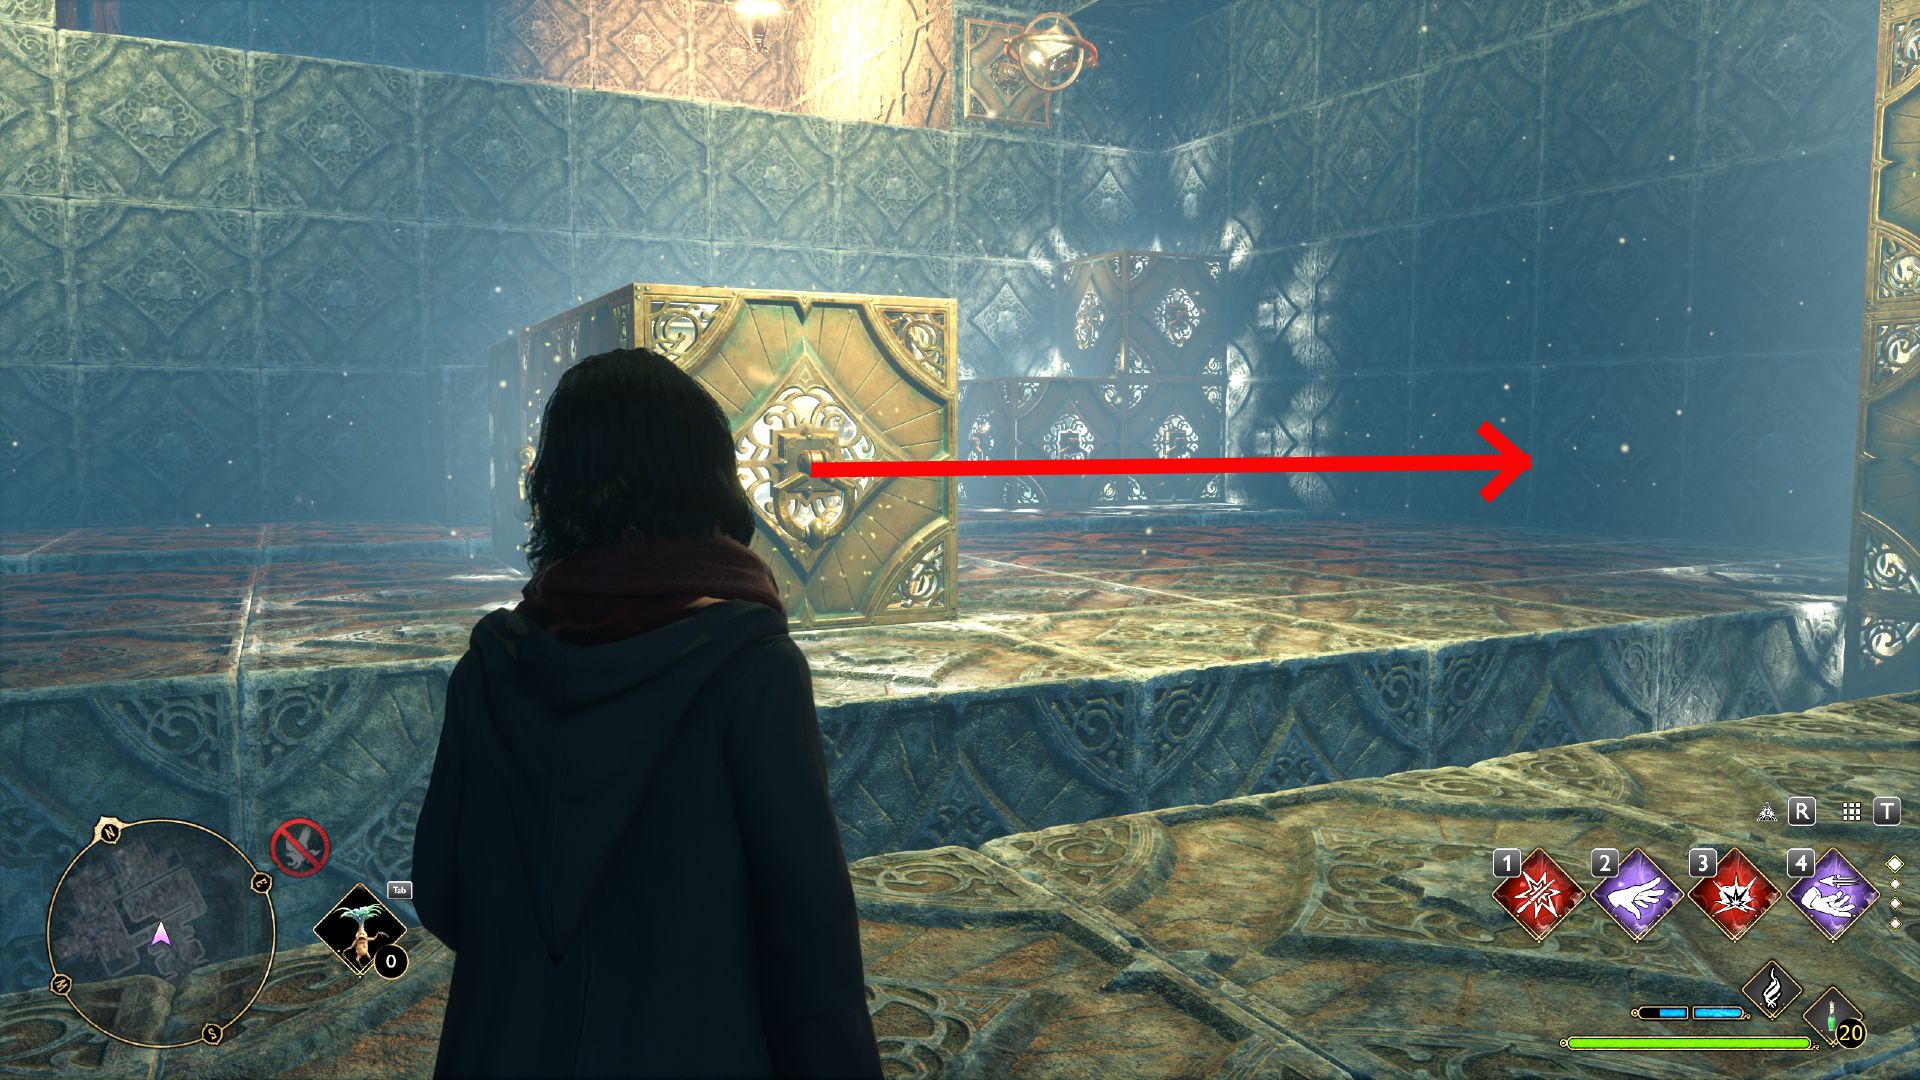
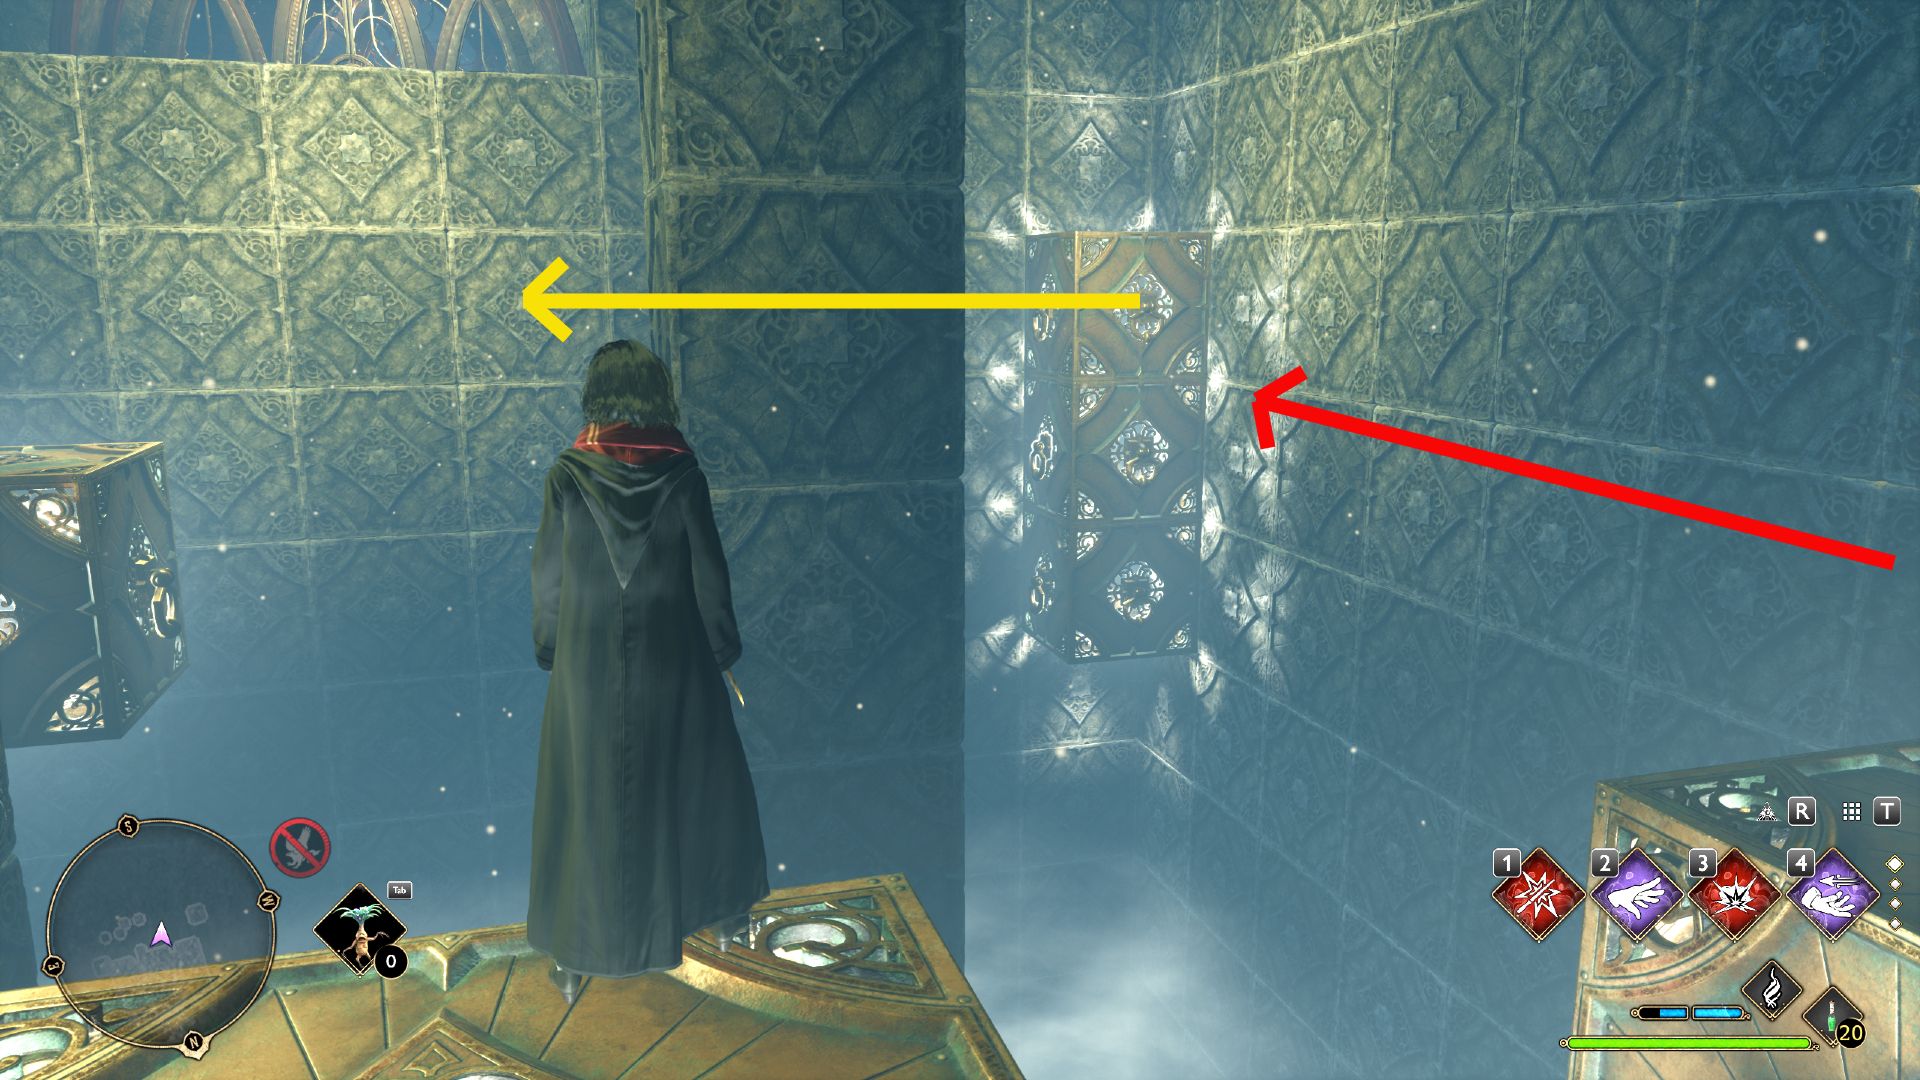
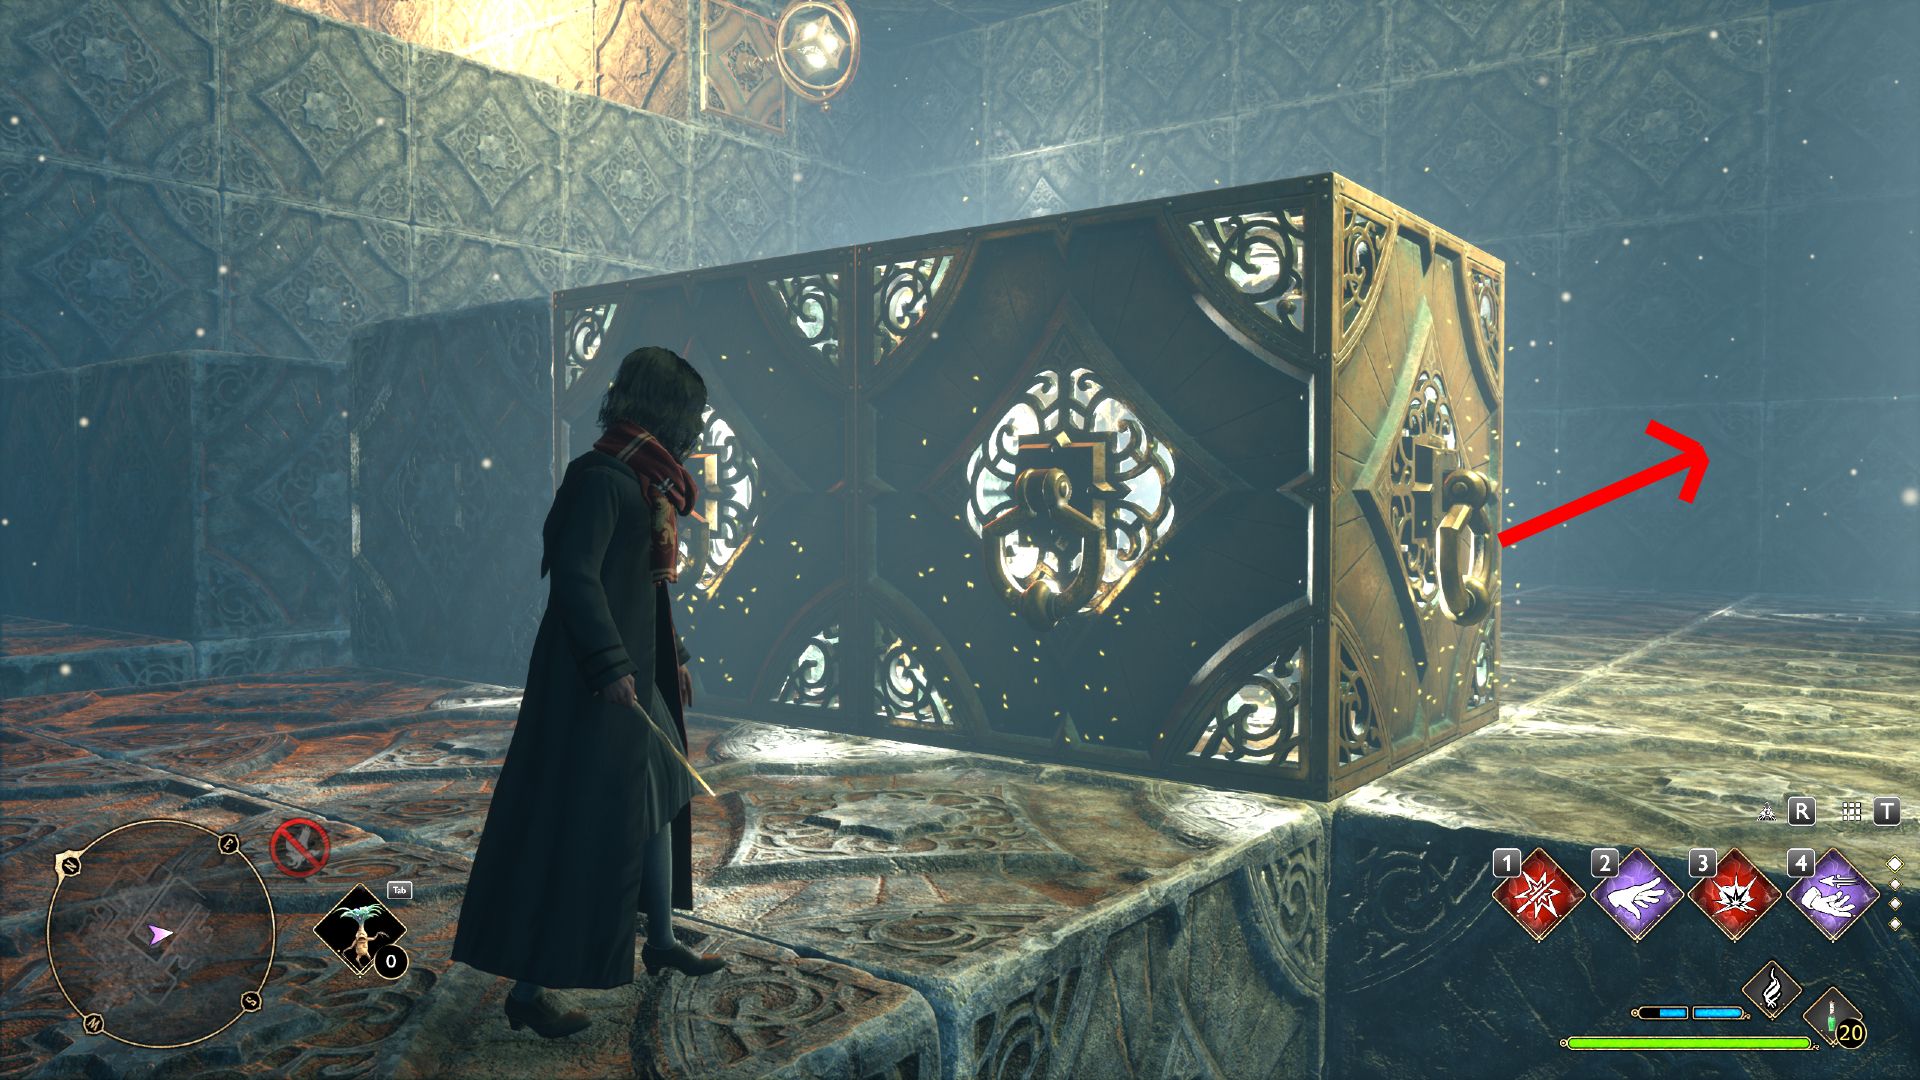
8
expend Depulso on the same engine block to push them into the other block in the turning point .
9
utilize Accio to rend the five blocks toward the ingress .
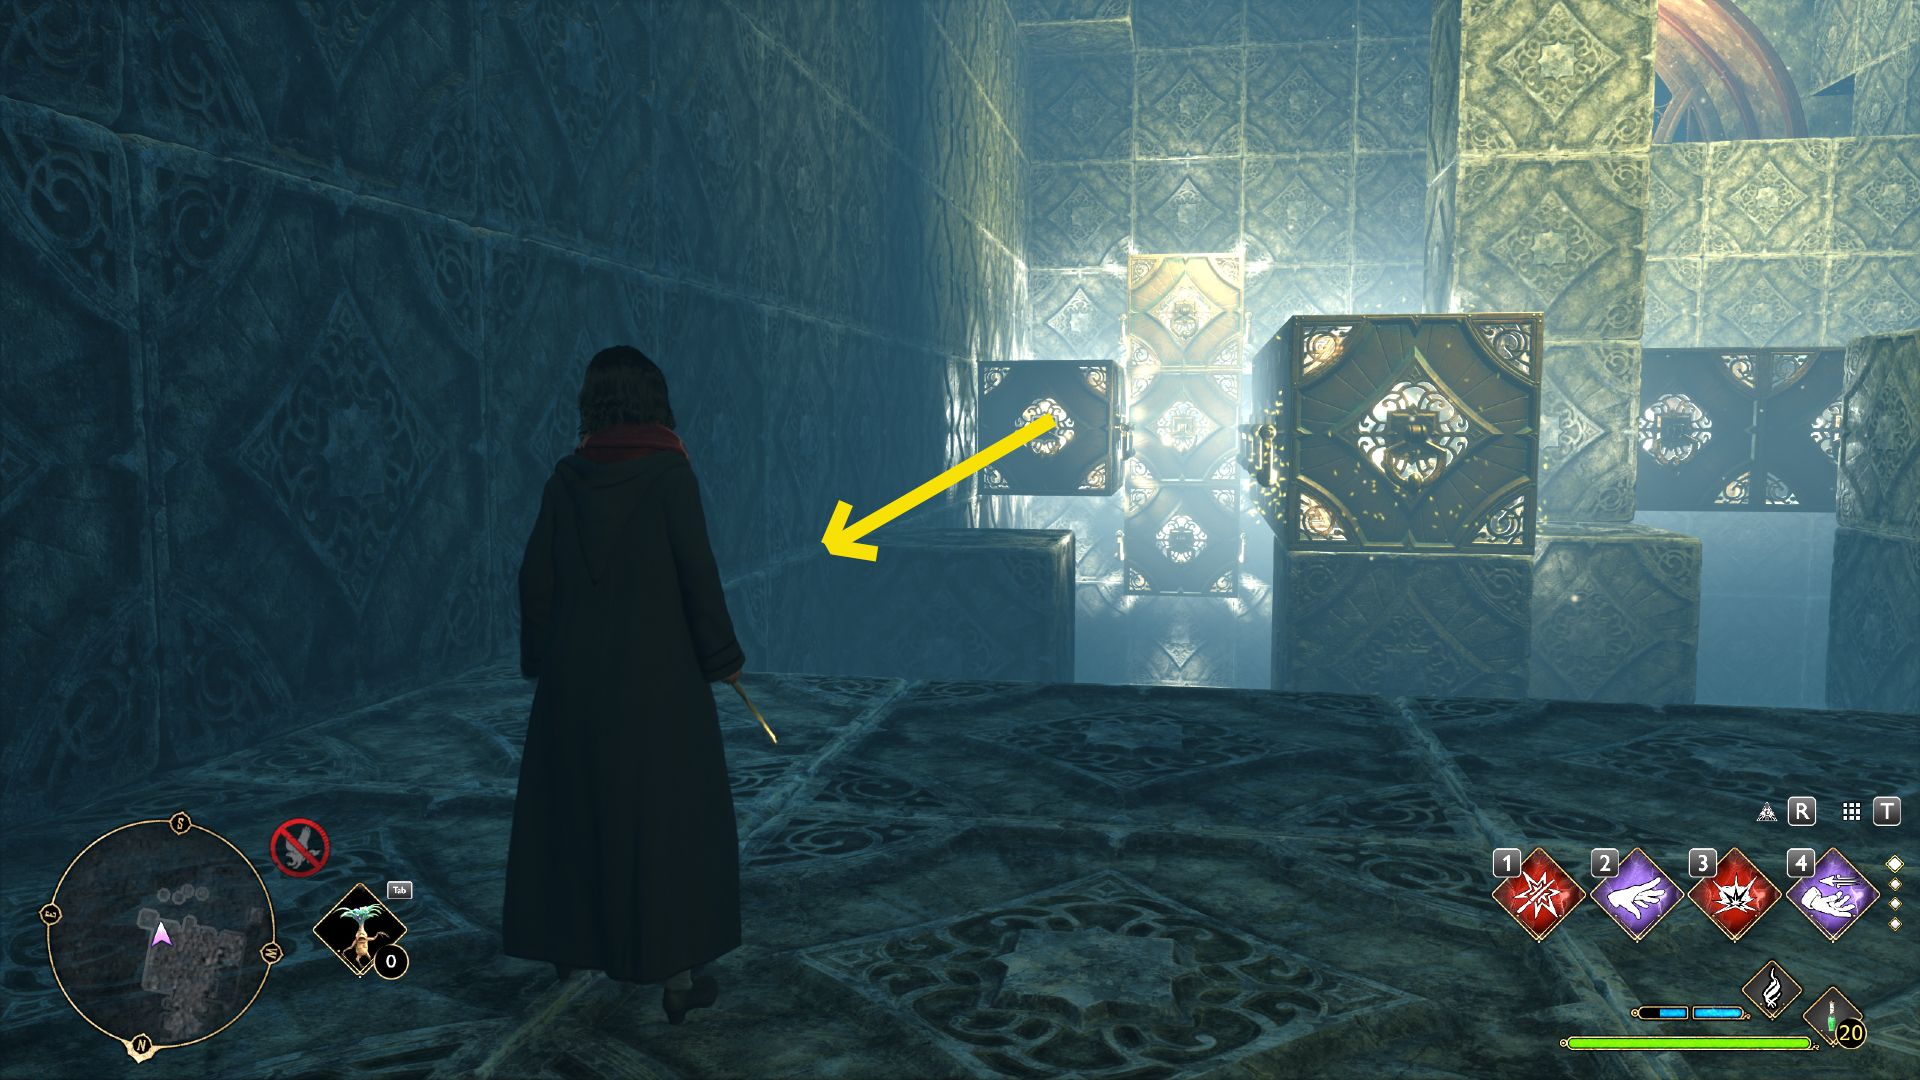
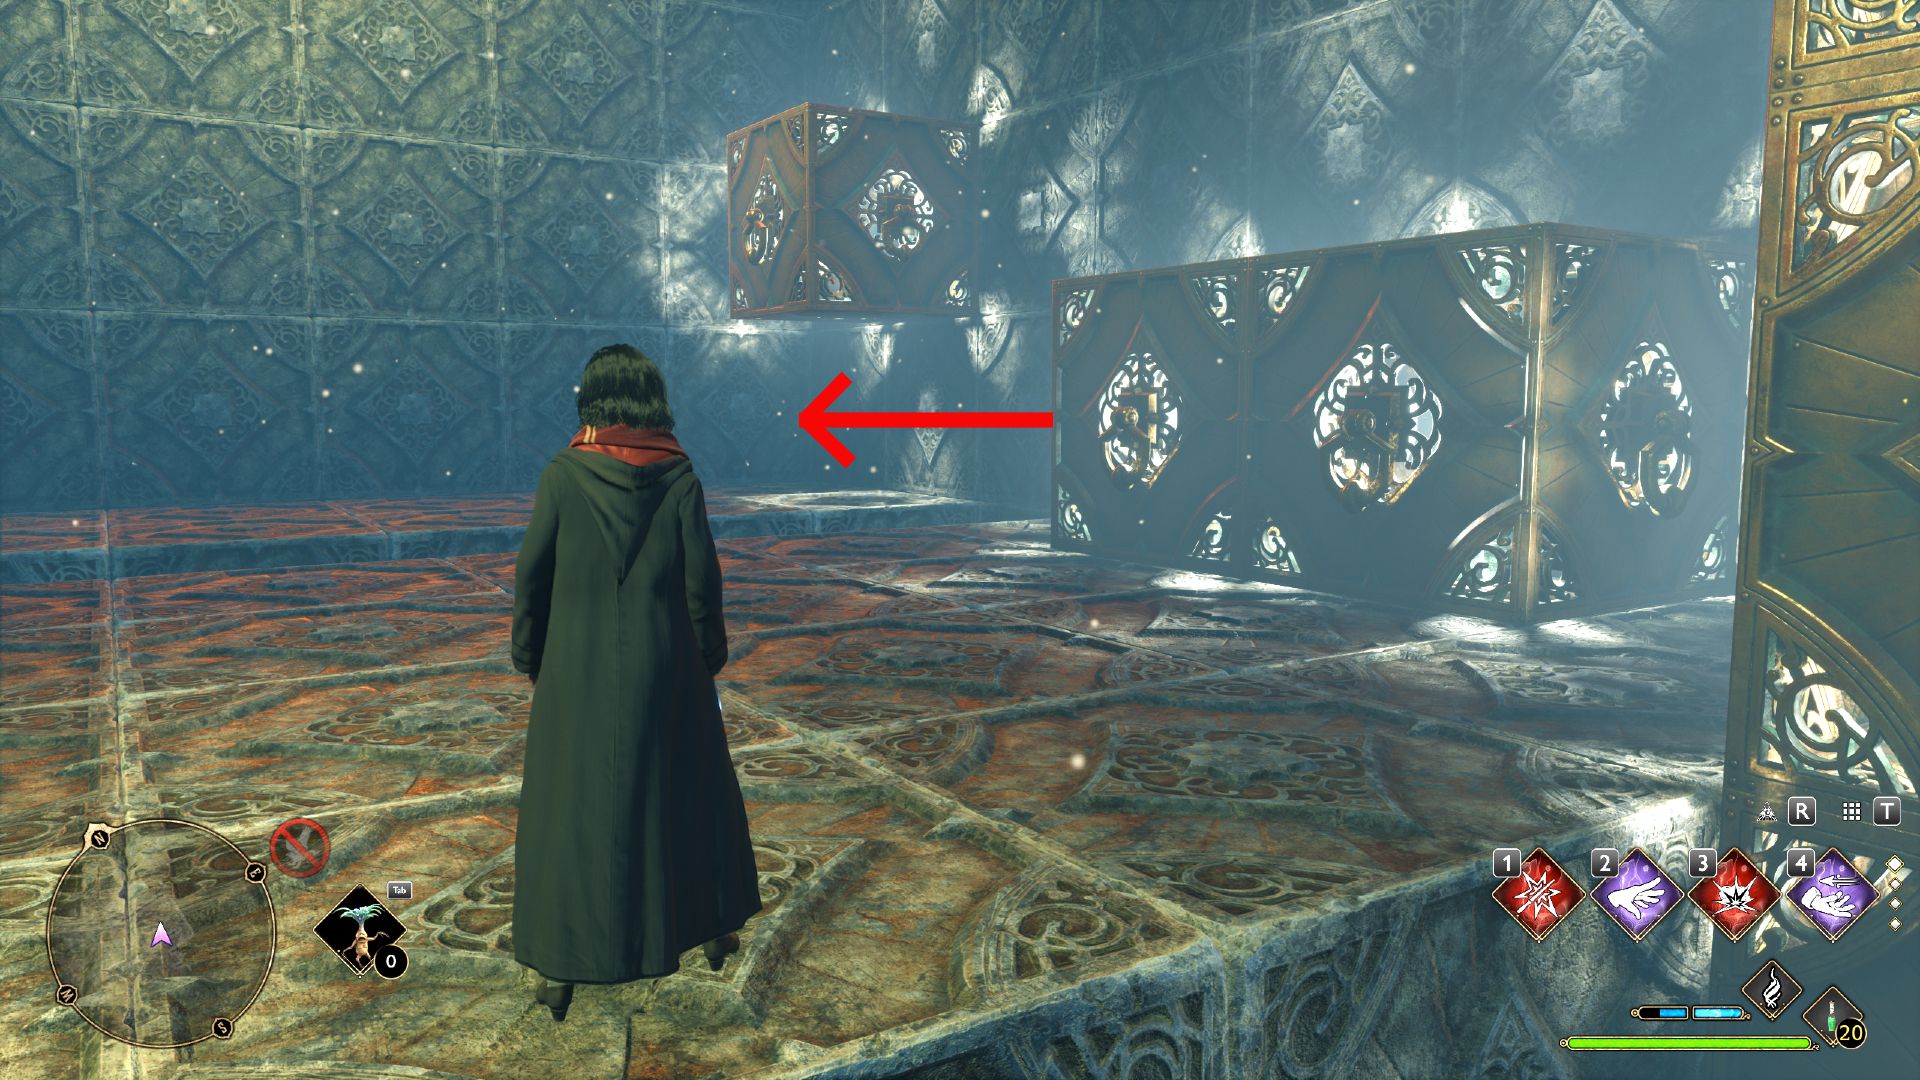
10
Use Accio to attract the five pulley toward the right rampart .
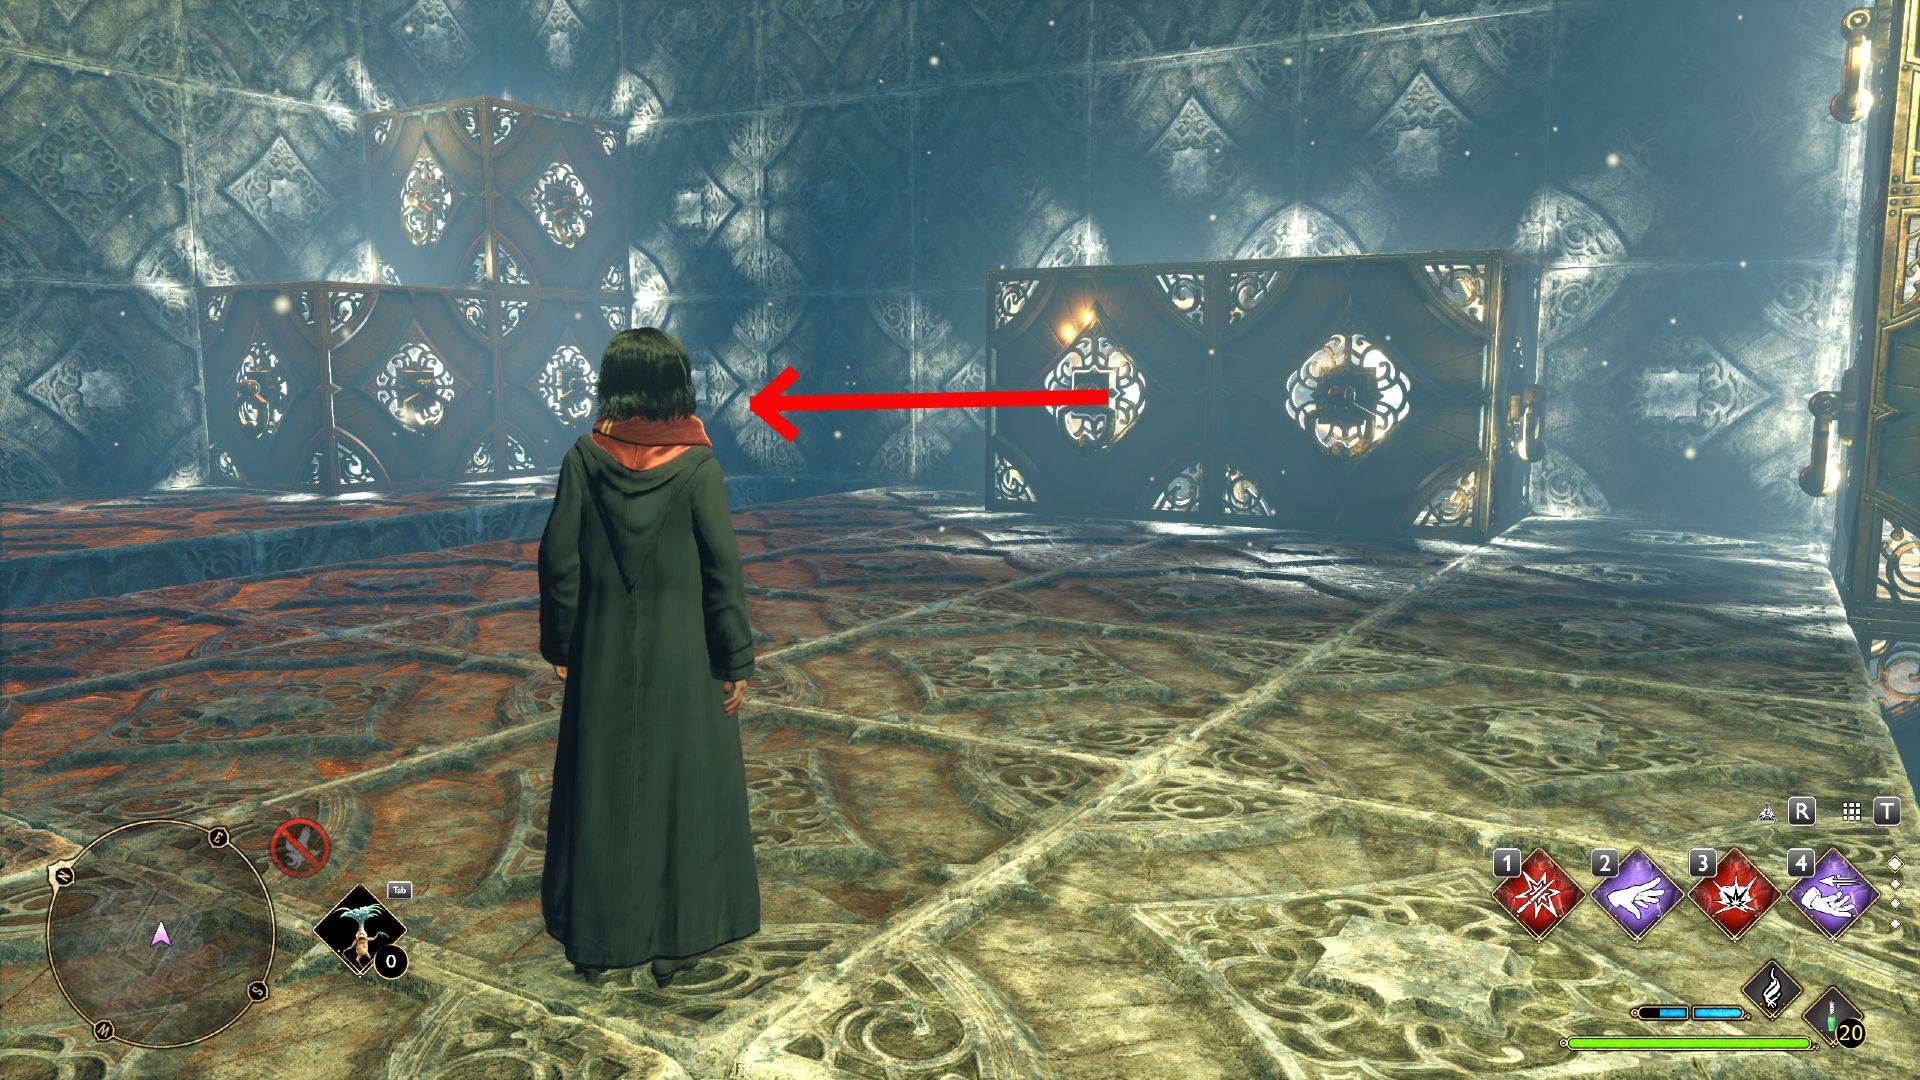
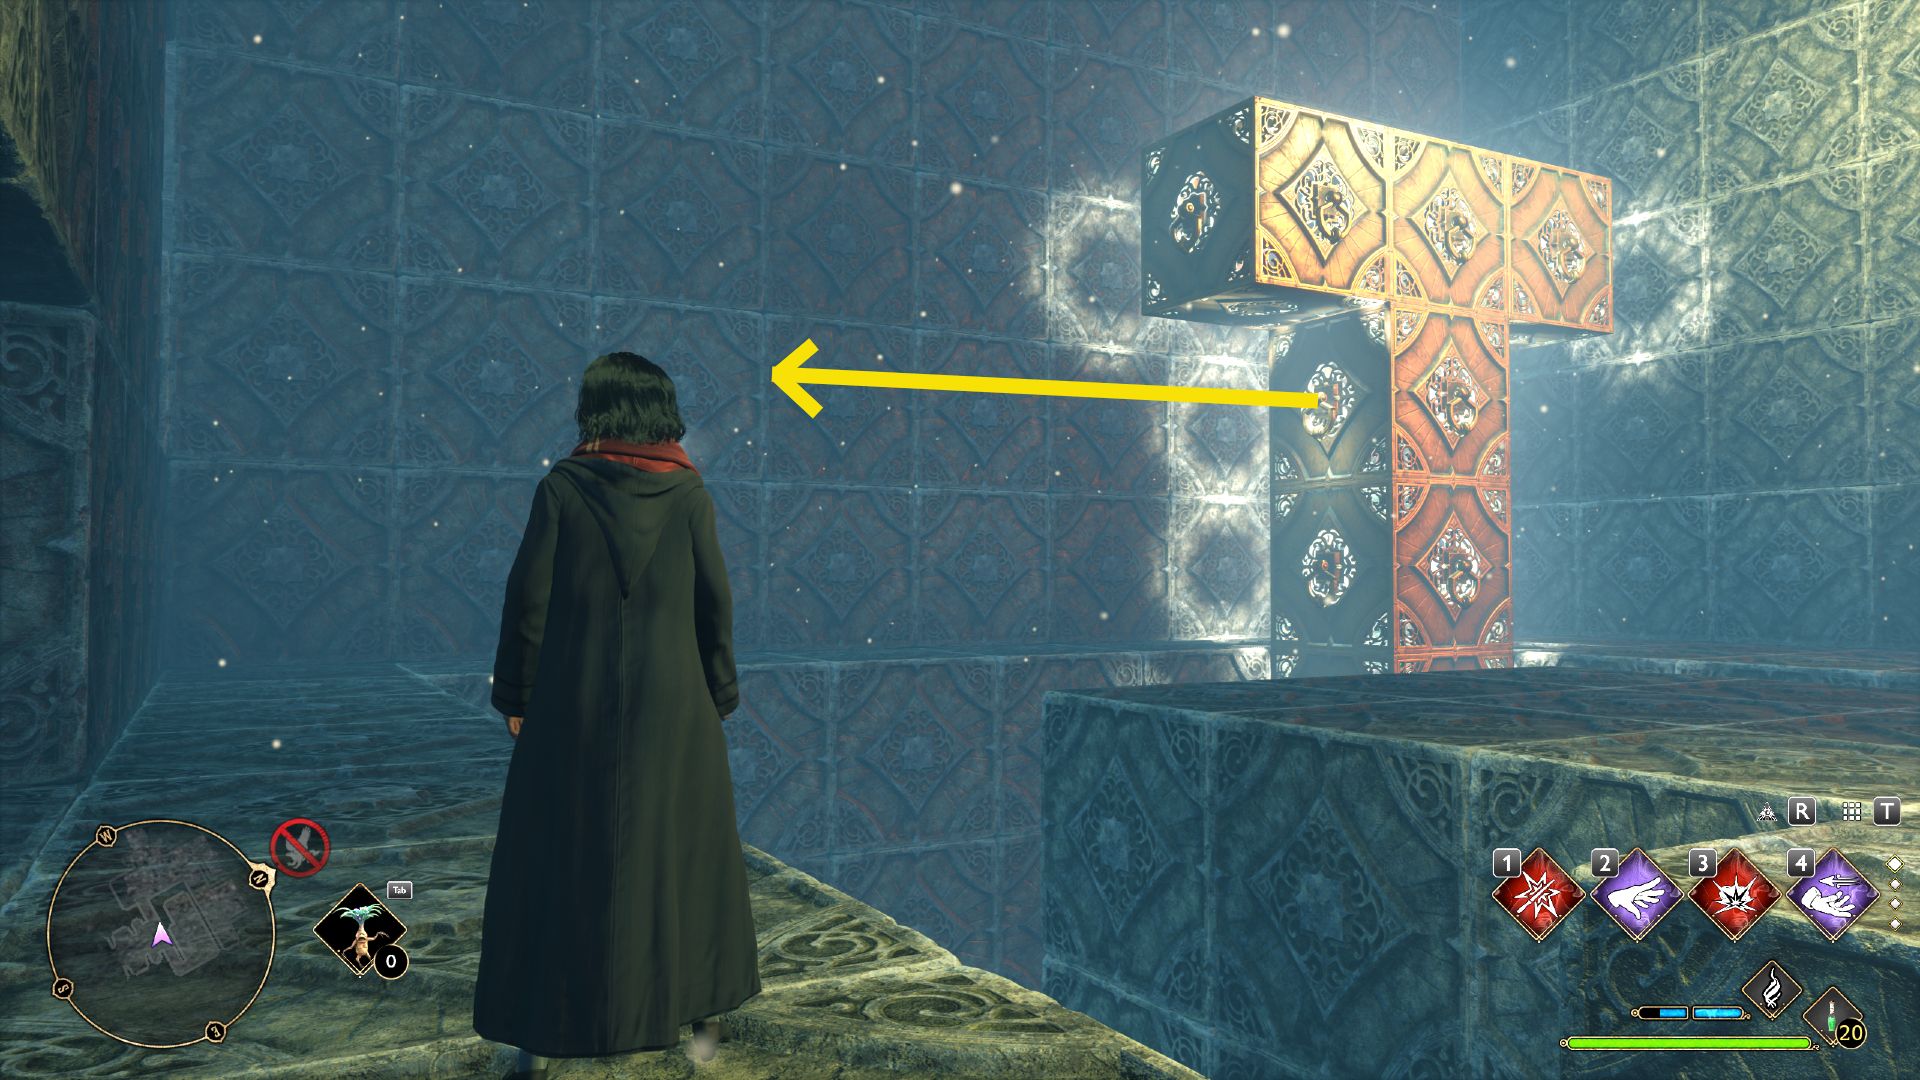
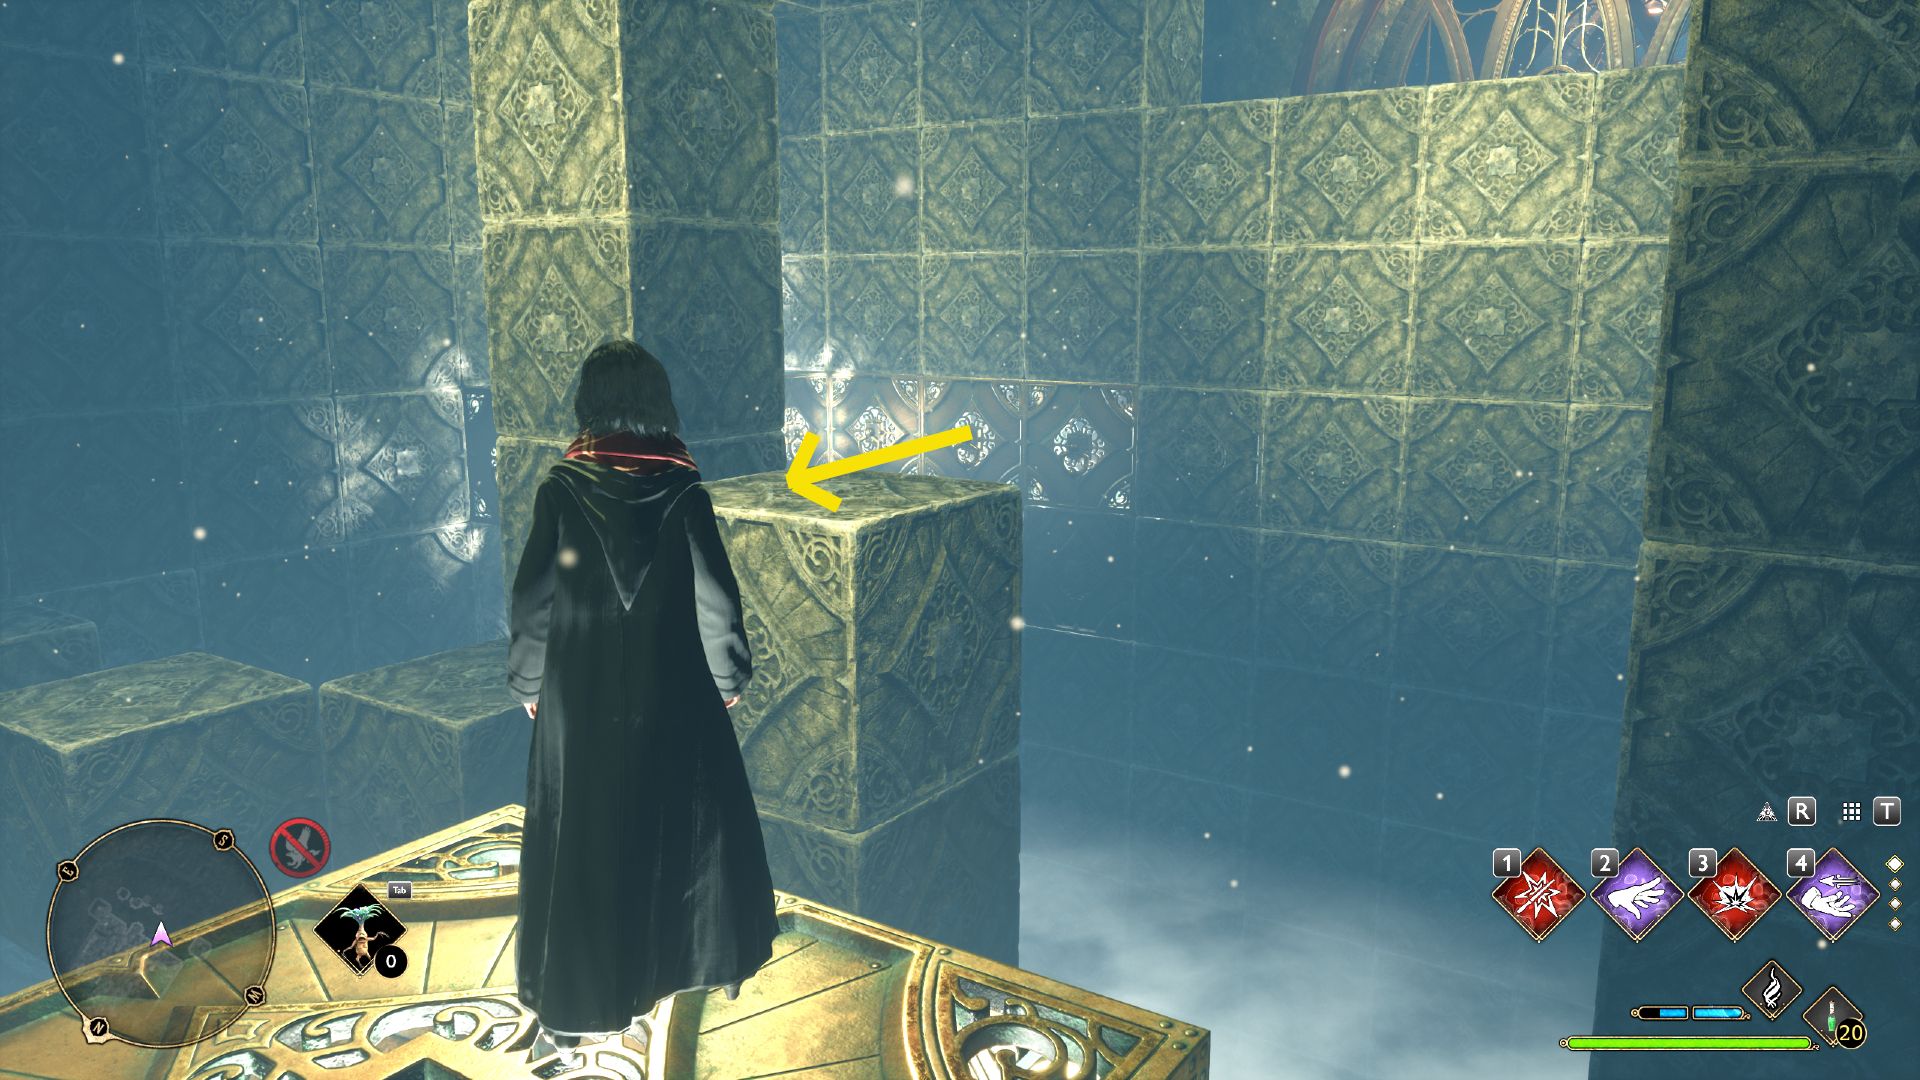
11
Use Accio on the T - shaped stack of blocks to pull it to the left .
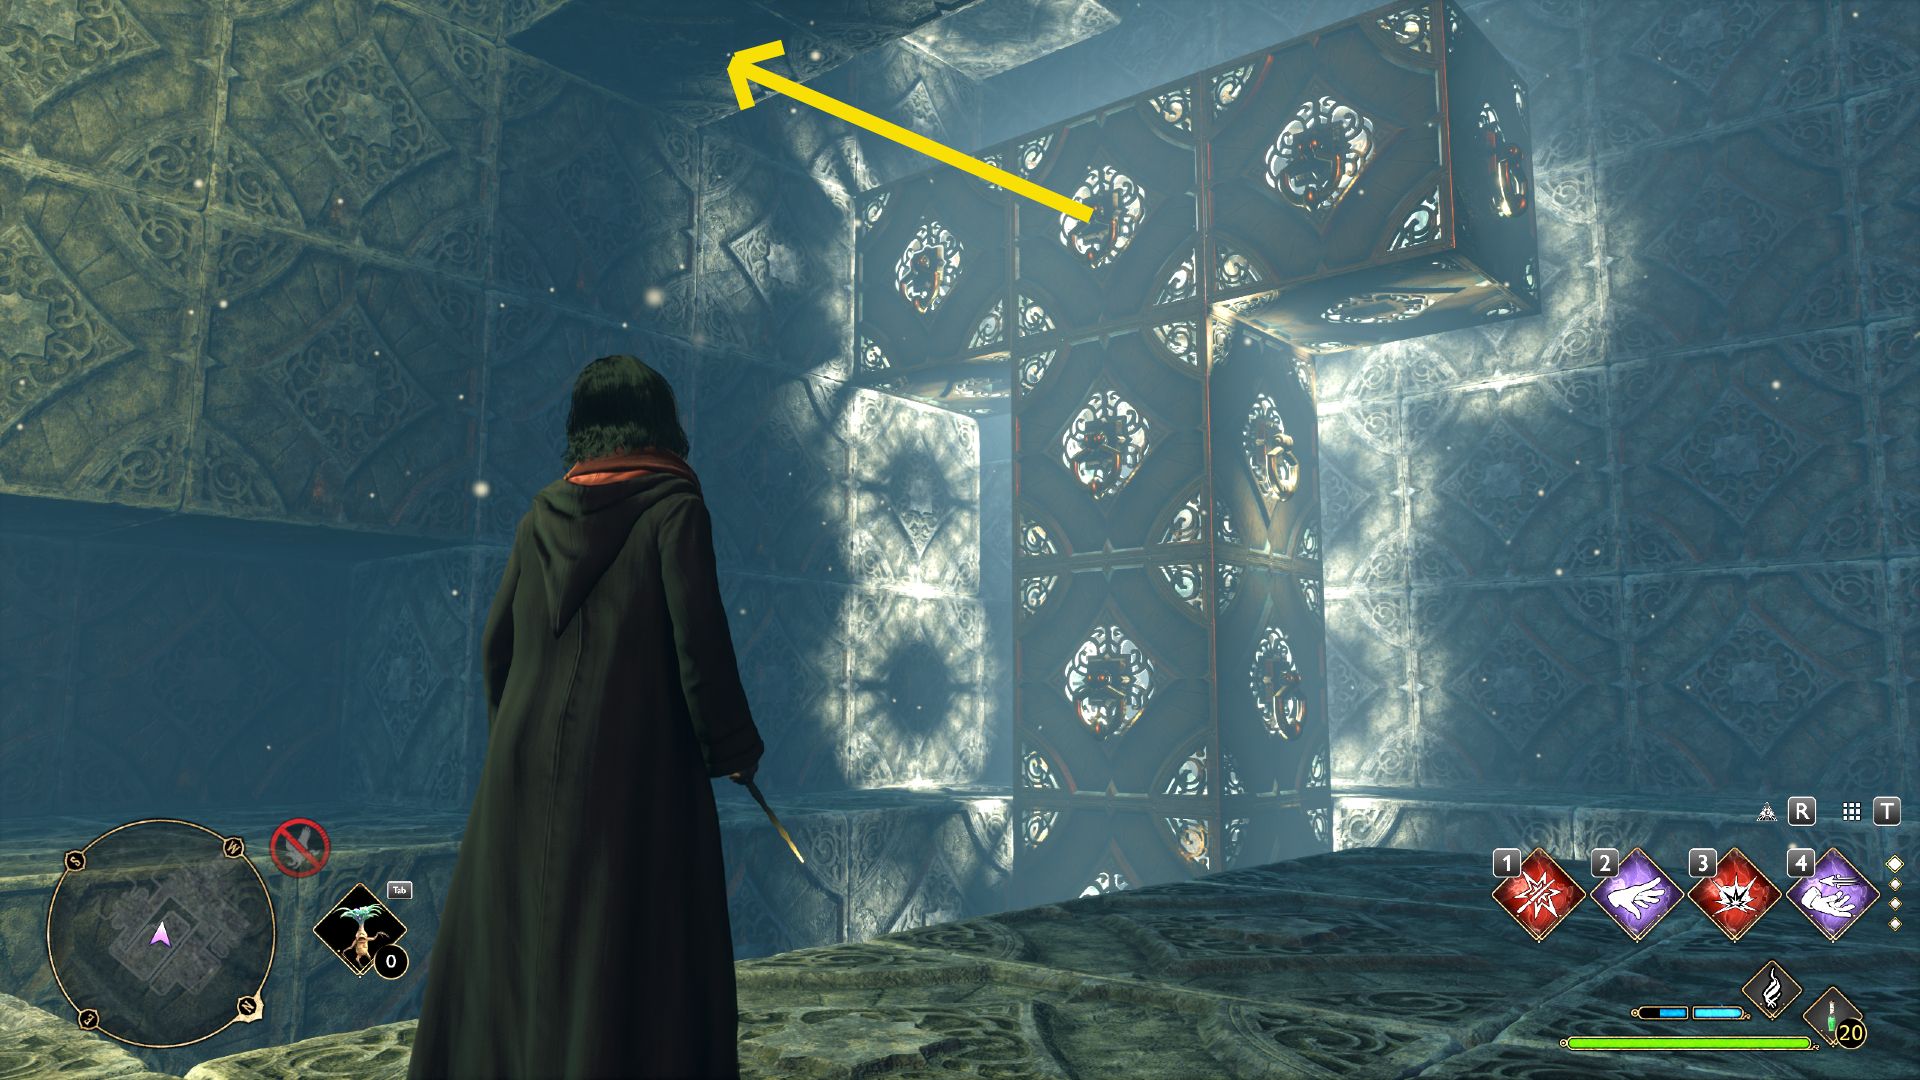
12
Use Accio on the T - shaped stack of closure to rend it towards you . This forms a openhanded social structure of block .
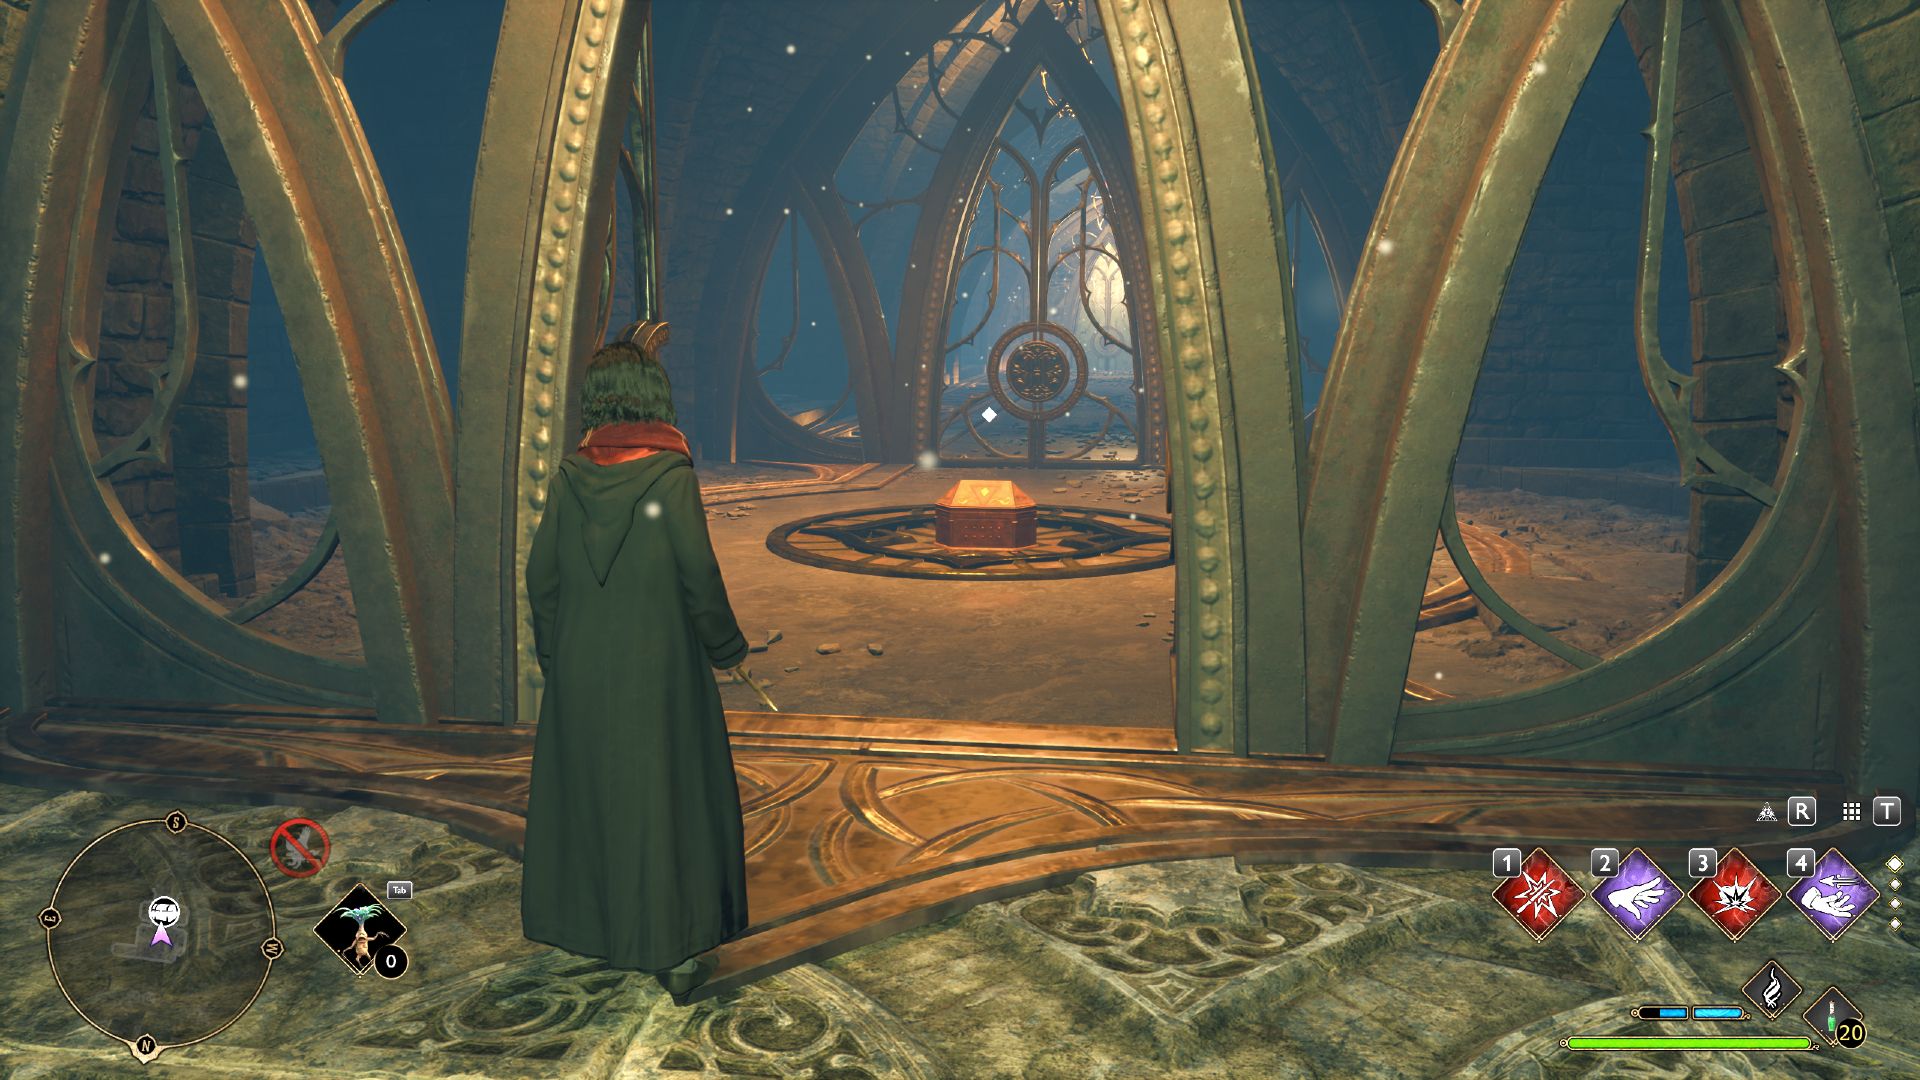
13
Climb up the blocks to reach the expiration .
How To Complete The Second Set Of Puzzles In Depulso Puzzle Room 2
You have to do some platforming to get all three chests and accomplish the release in the second part of Depulso Puzzle Room 2 . However , this can be a little trickier than some ofHogwarts Legacy’splatforming Merlin Trials , so you should always do a running jump .
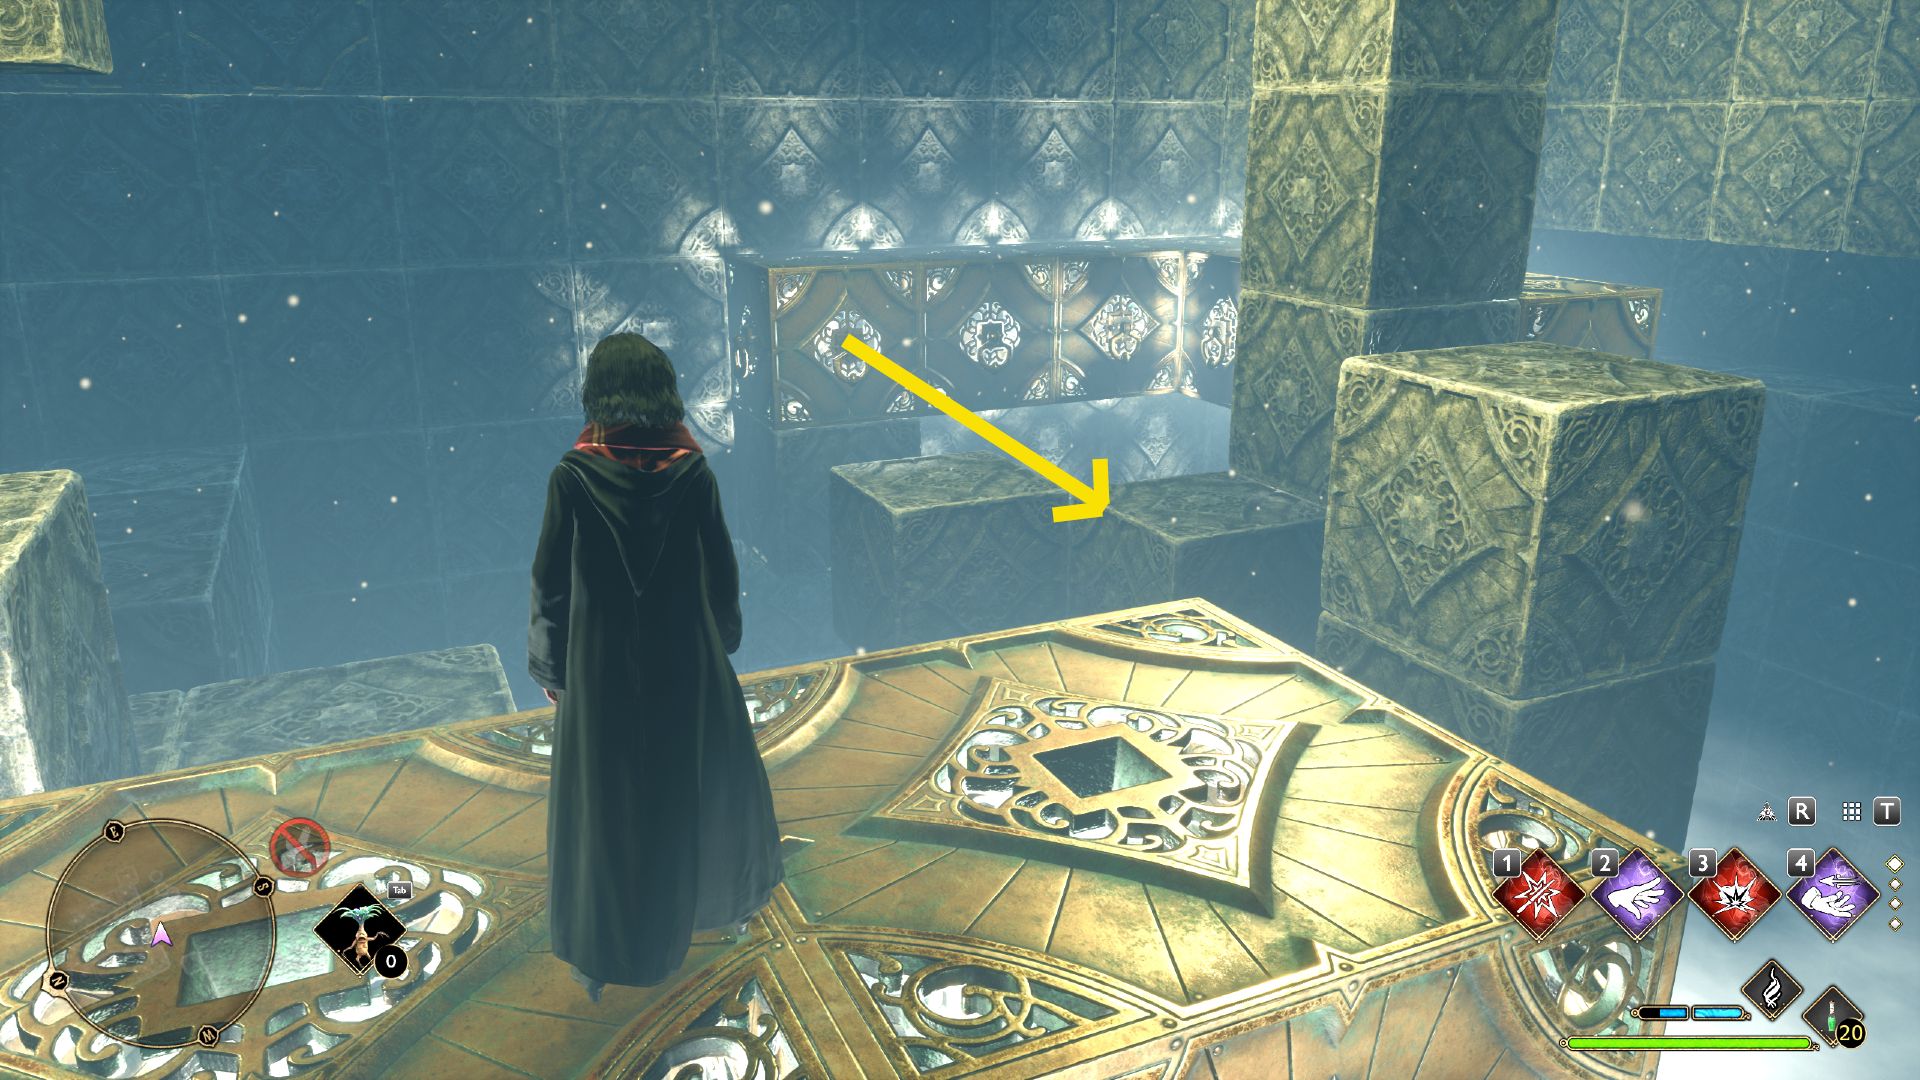
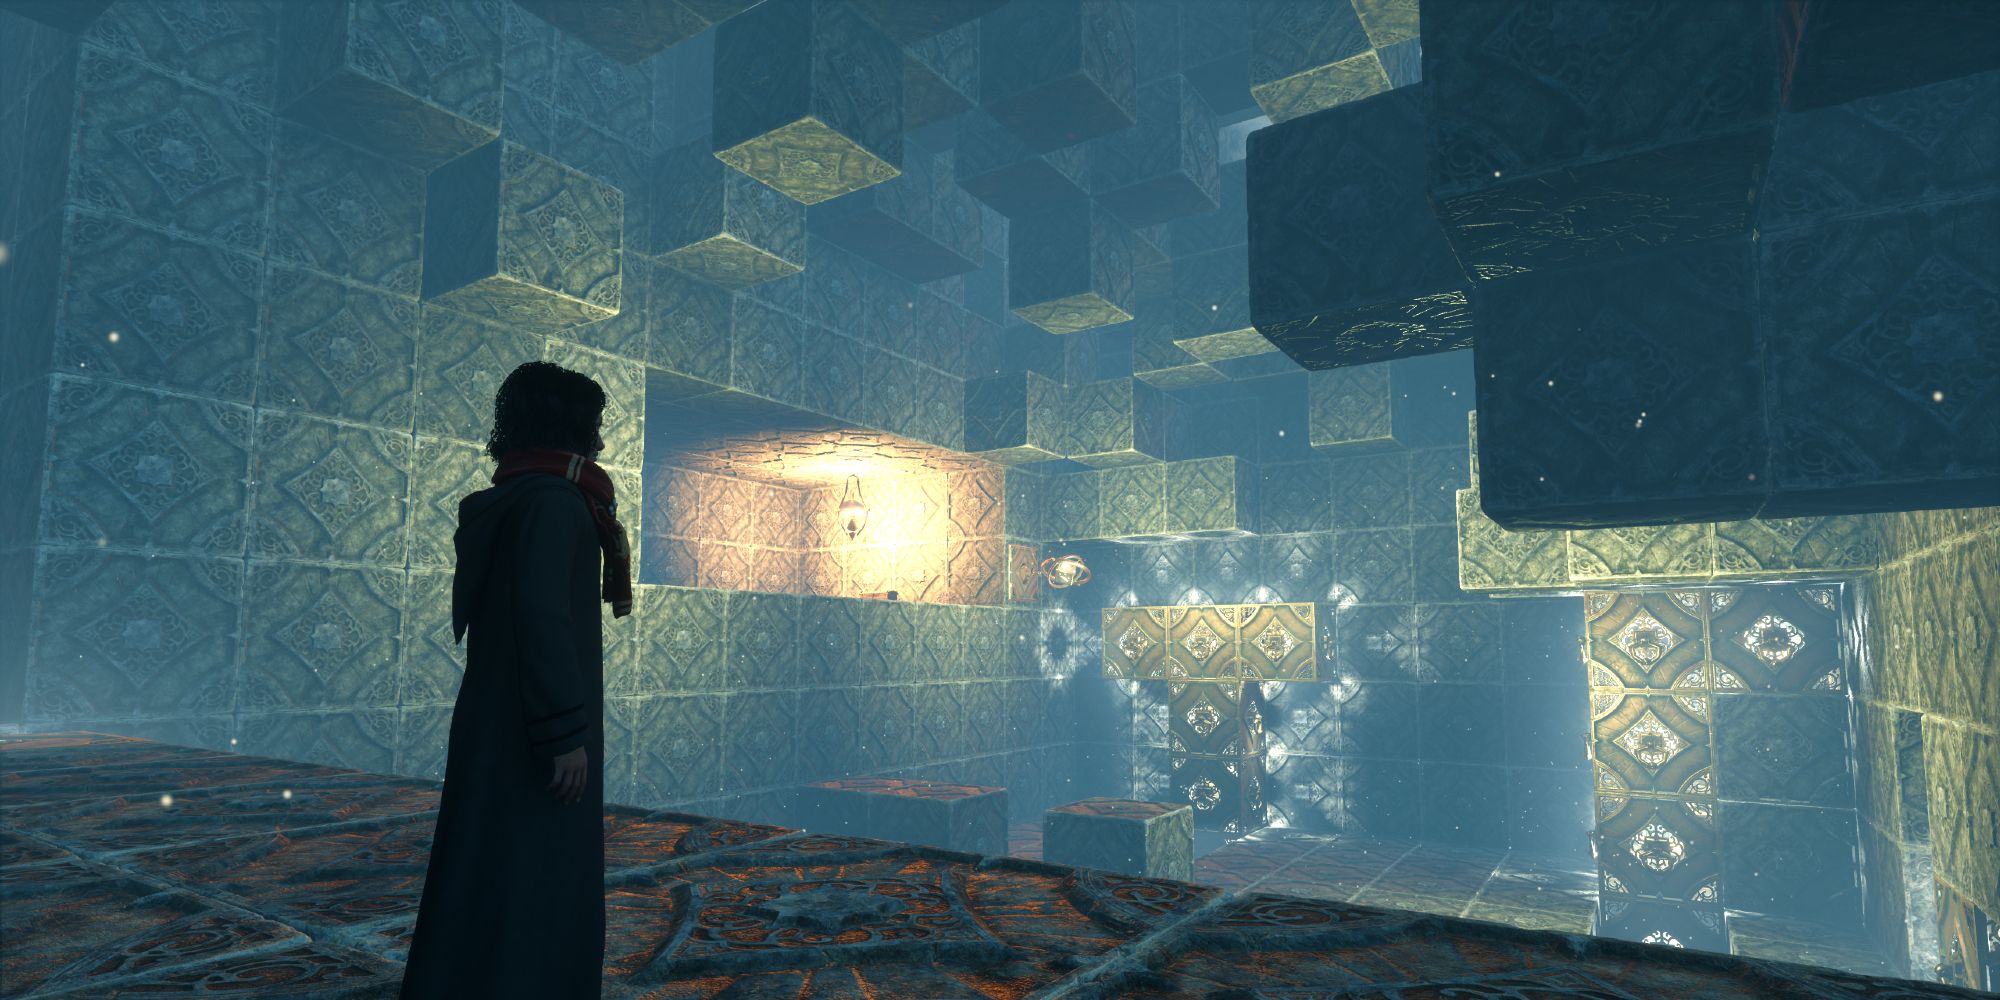
Use Depulso on the three blocking on the leftfield to labour them toward the back wall .
Climb up the middle block and use Accio to pull in the blocks in front of you .
pass over across the gap and turn to look at the three blocks . Use Accio to draw them towards the ripe wall .
jump out onto the three block and rise up to reach the first chest . This can be a wily saltation , so you should sample and jump at an angle .
Jump back across and look towards the back wall . Use Accio on the block in the left corner to draw them toward the entry .
Use Accio on the same blocks to pull them towards you .
wrick around . Depulso the four blocks behind you to the right field .
Use Accio to pull those blocks toward the back wall .
Turn around and use Depulso on the blocks you climbed to progress to the first chest to push them into the back wall . Use Accio to pull them towards the left over corner .
head up towards the left wall . employ Accio to pull all the blocks in the left corner towards you . mount up and grab the second chest .
expend Depulso to push the cube back into the left turning point . Head back to the blocks in the middle of the room .
Use Accio on the blocks in the left-hand corner to draw them to the right . Jump across to the middle stone block and jump across to the blocks .
mount up to the exit .
After rise up , you will find a pectus containing a Conjuration you’re able to use todecorate the Room of Requirement inHogwarts Legacy . Depulso Puzzle Room 2 take the most intriguing puzzles inHogwarts Legacy , but with a bit of help , you should be capable to claim all the reward it extend .
In the USA :
In Canada :
In the UK :